Door Removal
TOOLS NEEDED: ¹⁄₄ in.
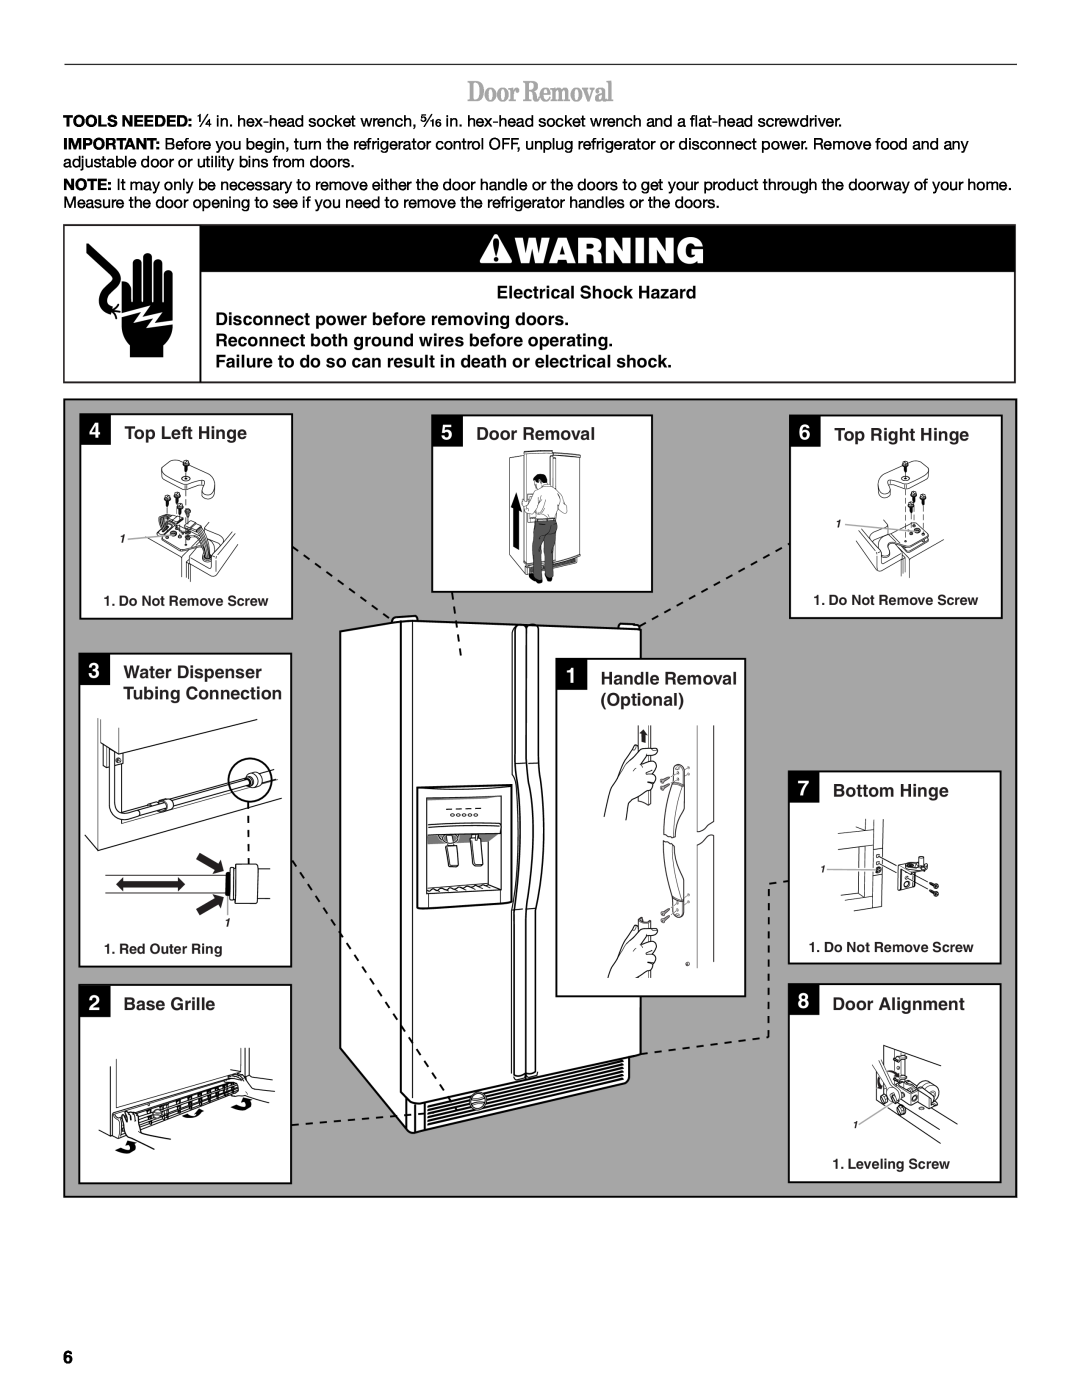
IMPORTANT: Before you begin, turn the refrigerator control OFF, unplug refrigerator or disconnect power. Remove food and any adjustable door or utility bins from doors.
NOTE: It may only be necessary to remove either the door handle or the doors to get your product through the doorway of your home. Measure the door opening to see if you need to remove the refrigerator handles or the doors.
Electrical Shock Hazard
Disconnect power before removing doors.
Reconnect both ground wires before operating.
Failure to do so can result in death or electrical shock.
4 | Top Left Hinge | 5 | Door Removal | 6 | Top Right Hinge |
|
|
|
|
| 1 |
| 1 |
|
|
|
|
| 1. Do Not Remove Screw |
|
|
| 1. Do Not Remove Screw |
3 | Water Dispenser |
| 1 | Handle Removal |
|
| Tubing Connection |
|
| (Optional) |
|
|
|
|
|
| |
|
|
|
| 7 | Bottom Hinge |
|
|
|
|
| 1 |
| 1 |
|
|
|
|
| 1. Red Outer Ring |
|
| 1. Do Not Remove Screw | |
2 | Base Grille |
|
| 8 | Door Alignment |
|
|
|
|
| 1 |
|
|
|
|
| 1. Leveling Screw |
6 |
|
|
|
|
|