PERMANENT INSTALLATION INSTRUCTIONS
Before You Start
![]() WARNING
WARNING
Excessive Weight Hazard
Use two or more people to move and install washer. Failure to do so can result in back or other injury.
■To prevent floor damage, set the washer onto cardboard before moving across floor.
■Move the washer to within approximately 3 ft (90 cm) of the final location.
Drain System
The washer can be installed using the standpipe drain system (floor or wall), the laundry tub drain system, or the floor drain system. Select the drain hose installation method you need. See “Tools and Parts.”
Standpipe drain system - wall or floor (views A & B)
The standpipe drain requires a minimum diameter standpipe of 2" (5 cm). The minimum
The top of the standpipe must be at least 39" (99 cm) high and no higher than 72" (183 cm) from the bottom of the washer.
39" (99 cm) ![]()
AB
Laundry tub drain system (view C)
The laundry tub requires a minimum
The top of the laundry tub must be at least 39" (99 cm) above the floor and no higher than 72" (183 cm) from the bottom of the washer.
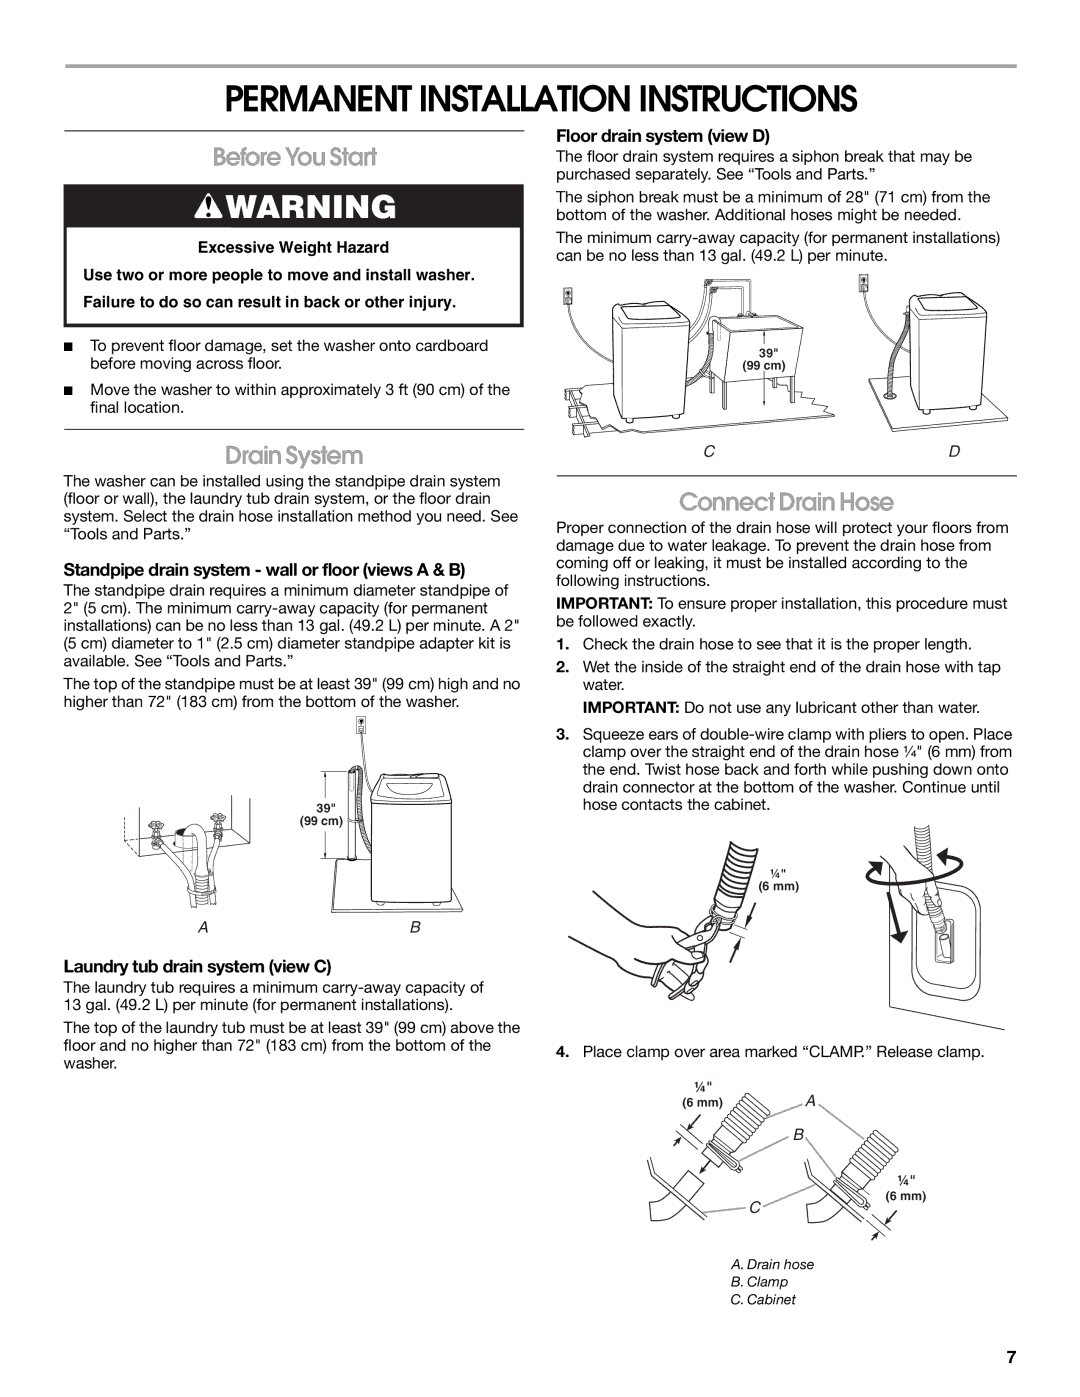
Floor drain system (view D)
The floor drain system requires a siphon break that may be purchased separately. See “Tools and Parts.”
The siphon break must be a minimum of 28" (71 cm) from the bottom of the washer. Additional hoses might be needed.
The minimum
39"
(99 cm)
CD
Connect Drain Hose
Proper connection of the drain hose will protect your floors from damage due to water leakage. To prevent the drain hose from coming off or leaking, it must be installed according to the following instructions.
IMPORTANT: To ensure proper installation, this procedure must be followed exactly.
1.Check the drain hose to see that it is the proper length.
2.Wet the inside of the straight end of the drain hose with tap water.
IMPORTANT: Do not use any lubricant other than water.
3.Squeeze ears of
¼" (6 mm)
4.Place clamp over area marked “CLAMP.” Release clamp.
¼"
(6 mm) | A |
B
¼"
(6 mm)
C
A. Drain hose
B.Clamp
C.Cabinet
7