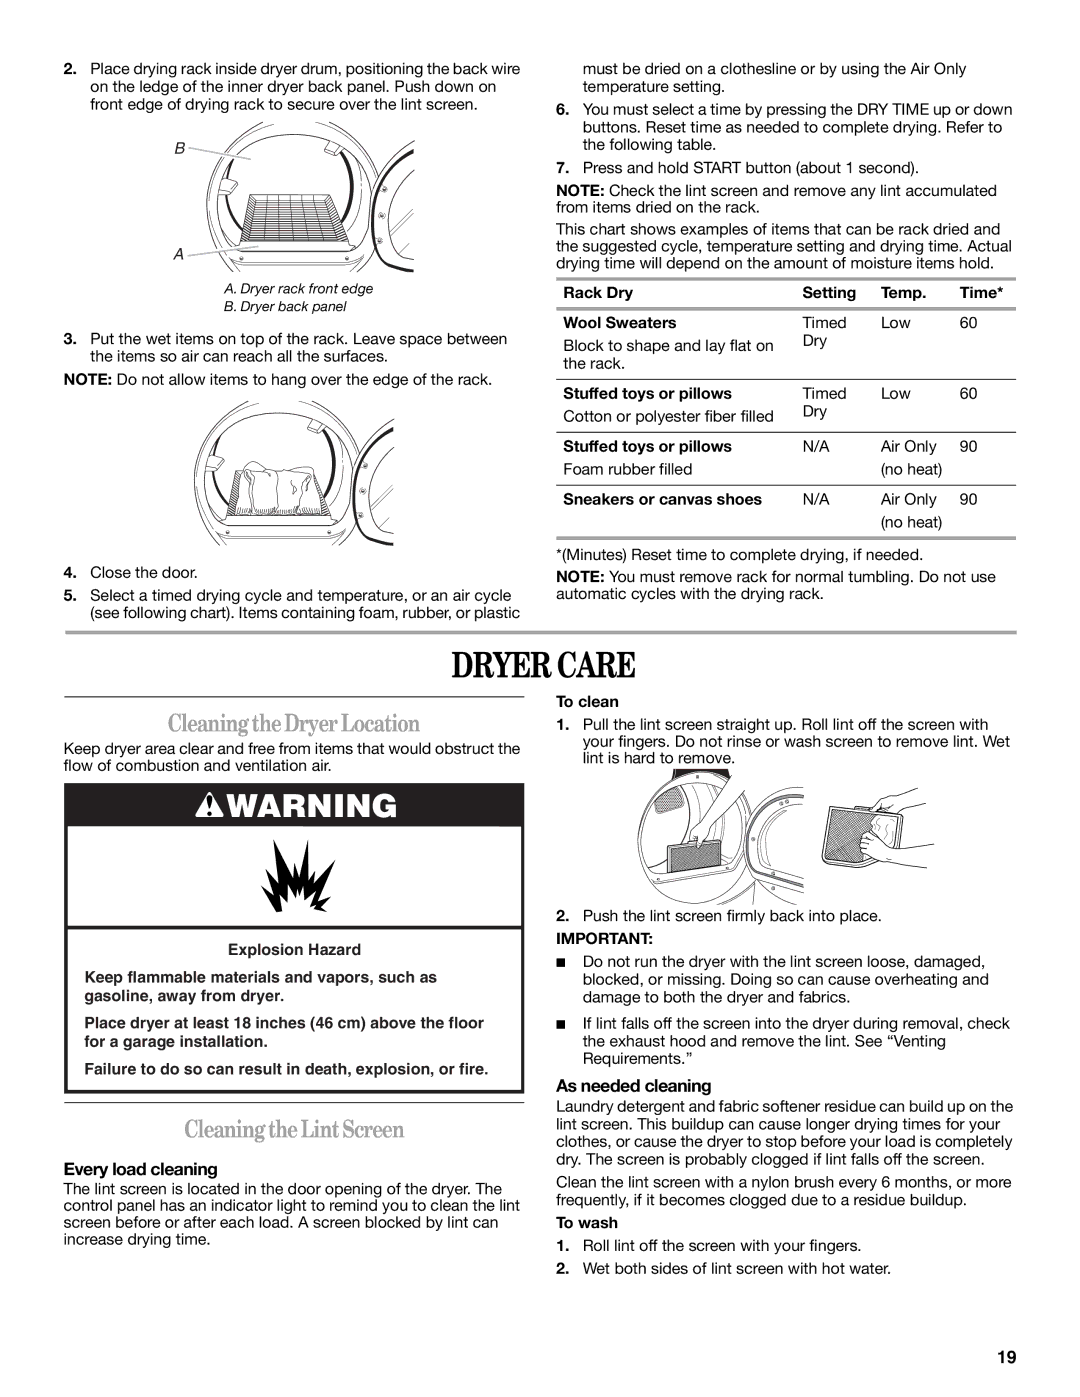
2.Place drying rack inside dryer drum, positioning the back wire on the ledge of the inner dryer back panel. Push down on front edge of drying rack to secure over the lint screen.

B

A

A. Dryer rack front edge

B. Dryer back panel

3.Put the wet items on top of the rack. Leave space between the items so air can reach all the surfaces.

NOTE: Do not allow items to hang over the edge of the rack.

4.Close the door.

5.Select a timed drying cycle and temperature, or an air cycle (see following chart). Items containing foam, rubber, or plastic

must be dried on a clothesline or by using the Air Only temperature setting.

6.You must select a time by pressing the DRY TIME up or down buttons. Reset time as needed to complete drying. Refer to the following table.

7.Press and hold START button (about 1 second).

NOTE: Check the lint screen and remove any lint accumulated from items dried on the rack.

This chart shows examples of items that can be rack dried and the suggested cycle, temperature setting and drying time. Actual drying time will depend on the amount of moisture items hold.

Rack Dry

Setting

Temp.

Time*

Wool Sweaters

Timed

Low

60

Block to shape and lay flat on

Dry


the rack.


Stuffed toys or pillows

Timed

Low

60

Cotton or polyester fiber filled

Dry


Stuffed toys or pillows

N/A

Air Only

90

Foam rubber filled


(no heat)


Sneakers or canvas shoes

N/A

Air Only

90


(no heat)


*(Minutes) Reset time to complete drying, if needed.

NOTE: You must remove rack for normal tumbling. Do not use automatic cycles with the drying rack.

DRYER CARE

CleaningtheDryer Location

Keep dryer area clear and free from items that would obstruct the flow of combustion and ventilation air.

WARNING

Explosion Hazard

Keep flammable materials and vapors, such as gasoline, away from dryer.

Place dryer at least 18 inches (46 cm) above the floor for a garage installation.

Failure to do so can result in death, explosion, or fire.

CleaningtheLintScreen

Every load cleaning

The lint screen is located in the door opening of the dryer. The control panel has an indicator light to remind you to clean the lint screen before or after each load. A screen blocked by lint can increase drying time.

To clean

1.Pull the lint screen straight up. Roll lint off the screen with your fingers. Do not rinse or wash screen to remove lint. Wet lint is hard to remove.

2.Push the lint screen firmly back into place.

IMPORTANT:

Do not run the dryer with the lint screen loose, damaged, blocked, or missing. Doing so can cause overheating and damage to both the dryer and fabrics.

If lint falls off the screen into the dryer during removal, check the exhaust hood and remove the lint. See “Venting Requirements.”

As needed cleaning

Laundry detergent and fabric softener residue can build up on the lint screen. This buildup can cause longer drying times for your clothes, or cause the dryer to stop before your load is completely dry. The screen is probably clogged if lint falls off the screen.

Clean the lint screen with a nylon brush every 6 months, or more frequently, if it becomes clogged due to a residue buildup.

To wash

1.Roll lint off the screen with your fingers.

2.Wet both sides of lint screen with hot water.

19

Page 19
Image 19
Whirlpool ELECTRONIC GAS DRYER manual Dryer Care, CleaningtheDryer Location, CleaningtheLintScreen, Every load cleaning

ELECTRONIC GAS DRYER specifications

The Whirlpool Electronic Gas Dryer is an innovative household appliance designed to streamline your laundry experience while ensuring optimal performance and efficiency. Packed with advanced features and cutting-edge technologies, this gas dryer caters to the needs of modern consumers who prioritize convenience, energy efficiency, and superior fabric care.

One of the standout features of the Whirlpool Electronic Gas Dryer is its precise drying technology, which includes moisture sensing capability. This intelligent system detects the moisture level in your clothes, automatically adjusting drying time accordingly. This not only helps prevent overdrying, which can damage fabrics and reduce lifespan, but also conserves energy by reducing unnecessary drying cycles.

Another significant aspect of this dryer is its variety of drying cycles. From Delicate and Heavy Duty to Quick Dry settings, the Whirlpool Electronic Gas Dryer offers customizable options for various fabric types and load sizes. This flexibility is enhanced by the inclusion of specialty cycles, such as Sanitize and Steam Refresh, which address specific care needs for items like bedding and athletic wear.

Energy efficiency is a key consideration in the design of the Whirlpool Electronic Gas Dryer. With an Energy Star certification, it meets stringent energy efficiency guidelines, helping homeowners save on utility bills while reducing their ecological footprint. This dryer uses gas as its primary heat source, which is typically more cost-effective and environmentally friendly compared to electric alternatives.

User-friendly controls make operating the Whirlpool Electronic Gas Dryer a breeze. The intuitive digital display allows for easy selection of drying cycles and settings, while the end-of-cycle signal alerts you when your laundry is ready. Additionally, the front-loading design and large capacity drum can accommodate substantial loads, making it ideal for busy households.

The durable construction of the Whirlpool Electronic Gas Dryer ensures long-lasting performance. High-quality materials and robust components contribute to its reliability, while the sleek design adds a modern touch to any laundry room. Overall, the Whirlpool Electronic Gas Dryer combines the latest technologies with thoughtful features, providing an effective solution for tackling laundry day challenges with ease and efficiency.