Before you plug it in
IMPORTANT
This ISthe only fine print you’ll find :n this booklet Please read it tc be sure you use your refrigerator properly
We build refrigerators to last, but we can’t con- trol how they are used Before using your refrlger- ator, you ure personally responsible for making sure that it
l IS installed ar:,l leveled on a floor that WIII hold the weight, a,id in an area suitable for iis size and tise
l IS connected Jnly to the right kind of outlet, with the right electrtc supply and grounding
l | IS | used | only | for | jobs | expected | of | home | ||||
| refrigerators |
|
|
|
|
|
|
|
| |||
l | IS properly | maintained. |
|
|
|
|
|
| ||||
. | IS out | of | the | weather. |
|
|
|
|
|
| ||
l IS used | in an area where the room temperature |
| ||||||||||
| will | not | fall | below | 55 | F. (13 | C). |
|
|
| ||
l | IS not | run where | there | are explosive | fumes |
|
| |||||
l | IS | not | used by | children | or | others | who may | not | ||||
| understand | how | it should | be | used |
|
|
| ||||
. | IS not | loaded | with food | before it has time | to | get | ||||||
| properly | cold |
|
|
|
|
|
|
| |||
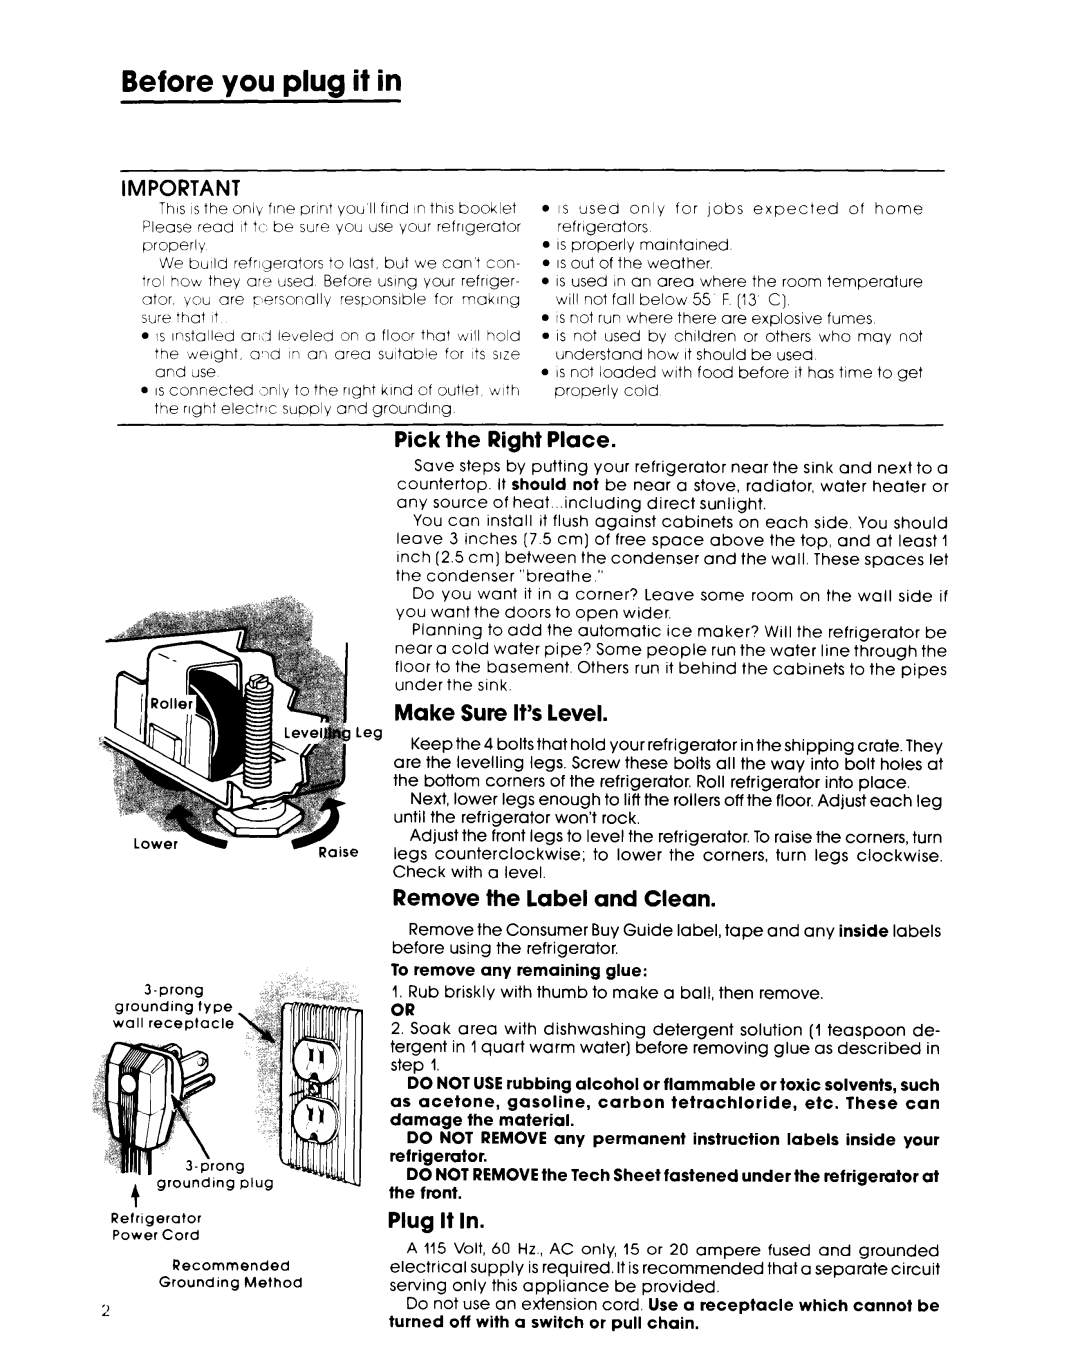
wall receptacle
Refrigerator
Power Cord
Recommended
Grounding Method
2
Pick the Right Place.
Save steps by putting your refrigerator near the sink and next to a
countertop. It should not be near a stove, radiator, water heater or
any source of heat...including direct sunlight.
You can install it flush against cabinets on each side. You should leave 3 inches (7.5 cm] of free space above the top, and at least 1 inch (2.5 cm] between the condenser and the wall. These spaces let the condenser “breathe.”
Do you want it in a corner? Leave some room on the wall side if you want the doors to open wider.
Planning to add the automatic ice maker? Will the refrigerator be near a cold water pipe? Some people run the water line through the floor to the basement. Others run it behind the cabinets to the pipes under the sink.
Make Sure It’s level.
.eg Keep the 4 bolts that hold your refrigerator in the shipping crate. They are the levelling legs. Screw these bolts all the way into bolt holes at the bottom corners of the refrigerator. Roll refrigerator into place.
Next, lower legs enough to lift the rollers off the floor. Adjust each leg until the refrigerator won’t rock.
Adjust the front legs to level the refrigerator. To raise the corners, turn
legs counterclockwise; to lower the corners, turn legs clockwise. Check with a level.
Remove the label and Clean.
Remove the Consumer Buy Guide label, tape and any inside labels before using the refrigerator.
To remove any remaining glue:
1.Rub briskly with thumb to make a ball, then remove.
OR
2.Soak area with dishwashing detergent solution (1 teaspoon de- tergent in 1quart warm water) before removing glue as described in step 1.
DO NOT USE rubbing alcohol or flammable or toxic solvents, such
as acetone, gasoline, carbon tetrachloride, etc. These can damage the material.
DO NOT REMOVE any permanent instruction labels inside your refrigerator.
DO NOT REMOVE the Tech Sheet fastened under the refrigerator at the front.
Plug It In.
A 115 Volt, 60 Hz., AC only, 15 or 20 ampere fused and grounded
electrical supply is required. It is recommended that a separate circuit serving only this appliance be provided.
Do not use an extension cord. Use a receptacle which cannot be turned off with a switch or pull chain.