Install properly.. .
1 Allow % Inch (1.25 cm] space on each side and at the top of the refrigerator for ease of installation
2.If the refrigerator ISto be against a wall, you might want to leave extra space so the door can be opened wider.
3 The refrigerator back can be flush against the wall
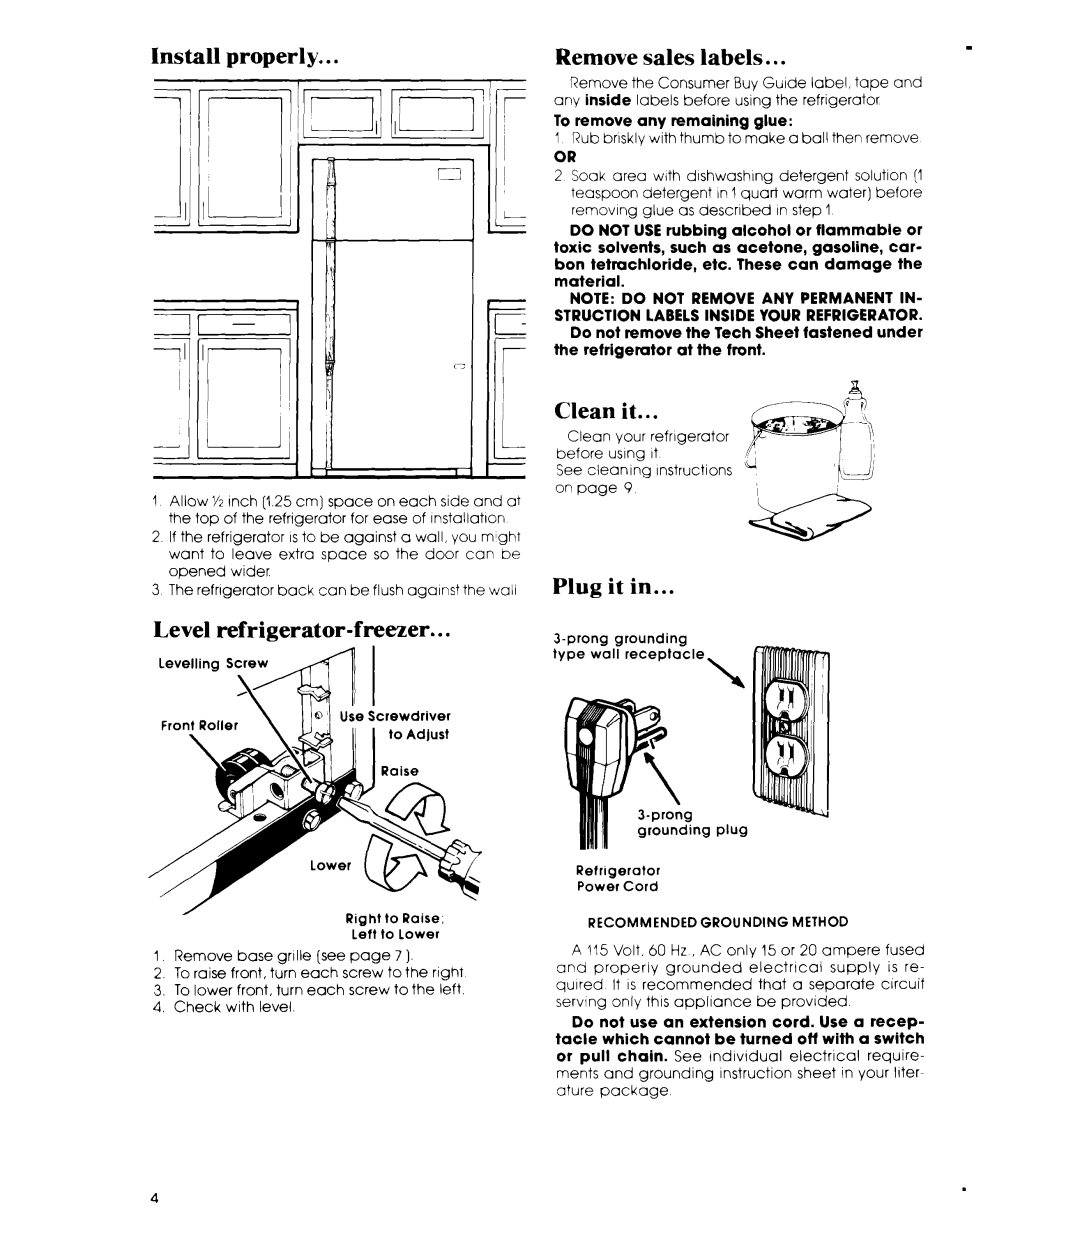
Level refrigerator-freezer.. .
Levetling SK4 | 1 |
Front Roller
Right to Raise,
Left to Lower
I. Remove base grille (see page 7 ).
2.To raise front, turn each screw to the right
3.To lower front, turn each screw to the left.
4.Check with level.
Remove sales labels.. .
Remove the Consumer Buy Guide label, tape and any inside labels before using the refrigerator
To remove any remaining glue:
1 Rub briskly with thumb to make a ball then remove
OR
2 Soak area with dishwashing detergent solution (1 teaspoon detergent in 1 quart warm water] before removing glue as described In step 1
DO NOT USErubbing alcohol or flammable or toxic solvents, such as acetone, gasoline, car- bon tetrachloride, etc. These can damage the material.
NOTE: DO NOT REMOVE ANY PERMANENT IN- STRUCTION LABELS INSIDE YOUR REFRIGERATOR.
Do not remove the Tech Sheet fastened under the refrigerator at the front.
Clean it.. .
Clean your refrigerator before using It
See cleaning instructions on page 9
Plug it in...
grounding plug
Refrigerator
Power Cord
RECOMMENDED GROUNDING METHOD
A 115 Volt. 60 Hz, AC only 15 or 20 ampere fused
and properly grounded electrlcal supply is re-
quired It IS recommended that a separate circuit serving only this appliance be provided.
Do not use an extension cord. Use a recep- tacle which cannot be turned off with a switch or pull chain. See lndlvldual electrical require- ments and grounding instruction sheet in your liter- ature package
.