USING YOUR RANGE
SETTING THE CLOCK (MODELS FEP33OG AND FES33OG)
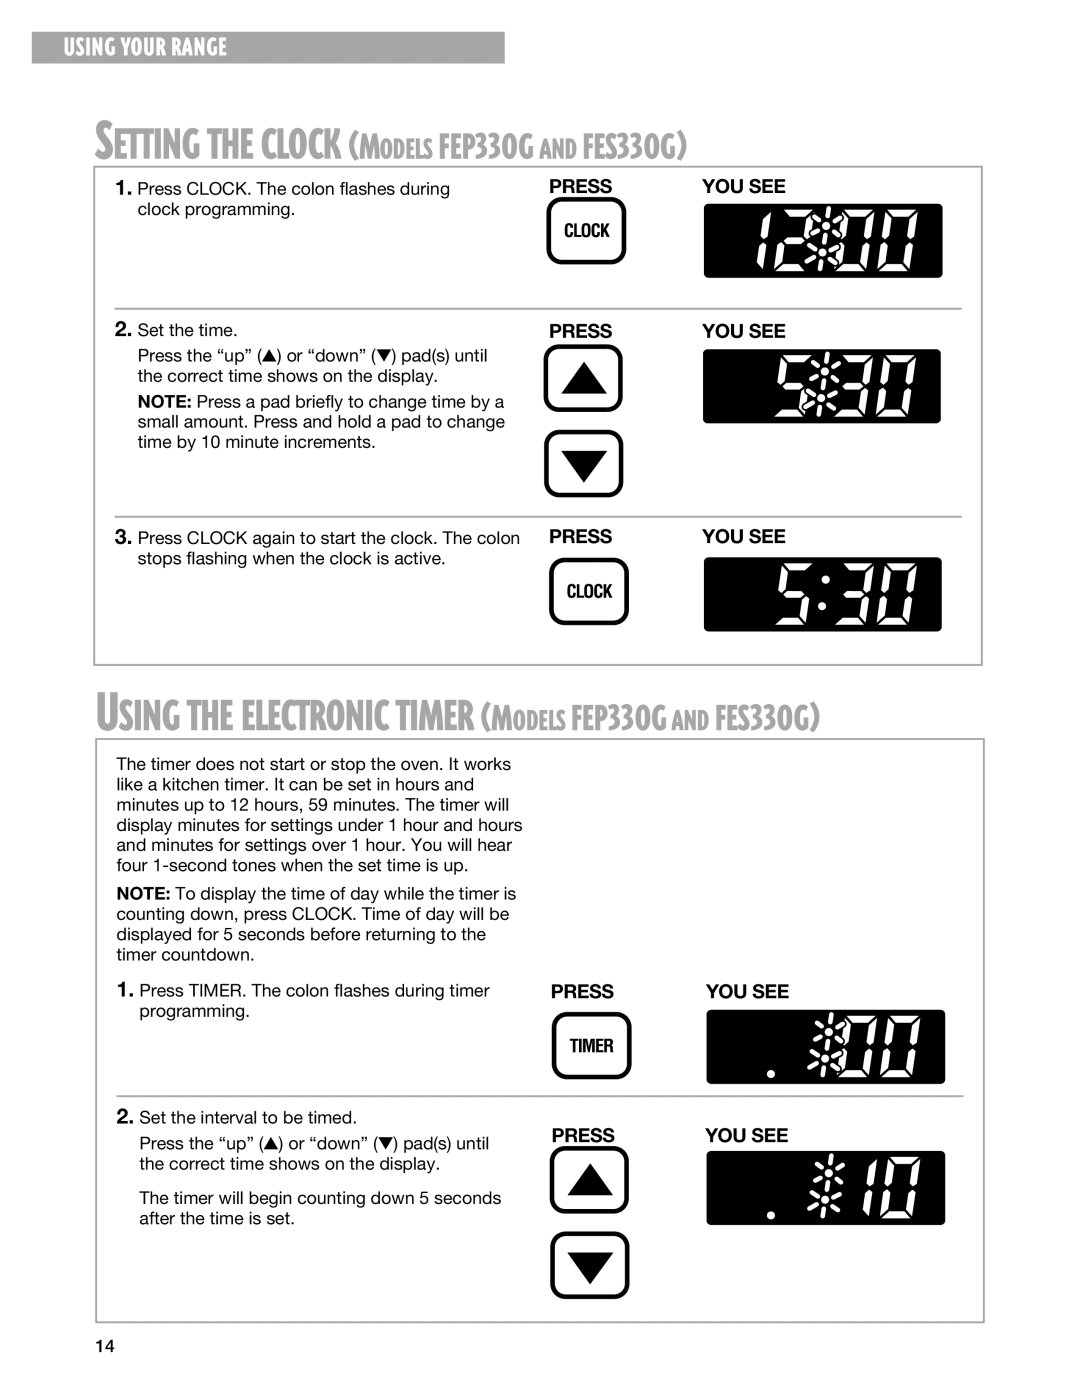
1. Press CLOCK. The colon flashes during | PRESS | YOU SEE |
clock programming. |
|
|
2. Set the time. | PRESS | YOU SEE |
Press the “up” (▲) or “down” (▼) pad(s) until |
|
|
the correct time shows on the display. |
|
|
NOTE: Press a pad briefly to change time by a |
|
|
small amount. Press and hold a pad to change |
|
|
time by 10 minute increments. |
|
|
3. Press CLOCK again to start the clock. The colon PRESS | YOU SEE |
stops flashing when the clock is active. |
|
USING THE ELECTRONIC TIMER (MODELS FEP33OG AND FES33OG)
The timer does not start or stop the oven. It works like a kitchen timer. It can be set in hours and minutes up to 12 hours, 59 minutes. The timer will display minutes for settings under 1 hour and hours and minutes for settings over 1 hour. You will hear four
NOTE: To display the time of day while the timer is counting down, press CLOCK. Time of day will be displayed for 5 seconds before returning to the timer countdown.
1. Press TIMER. The colon flashes during timer | PRESS | YOU SEE |
programming. |
|
|
2.Set the interval to be timed.
Press the “up” (▲) or “down” (▼) pad(s) until | PRESS | YOU SEE |
|
| |
the correct time shows on the display. |
|
|
The timer will begin counting down 5 seconds after the time is set.
14