Building in your microwave oven
Your microwave oven ISnot limited to carts, counters or tables Custom installations are made easy with kits available from your dealer.
1. Build | the mlcrowave | oven Into | a cabinet | or | Ask your | dealer for details | on | Kit | ||||||||||
wall by itself or over |
| RCK803 | (832849) | |||||||||||||||
| RCKB05 | (832856) | - | |||||||||||||||
Whirlpool |
| RDE, REE,RGE. RB and | SB model | series or |
| |||||||||||||
Imperial | 7200 | single | gas | ovens |
|
|
|
|
| RCK807 | (832850) | - | 27.inch | Kit | ||||
2. Attach |
| the | mlcrowave | oven | to a wall | by itself |
| RCK710 (832763) |
| |||||||||
|
| RCK811(832875) - Wall Mount Vent Grille | ||||||||||||||||
or with cabinets over tt |
|
|
|
|
|
|
| |||||||||||
|
|
|
|
|
|
| and Filter Kit |
|
|
|
|
| ||||||
|
|
|
|
|
|
|
|
|
|
| . |
|
|
|
|
| ||
3. Put the | microwave | oven | on the | MICRO | SHELF* | RCK713 (832940) | Mount Cookbook | |||||||||||
Hood over | a cooktop | The | hood | is available |
| . | Storage | Cabinet |
|
|
|
|
| |||||
ducted | or as a reclrculatlng |
| hood, | and | Includes | RH3330XL - MICRO | SHELF’ Hood |
| ||||||||||
cooktop | lights |
|
|
|
|
|
|
|
| . | RCK902 | (832873) | Cabinet | for | ||||
use with MICRO SHELF” Hood
‘Tmk
Caring for your microwave oven
Cleaning the microwave oven
Wipe | warm | sudsy | For stubborn | soil, boil a cup | Be sure to clean | the | areas | ||||||
water | and | a soft | cloth or | of water | in the | oven | for 2 or 3 | where | the door | and | oven | ||
sponge. |
|
|
| minutes | Steam | will | soften | frame | touch when closed | ||||
|
|
|
|
| the soil |
|
|
|
| When | cleaning | surfaces of | |
|
|
|
|
|
|
|
|
|
| door and oven that come to- | |||
|
|
|
|
|
|
|
|
|
| gether on closing the door, | |||
|
|
|
|
|
|
|
|
|
| use only mild, | |||
|
|
|
|
|
|
|
|
|
| soaps | or detergents | applied | |
|
|
|
|
|
|
|
|
|
| with a sponge or soft cloth | |||
Caution: |
|
|
|
|
|
|
|
| Rinse | well |
|
| |
|
|
|
|
|
|
|
|
|
|
|
| ||
Abrasive | cleansers, | steel wool pads, | gritty | wash | cloths, | etc can damage | the | control |
|
| |||
panel and the interior and exterior oven surfaces. Use a sof cloth or a sponge with a mild |
| ||||||||||||
detergent | or spray glass cleaner |
|
|
|
|
|
|
|
|
| |||
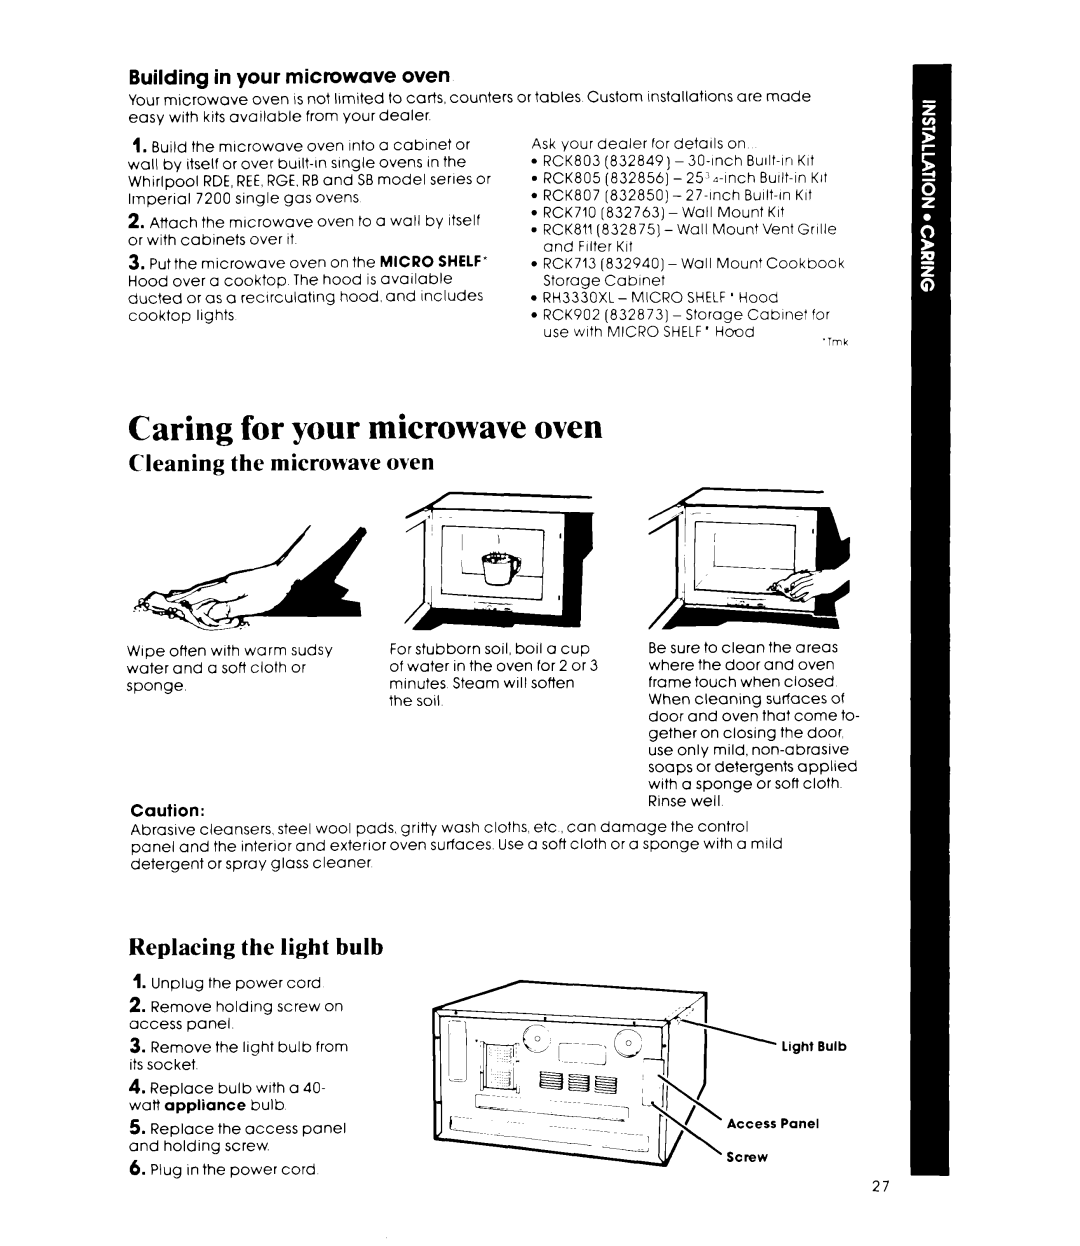
Replacing the light bulb
1.Unplug the power cord
2.Remove holding screw on access panel.
3.Remove the light bulb from its socket.
4.Replace bulb with a 40.
watt appliance bulb
5.Replace the access panel and holding screw.
6.Plug in the power cord
light Bulb
Access Panel