Service Diagnostics Mode
NOTE: This is an example of the information on the Technical Data Sheet shipped with the refrigerator.
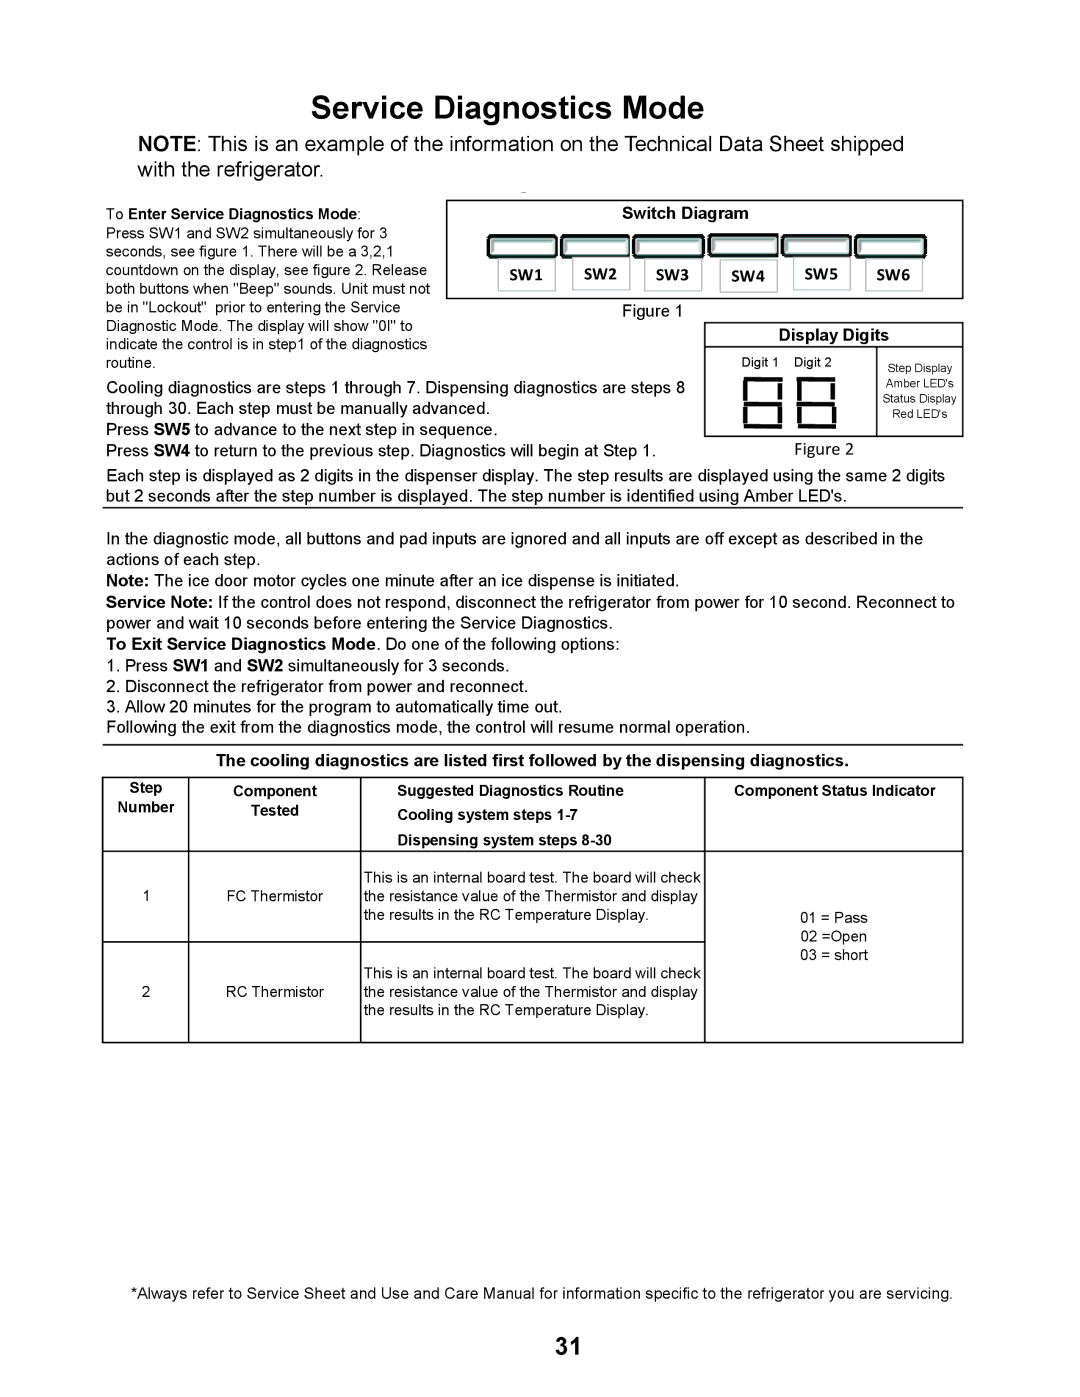
To Enter Service Diagnostics Mode: |
|
|
|
| Switch Diagram |
|
|
|
|
|
|
|
| |||||||
Press SW1 and SW2 simultaneously for 3 |
|
|
|
|
|
|
|
|
|
|
|
|
|
|
|
|
|
|
|
|
seconds, see figure 1. There will be a 3,2,1 |
|
|
|
|
|
|
|
|
|
|
|
|
|
|
|
|
|
|
|
|
countdown on the display, see figure 2. Release |
| SW1 |
| SW2 |
|
| SW3 |
|
| SW4 |
|
| SW5 |
|
| SW6 |
| |||
both buttons when "Beep" sounds. Unit must not |
|
|
|
|
|
|
|
|
|
|
|
|
|
|
|
|
|
|
|
|
|
|
|
|
|
|
|
|
|
|
|
|
|
|
|
|
|
|
|
| |
|
|
|
|
|
|
|
|
|
|
|
|
|
|
|
|
|
|
|
| |
be in "Lockout" prior to entering the Service |
|
|
|
| Figure 1 |
|
|
|
|
|
|
|
|
|
|
|
| |||
Diagnostic Mode. The display will show "0I" to |
|
|
|
|
|
|
|
|
|
|
|
|
|
|
|
|
|
|
| |
|
|
|
|
|
|
|
|
|
| Display Digits | ||||||||||
indicate the control is in step1 of the diagnostics |
|
|
|
|
|
|
|
|
|
| ||||||||||
routine. |
|
|
|
|
|
|
|
| Digit 1 | Digit 2 | Step Display | |||||||||
Cooling diagnostics are steps 1 through 7. Dispensing diagnostics are steps 8 |
|
|
|
|
|
|
|
|
|
| Amber LED's | |||||||||
|
|
|
|
|
|
|
|
|
| |||||||||||
through 30. Each step must be manually advanced. |
|
|
|
|
|
|
|
|
|
|
|
|
|
|
|
|
| Status Display | ||
|
|
|
|
|
|
|
|
|
|
|
|
|
|
|
|
| ||||
|
|
|
|
|
|
|
|
|
|
|
|
|
|
|
|
| Red LED's | |||
Press SW5 to advance to the next step in sequence. |
|
|
|
|
|
|
|
|
|
|
|
|
|
|
|
|
|
|
| |
Press SW4 to return to the previous step. Diagnostics will begin at Step 1. |
|
|
|
| Figure 2 |
|
| |||||||||||||
Each step is displayed as 2 digits in the dispenser display. The step results are displayed using the same 2 digits but 2 seconds after the step number is displayed. The step number is identified using Amber LED's.
In the diagnostic mode, all buttons and pad inputs are ignored and all inputs are off except as described in the actions of each step.
Note: The ice door motor cycles one minute after an ice dispense is initiated.
Service Note: If the control does not respond, disconnect the refrigerator from power for 10 second. Reconnect to power and wait 10 seconds before entering the Service Diagnostics.
To Exit Service Diagnostics Mode. Do one of the following options:
1.Press SW1 and SW2 simultaneously for 3 seconds.
2.Disconnect the refrigerator from power and reconnect.
3.Allow 20 minutes for the program to automatically time out.
Following the exit from the diagnostics mode, the control will resume normal operation.
The cooling diagnostics are listed first followed by the dispensing diagnostics.
Step | Component | Suggested Diagnostics Routine | Component Status Indicator |
Number | Tested | Cooling system steps |
|
|
| Dispensing system steps |
|
1 | FC Thermistor | This is an internal board test. The board will check |
|
the resistance value of the Thermistor and display |
| ||
|
| the results in the RC Temperature Display. | 01 = Pass |
|
|
| 02 =Open |
|
| This is an internal board test. The board will check | 03 = short |
2 | RC Thermistor |
| |
the resistance value of the Thermistor and display |
| ||
|
| the results in the RC Temperature Display. |
|
|
|
|
|
*Always refer to Service Sheet and Use and Care Manual for information specific to the refrigerator you are servicing.
31