Using your oven
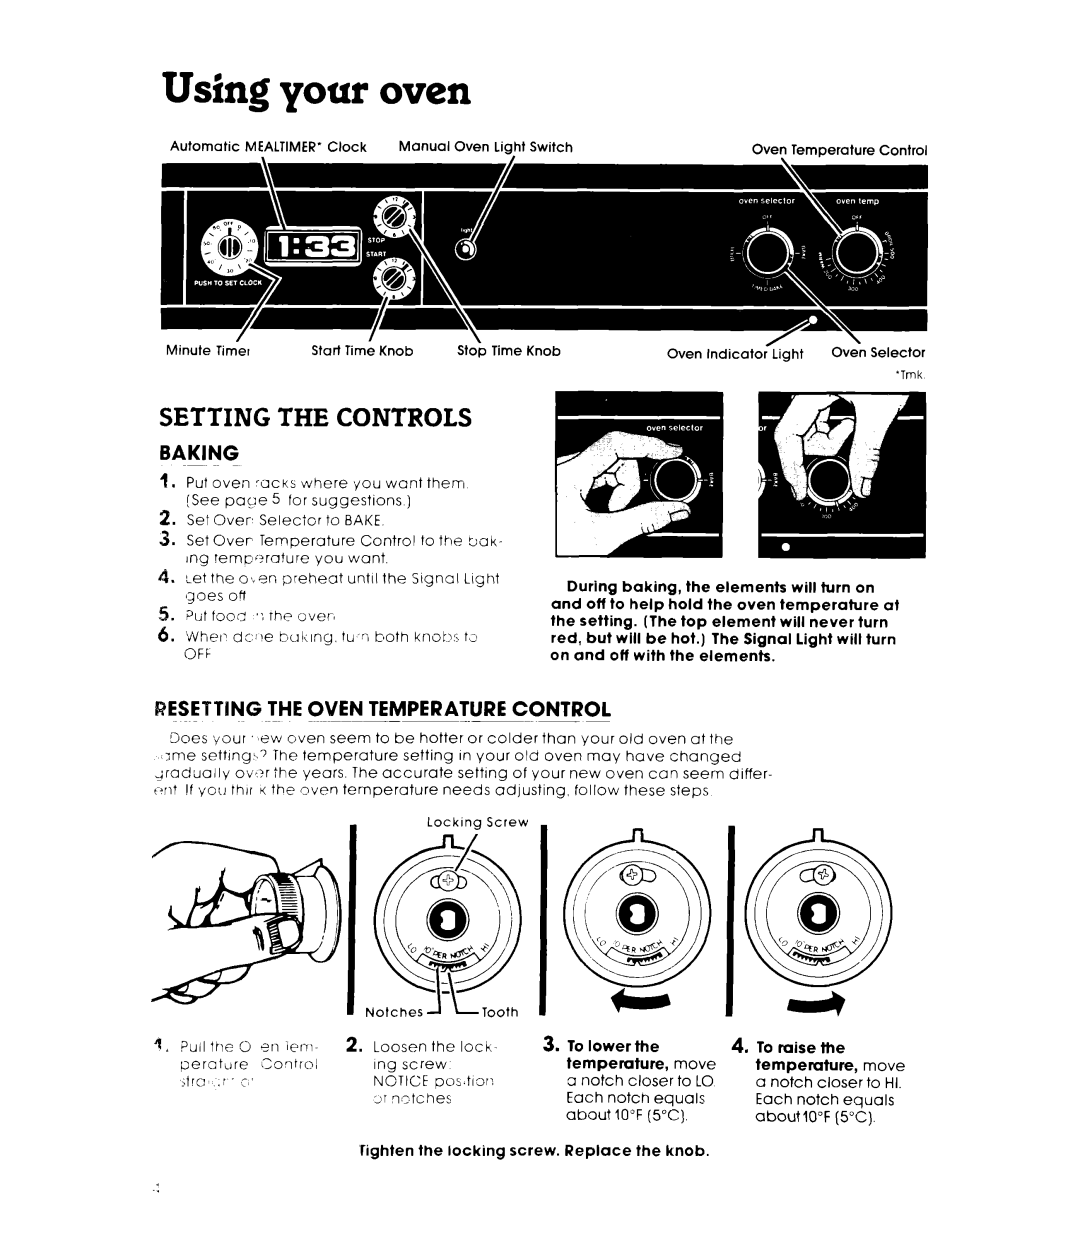
Automatic | MEALTIMER’ Clock | Manual Oven Light Switch | Oven Temperature | Control |
Minute Timer | Stop Time Knob | Oven Indicator~ight | O&n Selector | |
|
|
|
| ‘Tmk |
SETTING THE CONTROLS
BAKING
1.Put oven ‘QCK~ where ‘you want them (See paLIe 5 for suggestions )
2.Set Over Selector to BAKE.
3.Set Over Temperature Control to the ti,ak- Ing rempc?rature you want.
4 . cet the o:en preheat until the Slgnal Light (goes off
5.Put foofi ‘: rhe over,
6.Whet? dc:!e bul<lng. tu,Ti both knot!:; ta
OFF
During baking, the elements will turn on
and off to help hold the oven temperature at the setting. (The top element will never turn red, but will be hot.) The Signal light will turn on and off with the elements.
RESETTING THE OWEN TEMPERATURE CONTROL
Does your ew oven seem to be hotter or colder than your old oven at the
,irne settIny&,‘) The temperature setting In your old oven may have changed gradually ovt?r the years. The accurate setting of your new oven can seem differ-
crlt !f you thlr K the oven temperature needs adjusting, follow these steps
Lockinq Screw
|
|
| LTooth |
|
|
|
| |
1, ?uil | the | 0 en ieni- | 2. Loosen | the loch- | 3. To lower | the |
| |
peratiire | ~Zoirro | Ing screw | temperature, | move | ||||
if!0 | ,i | C,’ | NOTICF | pos.tlor! | CInotch | closer | to LO | |
|
|
| xr n:;tches | Each | notch equals | |||
|
|
|
|
| about | 10°F (5”C]. | ||
4.To raise the
temperature, move a notch closer to HI. Each notch equals about 10°F (5°C).
Tighten the locking screw. Replace the knob.