Setting the Controls
Be sure the kitchen is ventilated during heat, odors and smoke to disappear
the
c
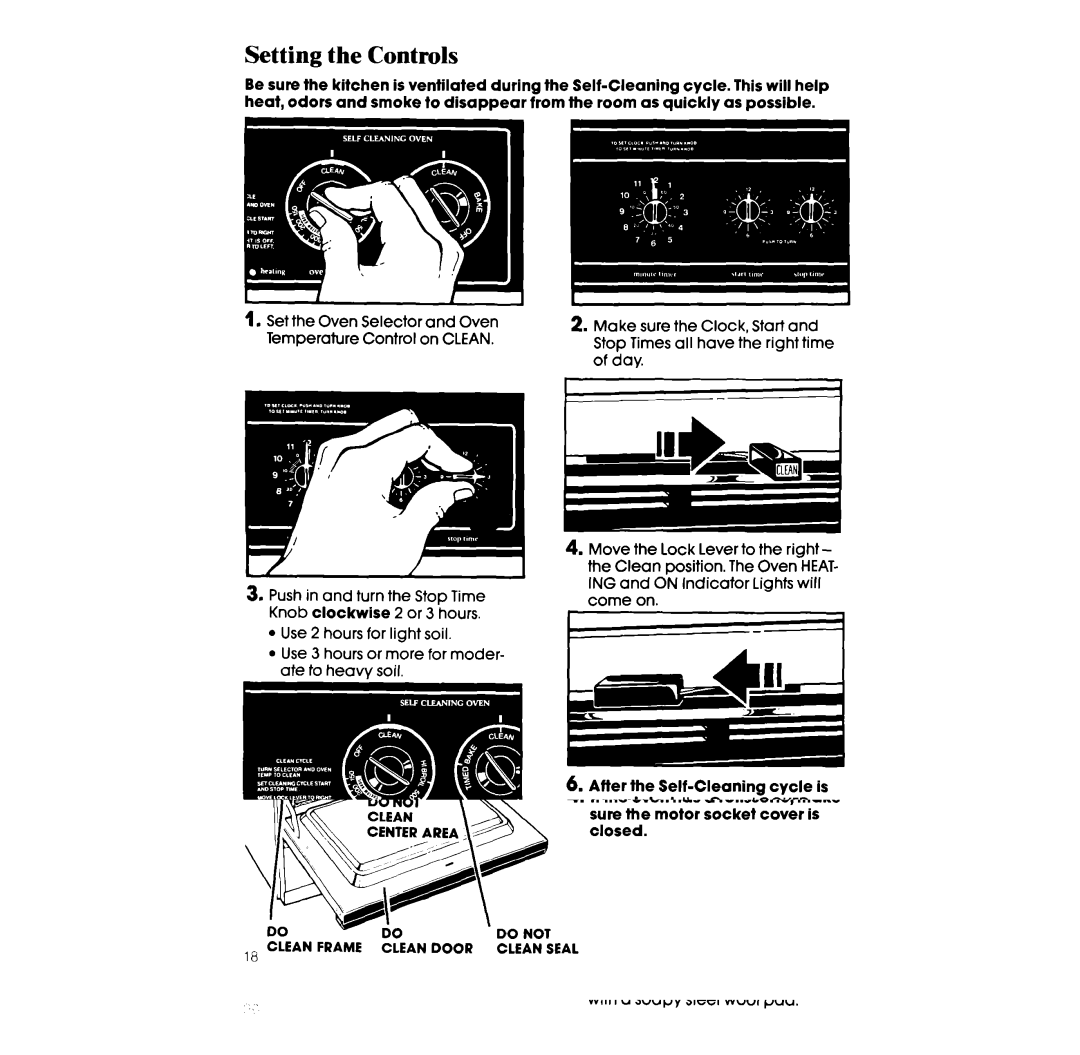
1. Set the Oven Selector and Oven Temperature Control on CLEAN.
3.Push in and turn the Stop Time Knob clockwise 2 or 3 hours. l Use 2 hours for light soil.
l Use 3 hours or more for moder-
L
5.The Oven LOCKEDIndicator Light comes on when the oven temper- ature exceeds normal baking temperatures. The Lock Lever must not be moved and the door
can’t be opened when the Oven LOCKEDIndicator Light is on.
_’
I
I
2.Make sure the Clock, Start and Stop Times all have the right time of day.
4.Move the Lock Lever to the right - the Clean position. The Oven HEAT- ING and ON Indicator Lights will come on.
c
6. After the
7.After the oven is cool, wipe off any residue or ash with a damp cloth. If needed, touch up spots with a soapy steel wool pad.
