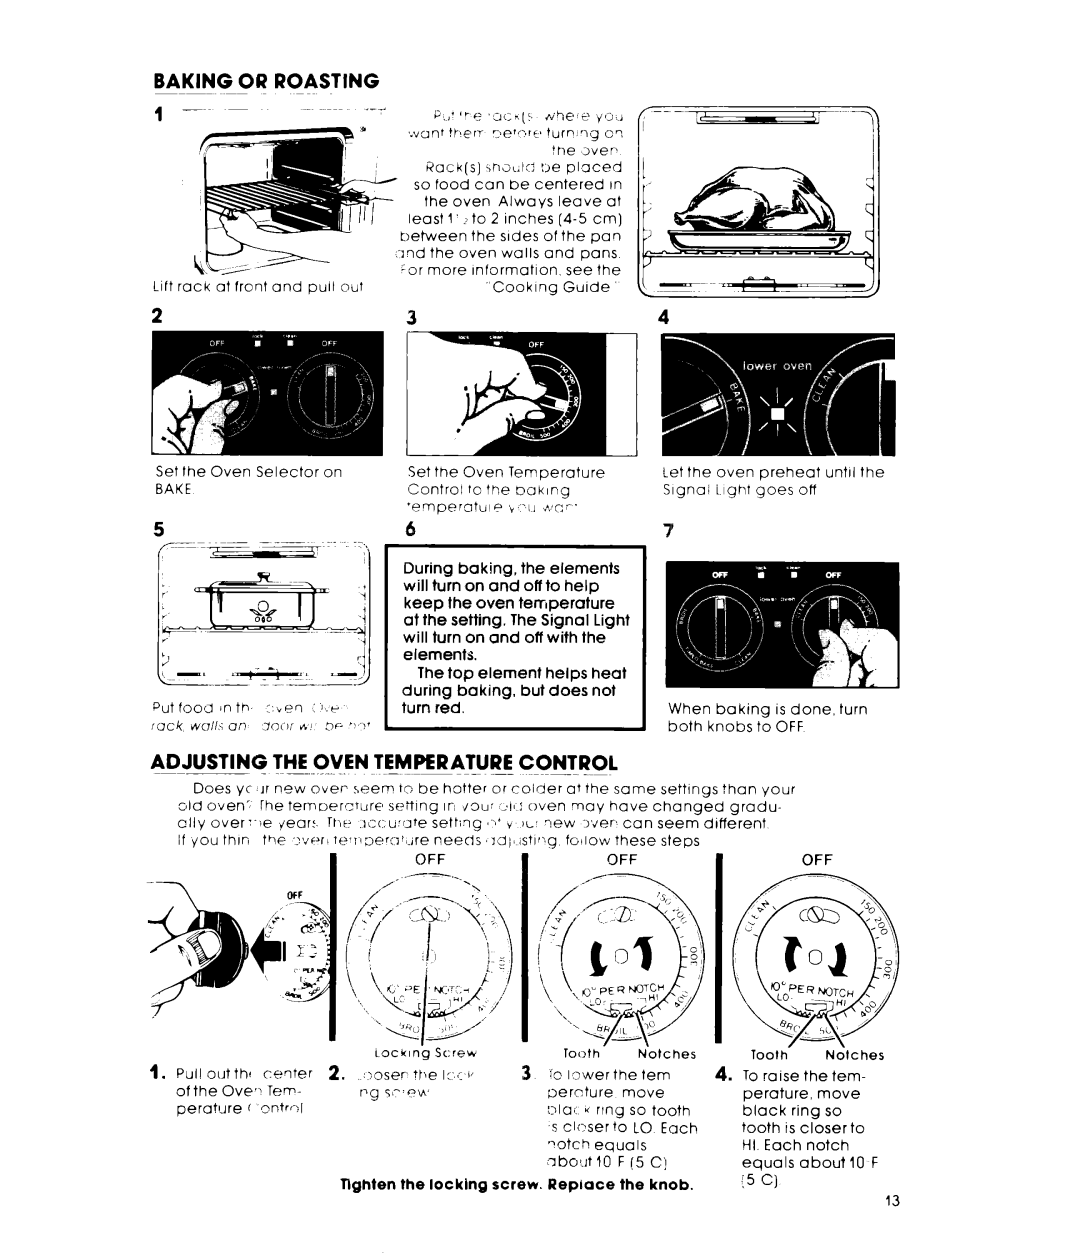
Lift rack at front and pull out
Set the Oven Selector on
BAKE
Rack(s) ihzLJ:! !je placed so food can be centered In
the oven Always leave at least 1’ 2to 2 inches
“CookIng Guide
Set the Oven Temperature
Control tc the SoKIng ‘emperatcrie
6
Let the oven preheat until the Slgnai ilght goes off
7
Put food jr- th, ::ven : “.r rack
During baking, the elements will turn on and off to help keep the oven terr,perature at the setting. The Signal Light will turn on and off with the elements.
The top element helps heat during baking, but does not turn red.
When baking is done, turn
. both knobs to OFF
ADJUSTING THE OVEN TEMPERATURE CONTROL
Does yc .lr new over seem to be hotter or coider at the same settings than your old oven- Ihe temoerctcrre seit!ng in \/ou: d!~: oven may have changed gradu- ally over :.ie year:. Thk? .lc(;u:ure sett:lq
if you thin the ‘“,‘f+
OFFOFFOFF
iocwlng Screw
1.Pul! Out th! cw?er 2. :,oser’ ?be
of the Ove.1 | TeT- | ,'g 5,“Ov. |
perature r |
|
Tooth Notches
3rc Izwer the tern 3ernture move :Yai * ring so tooth ‘s closer to LO Each nCtCh equals
nbout 10 F (5 C!
Tooth- Ndtches
4. To raise the tem- | |||
perature, | move | ||
black | ring so |
| |
tooth | is closer | to | |
HI. Each | notch |
| |
equals |
| about | 10 F |
Tighten the locking screw. Repiace the knob.
{5 C] |
13