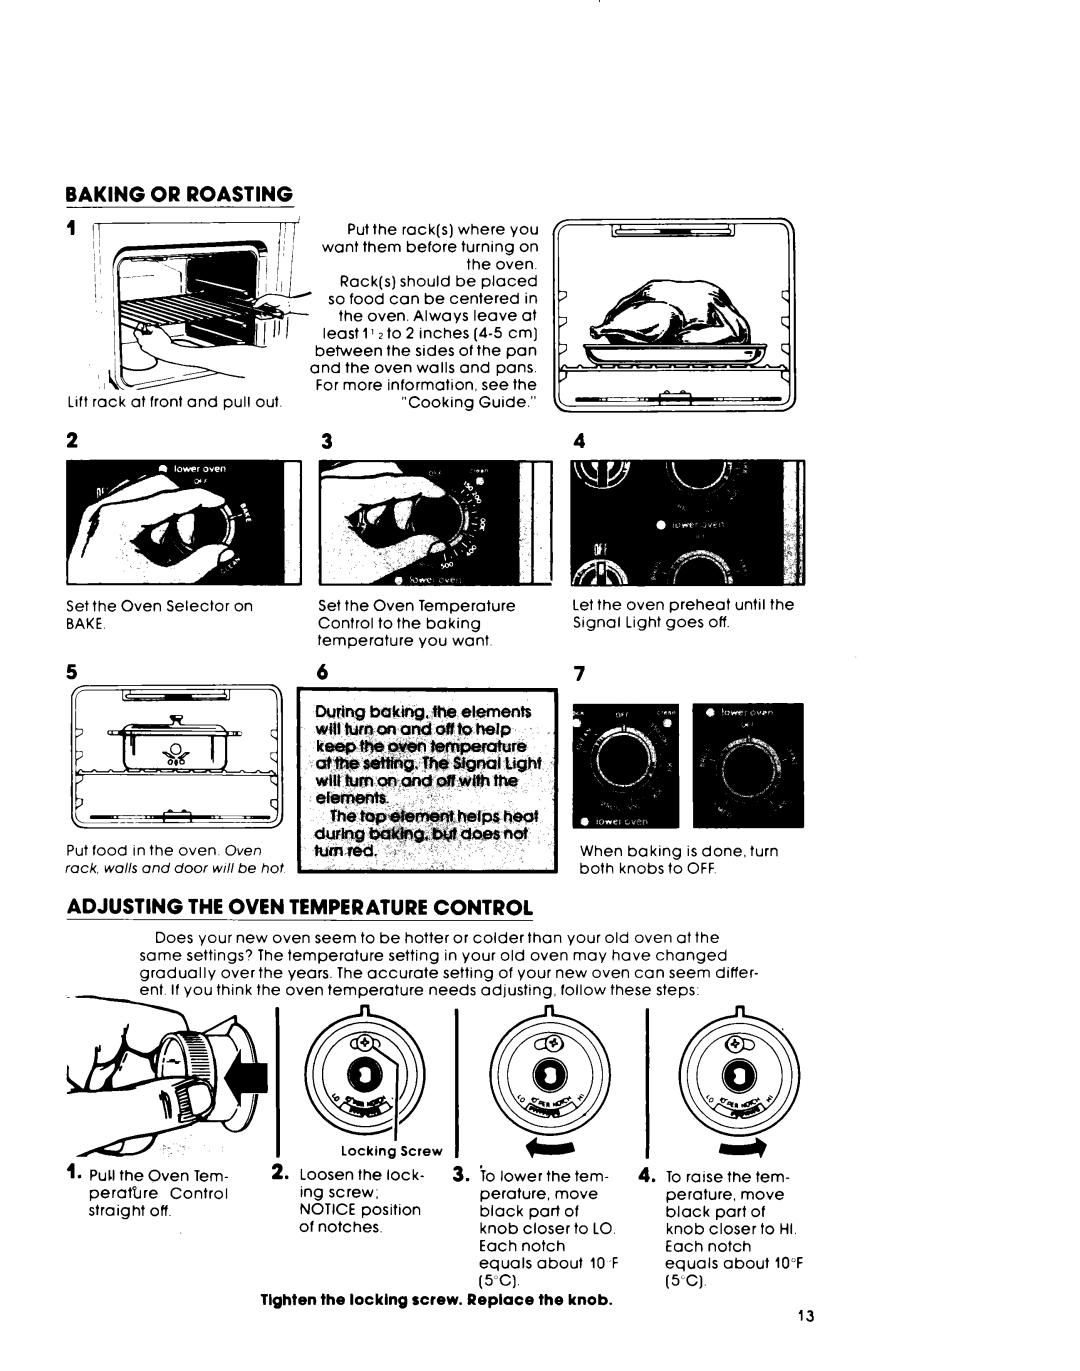
BAKING OR ROASTING
Lift rack at front and pull out.
Put the rack(s) where you want them before turning on
the oven.
Rack(s) should be placed
so food can be centered in the oven. Always leave at least I1 2 to 2 inches
between the sides of the pan and the oven walls and pans.
For more information, see the “Cooking Guide.”
2 | 3 | 4 |
|
| 1 |
|
|
Set the Oven Selector | on | Set the | Oven | Temperature |
BAKE. |
| Control | to the | baking |
|
| temperature | you want. | |
5 |
| 6 |
|
|
Put food in the oven Owen i rock, walls ond door w/l/ be hot
Let the oven preheat until the Signal Light goes off.
7
When baking is done, turn both knobs to OFF.
Does your new oven seem to be hotter or colder than your old oven at the
same settings? The temperature setting in your old oven may have changed
gradually overthe years. The accurate setting of your new oven can seem differ-
ou think the oven temperature needs adjusting, follow these steps:
|
|
| Locking | Screw |
|
|
|
|
|
|
|
| |
1. Pull the | Oven Tem- | 2. Loosen | the | lock- | 3. io lower | the | tem- | 4. To raise | the | tem- | |||
peratPlre | Control | ing | screw; |
| perature, | move | perature, | move | |||||
straight | off. | NOTICE | position | black |
| part of |
| black |
| part of | |||
|
| of | notches. |
| knob | closer | to LO. | knob | closer | to HI. | |||
|
|
|
|
|
| Each | notch |
| Each | notch |
| ||
|
|
|
|
|
| equals |
| about | 1OF | equals |
| about | 10°F |
|
|
|
|
|
| (5°C). |
|
|
| (5°C). |
|
|
|
Tlghten the locking screw. Replace the knob.
13
