THE LOWER OVEN LIGHT
The lower oven light will come on when you open the oven door or when you push the Oven light switch at the bottom of the control panel. Close the oven door or push the switch again to shut it off.
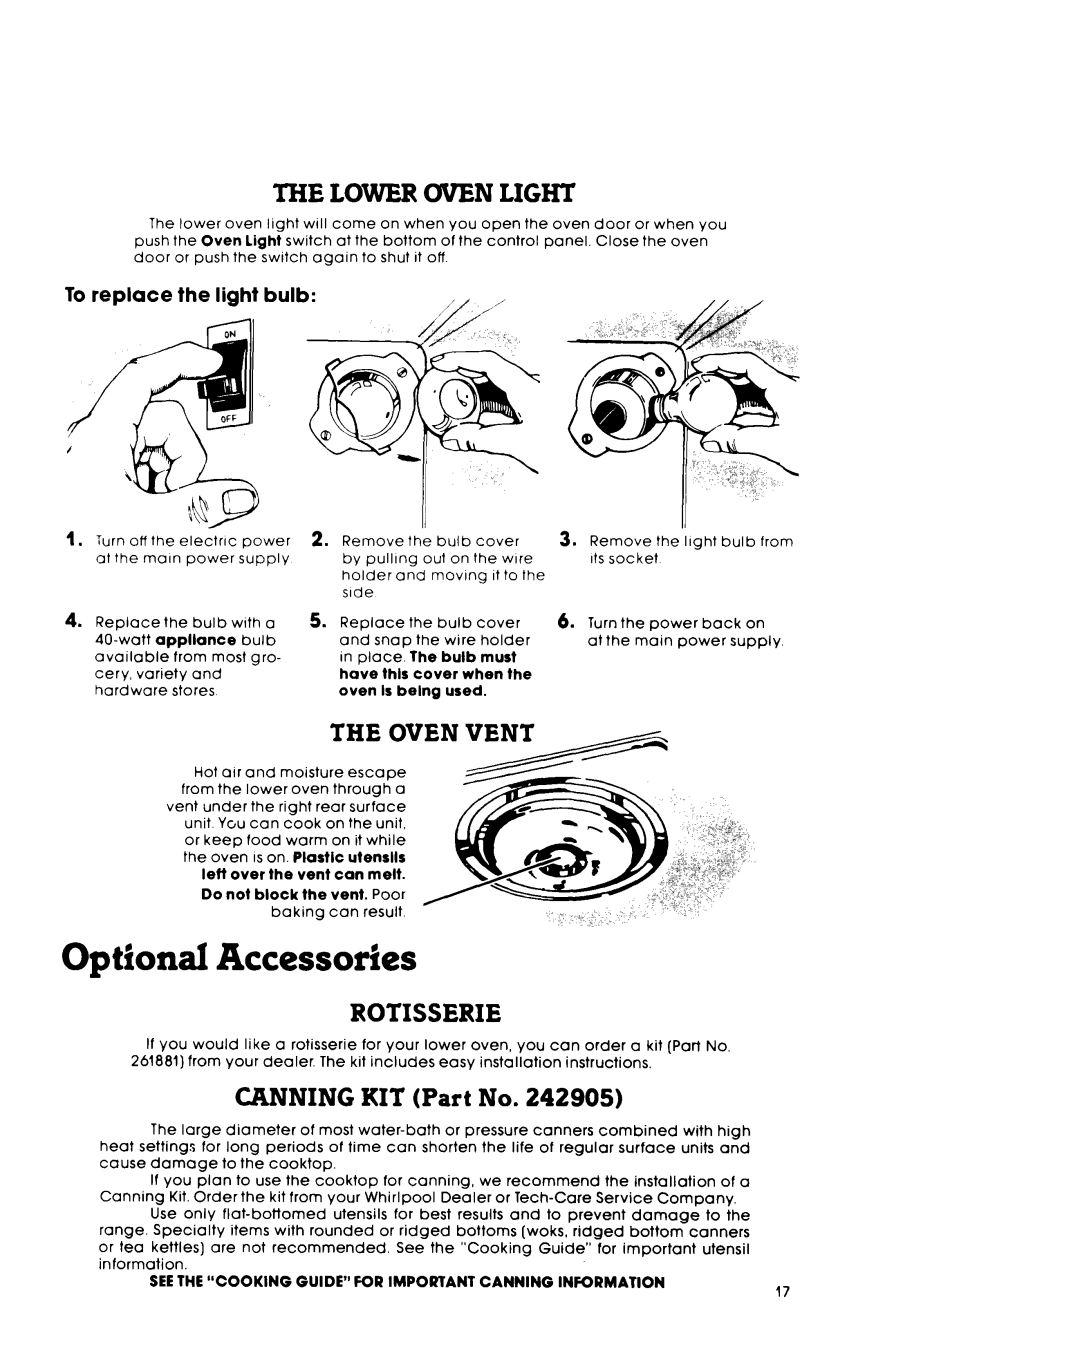
To replace the light bulb:
1. Turn off the electric power at the maln power supply
2. Remove | the bulb | cover | 3. Remove | the light bulb from | |
by pulling | out on | the wire | Its socket |
| |
holder | and | moving | it to | the |
|
side |
|
|
|
|
|
4. | Replace | the | bulb | with a | 5. | Replace | the | bulb | cover | 6. | Turn the power | back | on | |
| appliance | bulb |
| and | snap | the | wire | holder |
| at the main power | supply. | |||
| available | from most gro- |
| in place. | The | bulb | must |
|
|
|
| |||
| cery, variety | and |
|
| have | thls | cover when the |
|
|
|
| |||
| hardware | stores |
|
| oven | Is belng | used. |
|
|
|
| |||
THE OVEN VENT
Hot air and moisture escape from the lower oven through a
vent under the right rear surface unit. Ycu can cook on the unit, or keep food warm on it while the oven IS on. Plastic utensils
lett over the vent can melt. Do not block the vent. Poor
baking can result.
Optional Accessories
ROTISSERIE
If you would like a rotisserie for your lower oven, you can order a kit (Part No,
261881) from your dealer. The kit includes easy installation instructions,
|
|
|
|
| CANNING | KIT |
| (Part | No. 242905) |
|
|
|
| |||||||||
| The | large |
| diameter | of | most | or | pressure |
| canners | combined |
| with | high | ||||||||
heat settings | for | long | periods | of time | can | shorten | the | life | of | regular | surface |
| units | and | ||||||||
cause | damage |
| to | the | cooktop. |
|
|
|
|
|
|
|
|
|
|
|
|
|
|
| ||
| If you | plan |
| to use | the | cooktop |
| for | canning, |
| we recommend | the | installation | of a | ||||||||
Canning | Kit. Order | the | kit | from | your | Whirlpool | Dealer | or | Service | Company. |
| |||||||||||
| Use | only |
| utensils | for | best | results | and | to | prevent | damage | to | the | |||||||||
range. | Specialty |
| items | with rounded |
| or | ridged | bottoms | (woks, | ridged | bottom | canners | ||||||||||
or tea | kettles) | are | not | recommended. |
|
| See the | “Cooking | Guide” | for | important | utensil | ||||||||||
information. |
|
|
|
|
|
|
|
|
|
|
|
|
|
|
|
|
|
|
|
|
| |
SEETHE “COOKING GUIDE” FCR IMPORTANT CANNING INFORMATION
17