INSTALLING THE UNIT IN CABINET
The doors should be removed to decrease the weight 0.’ the oven and provide a better hand hold on the oven while lifting it into the cabinet,
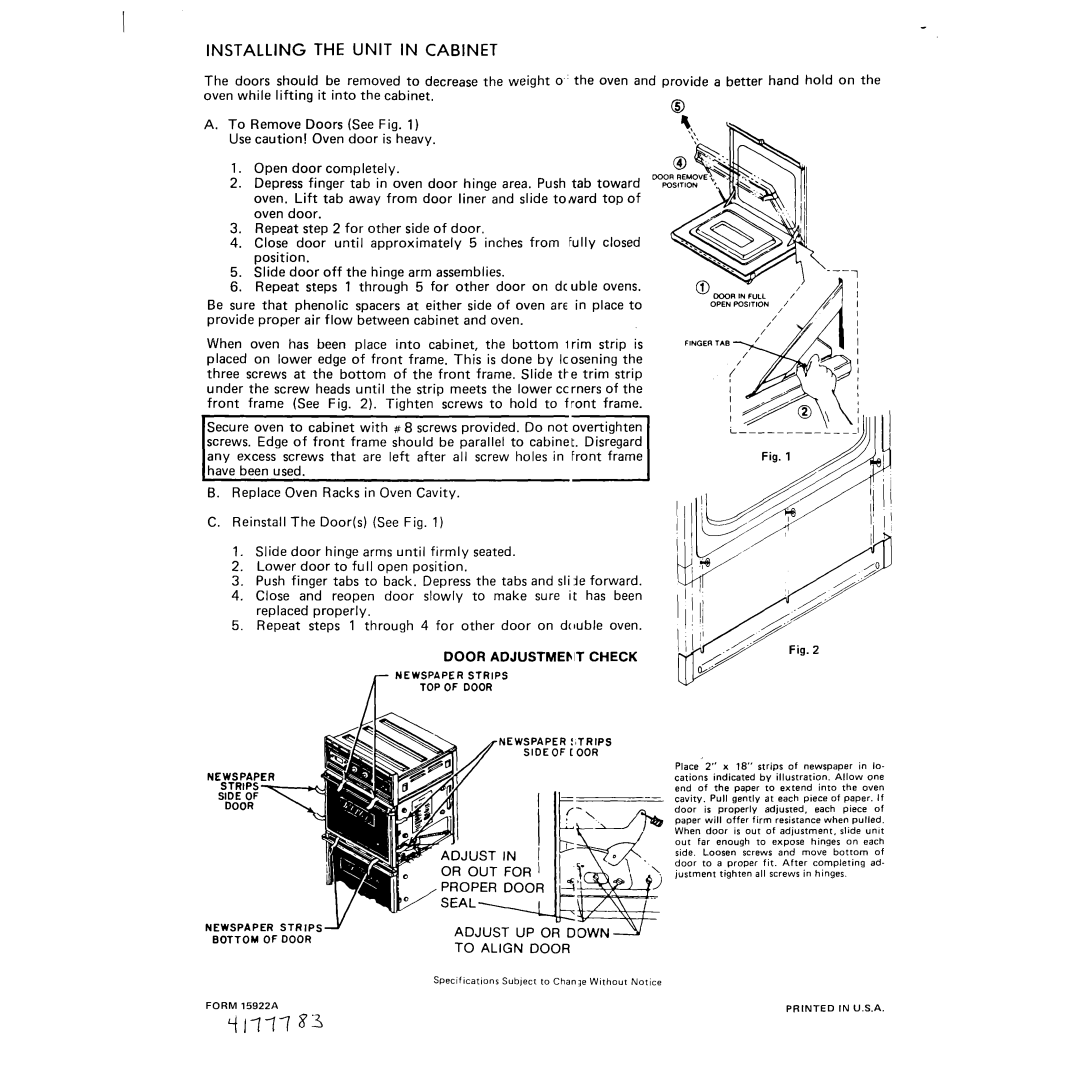
A.To Remove Doors (See Fig. 1) Use caution! Oven door is heavy.
1.Open door completely.
2.Depress finger tab in oven door hinge area. Push tab toward oven. Lift tab away from door liner and slide toward top of oven door.
3.Repeat step 2 for other side of door.
4.Close door until approximately 5 inches from Fully closed position.
5.Slide door off the hinge arm assemblies.
6.Repeat steps 1 through 5 for other door on dcuble ovens.
Be sure that phenolic spacers at either side of oven are in place to provide proper air flow between cabinet and oven.
When oven has been place into cabinet, the bottom trim strip is placed on lower edge of front frame. This is done by lcosening the three screws at the bottom of the front frame. Slide
Secure oven to cabinet with # 8 screws provided. Do not
have been used. | I |
|
B.Replace Oven Racks in Oven Cavity.
C.Reinstall The Door(s) (See Fig. 1)
1. Slide door hinge arms until firmly seated.
2.Lower door to full open position.
3.Push finger tabs to back. Depress the tabs and slide forward.
4.Close and reopen door slowly to make sure it has been replaced properly.
5.Repeat steps 1 through 4 for other door on double oven.
DOOR ADJUSTMEblT CHECK
NEWSPAPER STRIPS
TOP OF DOOR
A
NEWSPAPER !tTRIPS
SIDE OF I OOR
w ADJUST IN i
Place 2” x 18” strips of newspaper in lo-
cations indicated by illustration. Allow one end of the paper to extend into the oven cavity. Pull gently at each piece of paper. If
door is properly adjusted, each piece of paper will offer firm resistance when pulled.
When door is out of adjustment. slide unit out far enough to expose hinges on each side. Loosen screws and move bottom of
door to a proper fit. After completing ad- justment tighten all screws in hinges.
NEWSPAPER STRIPS BOTTOM OF DOOR
ADJUST UP OR DOWN3
TO ALIGN DOOR
Specifications Subject to Change Without Notice
FORM | 15922A | PRINTED | IN U.S.A. |
q | 8J |
|