ELECTRICAL
It is necessary to provide an appropriate junction box as shown on the previous page. The installation ot this junction box and the wiring connecting it to the hollse wiring should be done by a qualified electrician. All wiring must be done in accordance with the Natioral Electrical Code and/or any other applicable local codes or ordinances.
The power supply to the junction box must be 120/240 volt or 120/208 volt, 60 hertz A.C. single phase, 3 wire. Do not connect the oven to a D.C. power suppllr as serious damage to the components will result. Refer to TABLE 1 for fuse or circuit breaker size for the model being installed. Remember that the oven must have a separate circuit. Do not operate other electr cal equipment on the same cirucit.
Model No.
TABLE 1
Fuse or Breaker
Maximum Wattage
Size Required
3.8KW@;40V | 30 AMPS |
6.0KW@ 240 V
40 AMPS
7.5KW @ 240 V
UNPACKING THE UNIT
The oven should be left on the carton base until it is ready to put into the cabinet. It is also recommended that the patls over the door(s) be left in place. These precautions will reduce the possibility of damage to the front of the unit and the bot om of the front frame.
Prior to installation, test the electrical service to assure that it agrees with the specifications on the oven data plate.
Remove all cords, tape and wire used to hold various p3rts in position during shipment. Remove oven racks from the inide of the oven and put to one side while oven is being insta led in cabinet. Take broiler pan and grid from packing on top If the oven and keep with literature packet in a location when: they will be retained by the owner.
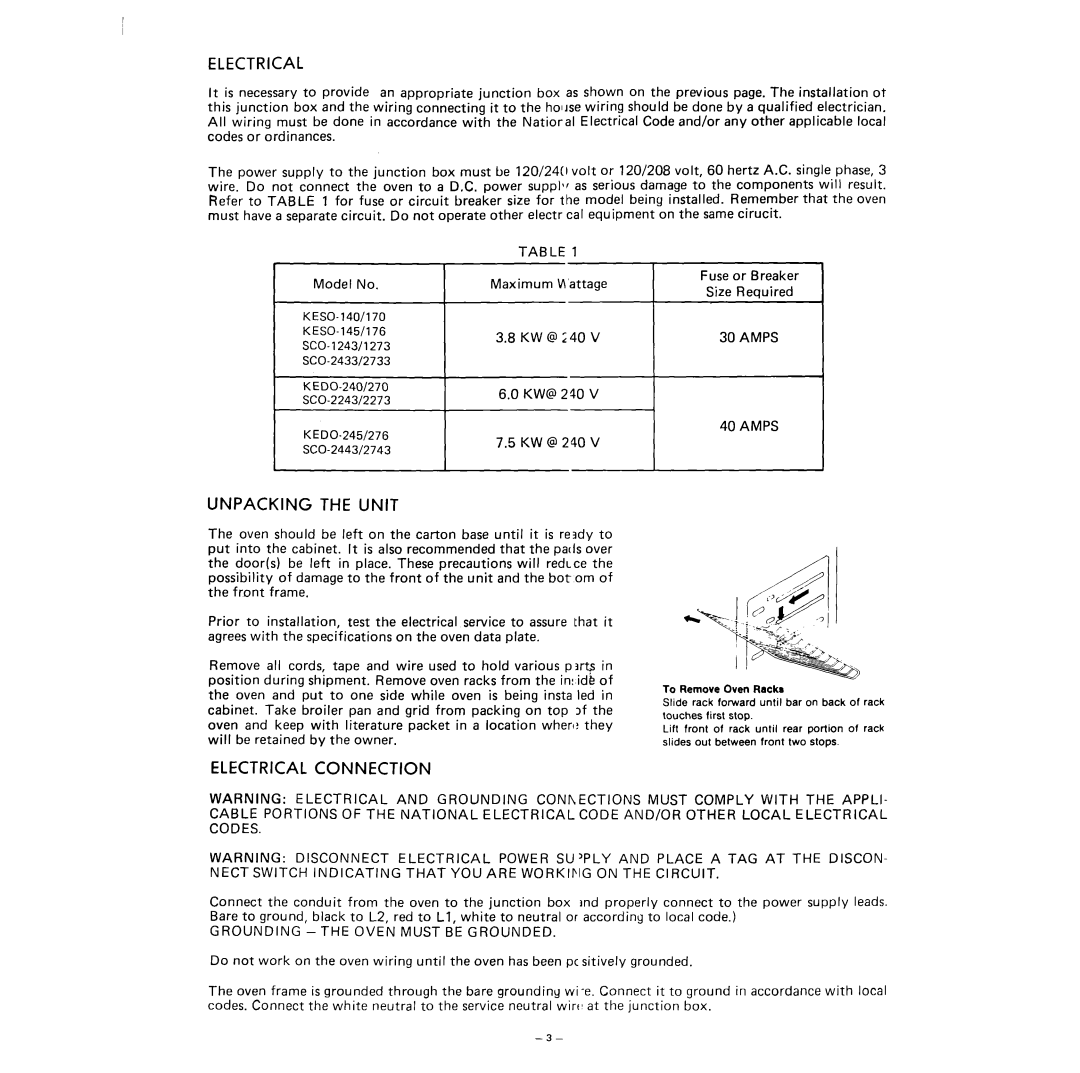
To Remove Oven Rack8
Slide rack forward until bar on back of rack touches first stop.
Lift front of rack until rear portion of rack slides out between front two stops.
ELECTRICAL CONNECTION
WARNING: ELECTRICAL AND GROUNDING CONhECTlONS MUST COMPLY WITH THE APPLI-
CABLE PORTIONS OF THE NATIONAL ELECTRICAL CODE AND/OR OTHER LOCAL ELECTRICAL CODES.
WARNING: DISCONNECT ELECTRICAL POWER SU’PLY AND PLACE A TAG AT THE DISCON-
NECT SWITCH INDICATING THAT YOU ARE WORKING ON THE CIRCUIT.
Connect the conduit from the oven to the junction box jnd properly connect to the power supply leads. Bare to ground, black to L2, red to Ll, white to neutral or according to local code.)
GROUNDING -THE OVEN MUST BE GROUNDED.
Do not work on the oven wiring until the oven has been pc sitively grounded.
The oven frame is grounded through the bare groundiny codes. Connect the white neutral to the service neutral