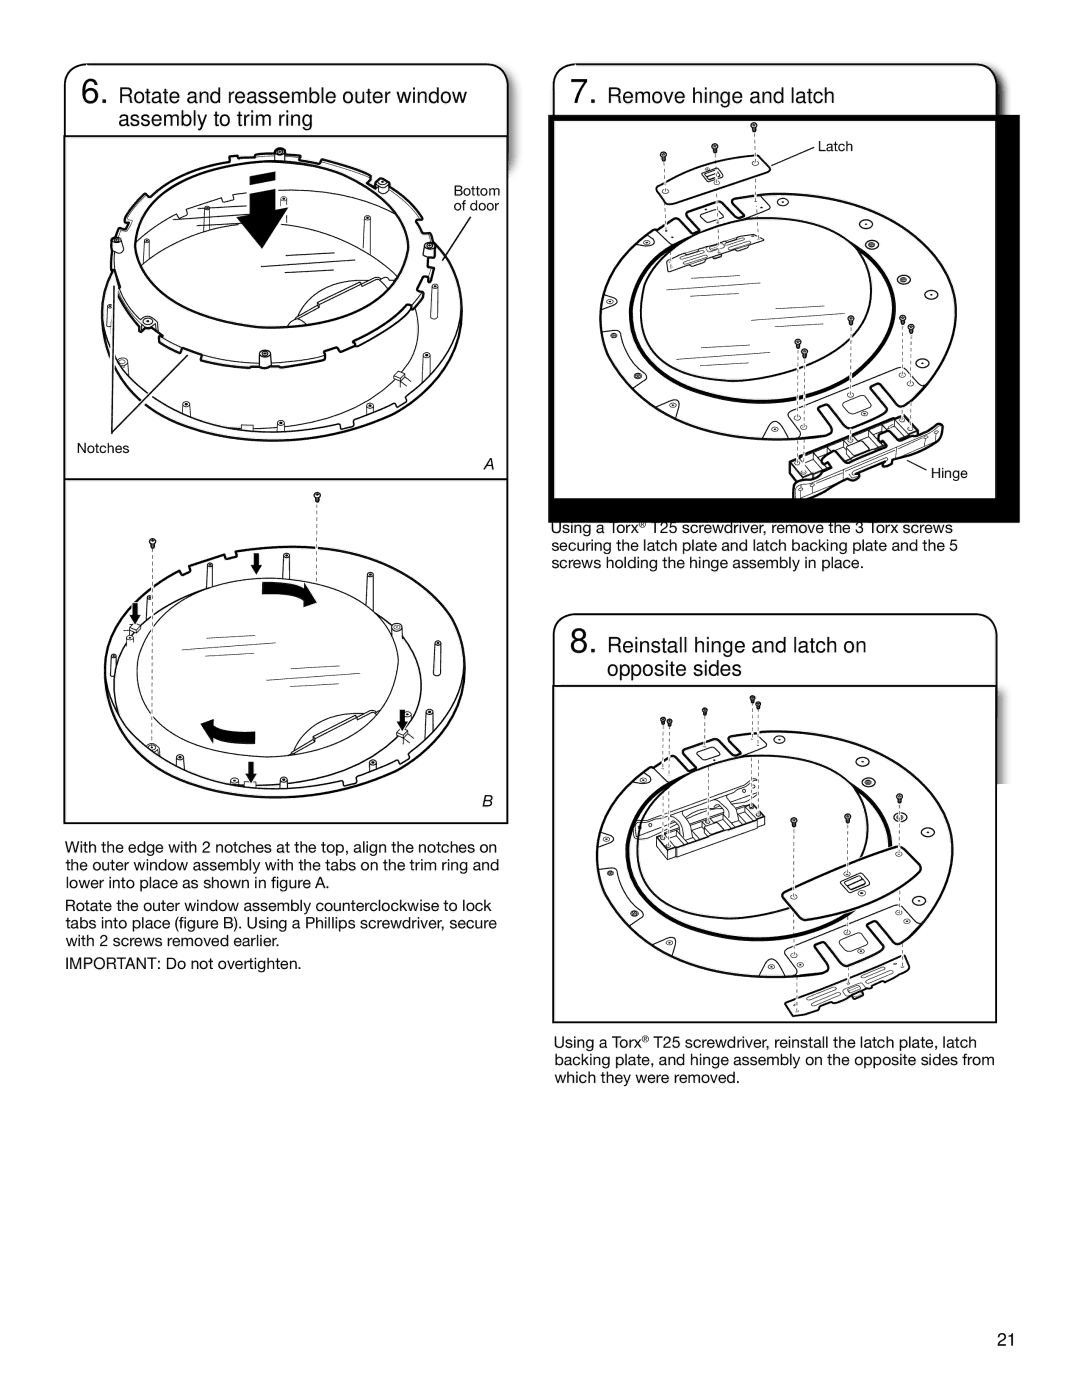
6. Rotate and reassemble outer window assembly to trim ring
Bottom |
of door |
Notches |
A |
B |
With the edge with 2 notches at the top, align the notches on the outer window assembly with the tabs on the trim ring and lower into place as shown in figure A.
Rotate the outer window assembly counterclockwise to lock tabs into place (figure B). Using a Phillips screwdriver, secure with 2 screws removed earlier.
IMPORTANT: Do not overtighten.
7. Remove hinge and latch
Latch
![]() Hinge
Hinge
Using a Torx® T25 screwdriver, remove the 3 Torx screws securing the latch plate and latch backing plate and the 5 screws holding the hinge assembly in place.
8. Reinstall hinge and latch on opposite sides
Using a Torx® T25 screwdriver, reinstall the latch plate, latch backing plate, and hinge assembly on the opposite sides from which they were removed.
21