
1F87-0261 specifications
The White Rodgers 1F87-0261 is a sophisticated thermostat designed to improve home heating and cooling efficiency. Known for its reliability and user-friendly features, this model is widely appreciated by homeowners and HVAC professionals alike.One of the standout features of the 1F87-0261 is its digital display, which allows users to easily read temperature settings and program schedules. The large, backlit screen ensures visibility in various lighting conditions, making it accessible for all users. This thermostat is designed for both 1-stage heating and cooling systems, and it is compatible with multisystem setups, providing flexibility for various home configurations.
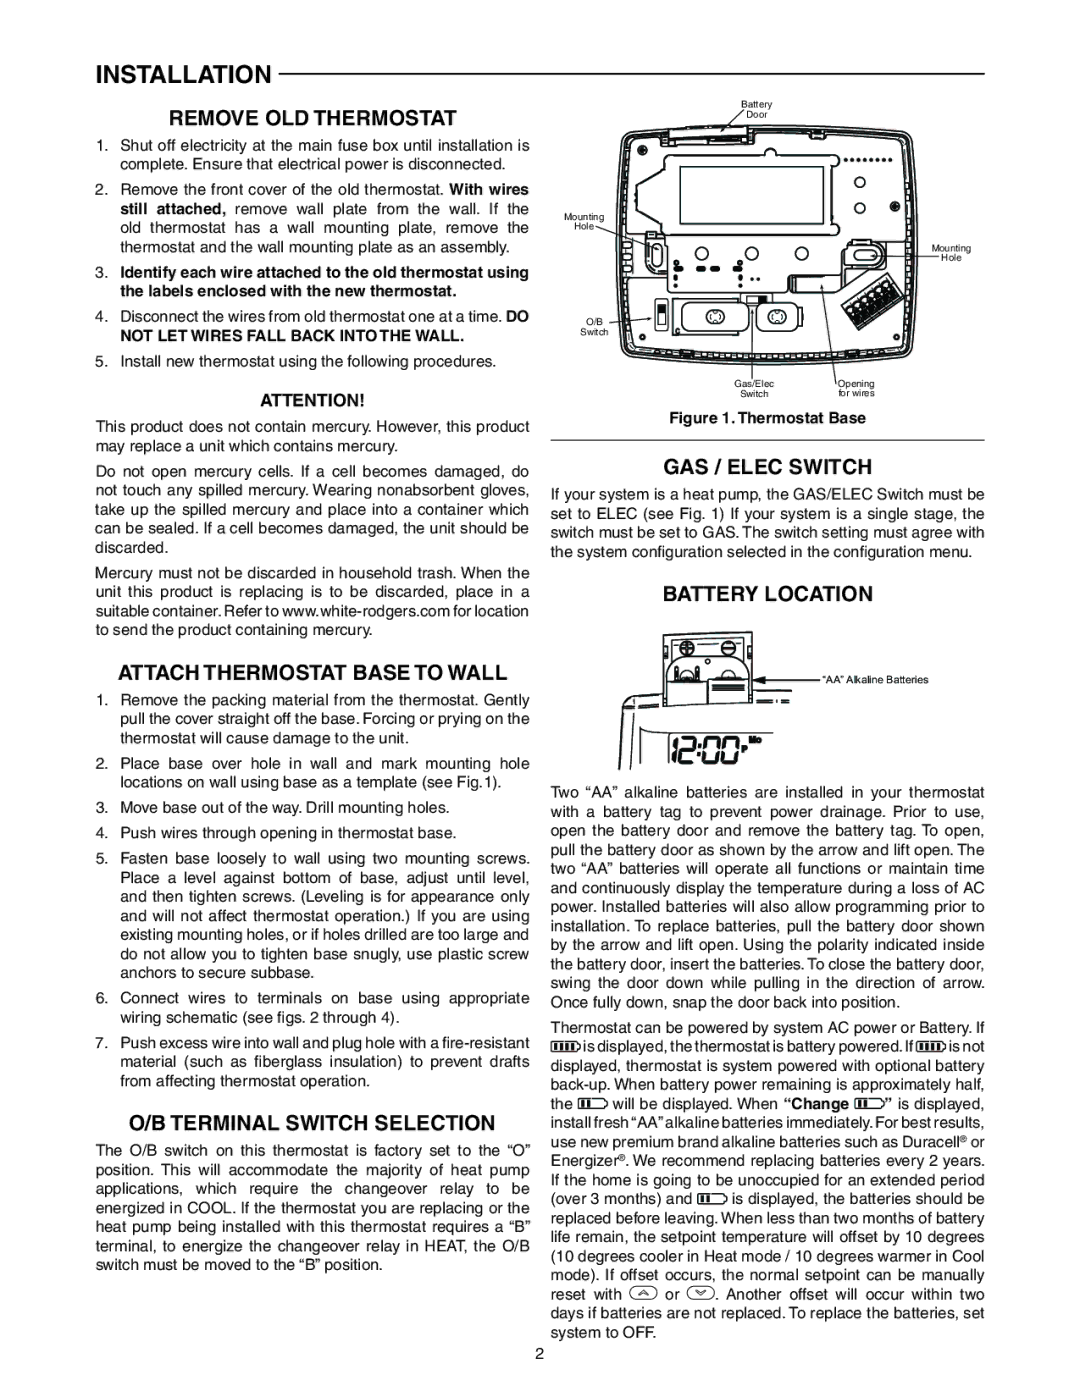
The installation process of the White Rodgers 1F87-0261 is straightforward, making it an attractive option for DIY enthusiasts. The thermostat is designed to fit standard wall plates, and the clear instructions facilitate a hassle-free installation. It requires a 24V power source, commonly found in most HVAC systems.
Programming capabilities are another significant advantage of the 1F87-0261. This model offers a seven-day programmable feature, allowing users to set different schedules for each day of the week. The user can adjust temperatures for specific timeframes, ensuring optimal comfort while also saving on energy costs. The temporary hold function enables users to override programmed settings temporarily without affecting the entire schedule.
Energy-saving features are embedded within the thermostat's design. It includes a setpoint limiting option that can restrict temperature adjustments, effectively preventing overuse and contributing to reduced energy bills. Moreover, the programmable strategy encourages users to maintain more efficient temperature settings during off-peak hours when energy costs may be lower.
With an emphasis on convenience, the White Rodgers 1F87-0261 offers an intuitive interface that simplifies the programming and adjustment of temperature settings. The thermostat also boasts of a maintenance reminder feature, which alerts users when it’s time for routine HVAC system checks, thereby enhancing system longevity.
In conclusion, the White Rodgers 1F87-0261 combines user-friendly programming, energy-saving capabilities, and compatibility with a range of HVAC systems. Its practical design and innovative features make it an ideal choice for homeowners seeking efficient climate control while managing energy expenditures effectively. The reliability and performance of this thermostat have made it a trusted option in residential climate management.