ADJUSTMENT
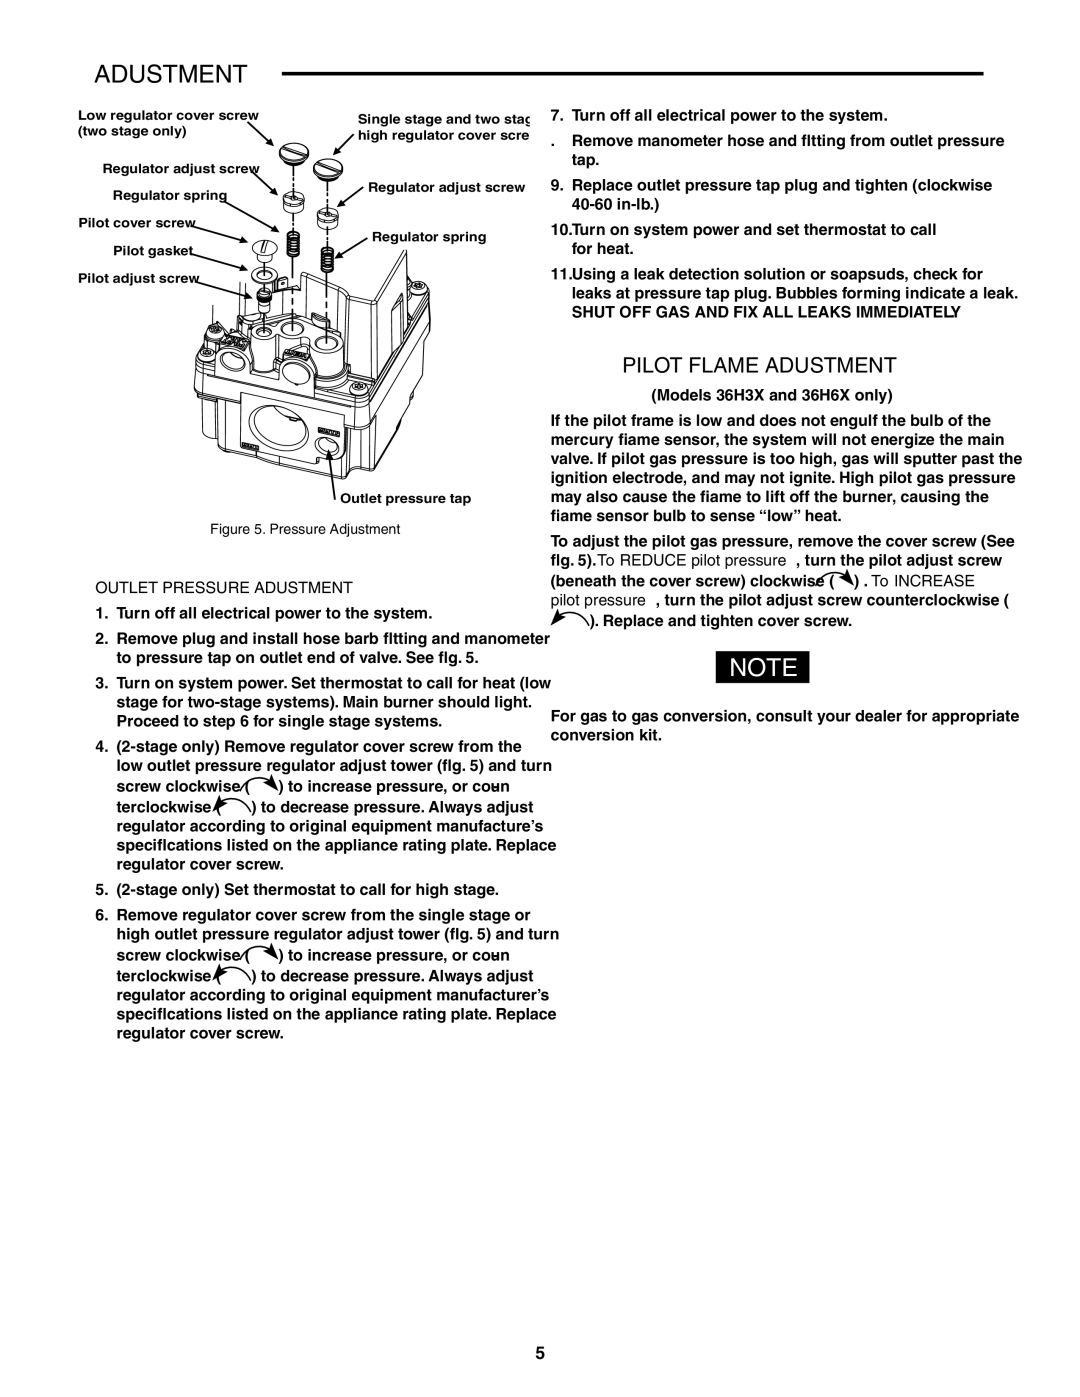
Low regulator cover screw (two stage only) ![]()
Regulator adjust screw
Regulator spring
Pilot cover screw
Pilot gasket
Pilot adjust screw
Single stage and two stage high regulator cover screw
Regulator adjust screw
Regulator spring
7.Turn off all electrical power to the system.
8.Remove manometer hose and fitting from outlet pressure tap.
9.Replace outlet pressure tap plug and tighten (clockwise
10.Turn on system power and set thermostat to call for heat.
11.Using a leak detection solution or soapsuds, check for leaks at pressure tap plug. Bubbles forming indicate a leak. Shut off gas and Fix all leaks immediately.
Outlet pressure tap
Figure 5. Pressure Adjustment
Outlet Pressure Adjustment
1.Turn off all electrical power to the system.
2.Remove plug and install hose barb fitting and manometer to pressure tap on outlet end of valve. See fig. 5.
3.Turn on system power. Set thermostat to call for heat (low stage for
4.
screw clockwise (![]() ) to increase pressure, or coun-
) to increase pressure, or coun-
terclockwise ( ![]() ) to decrease pressure. Always adjust regulator according to original equipment manufacture’s specifications listed on the appliance rating plate. Replace regulator cover screw.
) to decrease pressure. Always adjust regulator according to original equipment manufacture’s specifications listed on the appliance rating plate. Replace regulator cover screw.
5.
6.Remove regulator cover screw from the single stage or high outlet pressure regulator adjust tower (fig. 5) and turn
screw clockwise (![]() ) to increase pressure, or coun-
) to increase pressure, or coun-
terclockwise ( ![]() ) to decrease pressure. Always adjust regulator according to original equipment manufacturer’s specifications listed on the appliance rating plate. Replace regulator cover screw.
) to decrease pressure. Always adjust regulator according to original equipment manufacturer’s specifications listed on the appliance rating plate. Replace regulator cover screw.
Pilot Flame Adjustment
(Models 36H3X and 36H6X only)
If the pilot frame is low and does not engulf the bulb of the mercury flame sensor, the system will not energize the main valve. If pilot gas pressure is too high, gas will sputter past the ignition electrode, and may not ignite. High pilot gas pressure may also cause the flame to lift off the burner, causing the flame sensor bulb to sense “low” heat.
To adjust the pilot gas pressure, remove the cover screw (See fig. 5). To reduce pilot pressure, turn the pilot adjust screw
(beneath the cover screw) clockwise (![]() ) . To Increase pilot pressure, turn the pilot adjust screw counterclockwise (
) . To Increase pilot pressure, turn the pilot adjust screw counterclockwise (
![]() ). Replace and tighten cover screw.
). Replace and tighten cover screw.
NOTE
For gas to gas conversion, consult your dealer for appropriate conversion kit.
5