BELT CLIP INSTALLATION
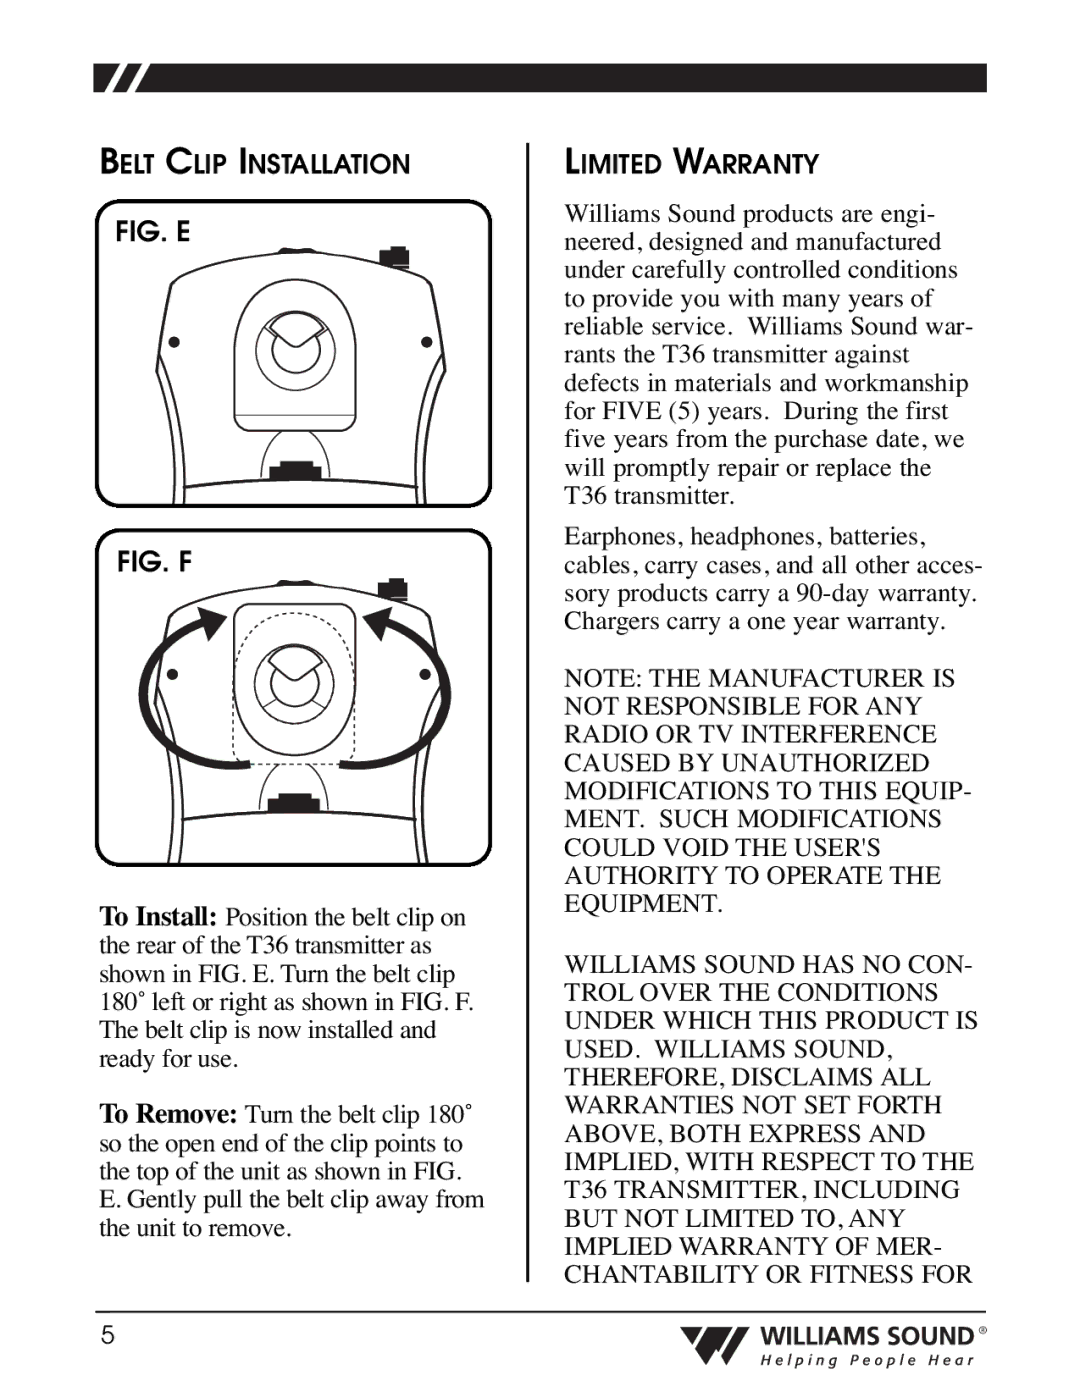
FIG. E
FIG. F
To Install: Position the belt clip on the rear of the T36 transmitter as shown in FIG. E. Turn the belt clip 180˚ left or right as shown in FIG. F. The belt clip is now installed and ready for use.
To Remove: Turn the belt clip 180˚ so the open end of the clip points to the top of the unit as shown in FIG.
E. Gently pull the belt clip away from the unit to remove.
LIMITED WARRANTY
Williams Sound products are engi- neered, designed and manufactured under carefully controlled conditions to provide you with many years of reliable service. Williams Sound war- rants the T36 transmitter against defects in materials and workmanship for FIVE (5) years. During the first five years from the purchase date, we will promptly repair or replace the T36 transmitter.
Earphones, headphones, batteries, cables, carry cases, and all other acces- sory products carry a
NOTE: THE MANUFACTURER IS NOT RESPONSIBLE FOR ANY RADIO OR TV INTERFERENCE CAUSED BY UNAUTHORIZED MODIFICATIONS TO THIS EQUIP- MENT. SUCH MODIFICATIONS COULD VOID THE USER'S AUTHORITY TO OPERATE THE EQUIPMENT.
WILLIAMS SOUND HAS NO CON- TROL OVER THE CONDITIONS UNDER WHICH THIS PRODUCT IS USED. WILLIAMS SOUND, THEREFORE, DISCLAIMS ALL WARRANTIES NOT SET FORTH ABOVE, BOTH EXPRESS AND IMPLIED, WITH RESPECT TO THE T36 TRANSMITTER, INCLUDING BUT NOT LIMITED TO, ANY IMPLIED WARRANTY OF MER- CHANTABILITY OR FITNESS FOR
5 |
| ® |