Installing Disc Table
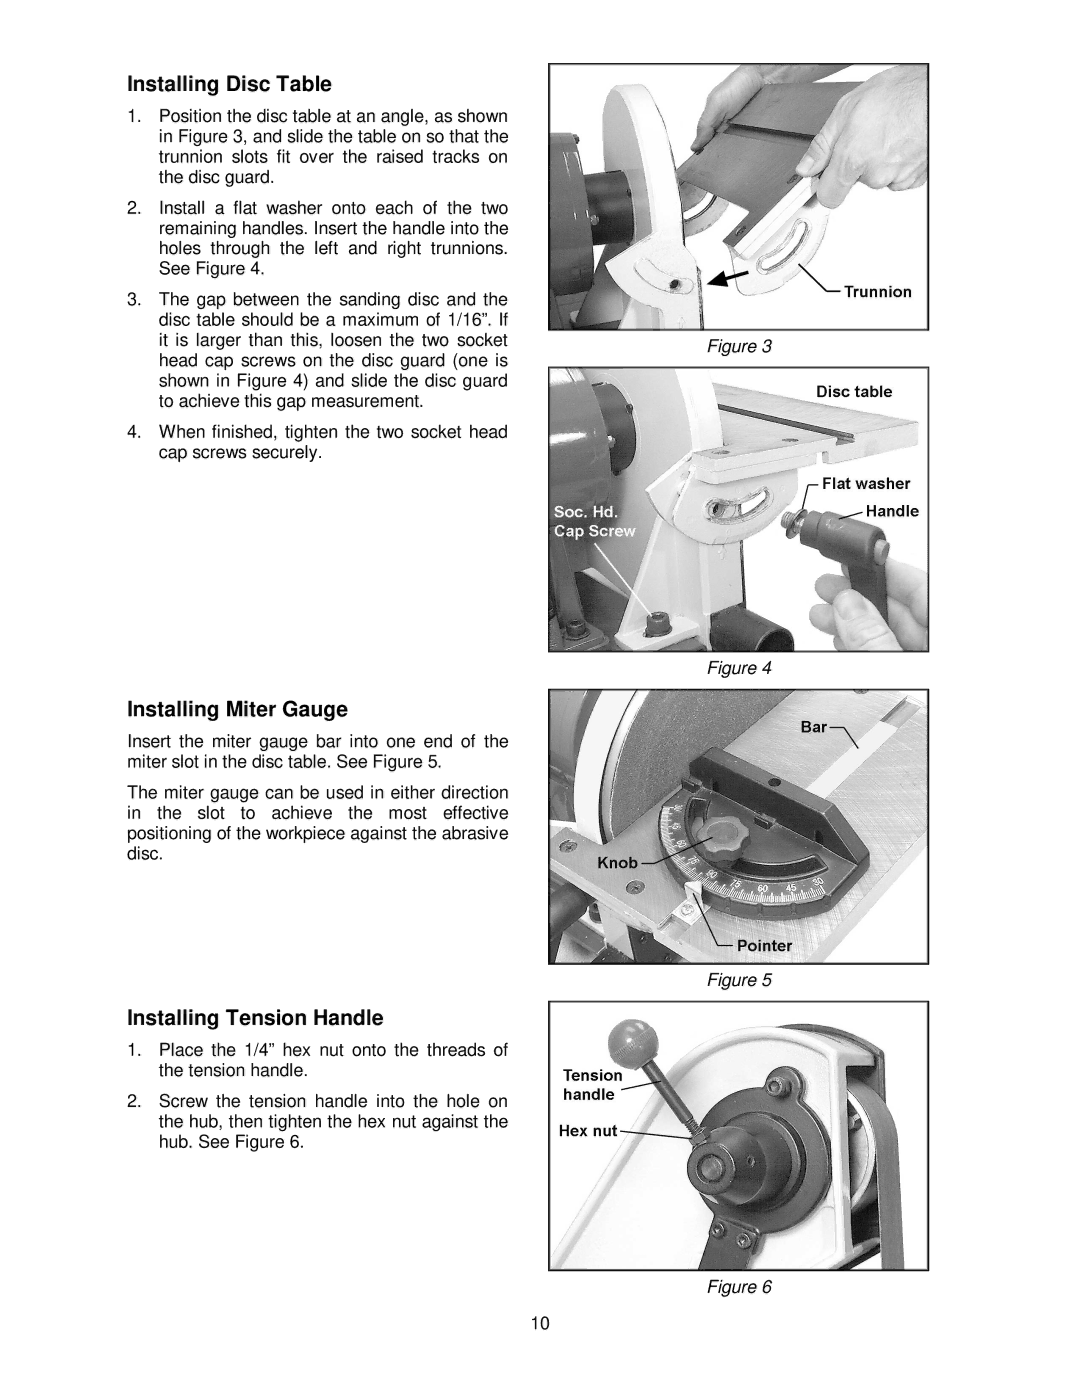
1.Position the disc table at an angle, as shown in Figure 3, and slide the table on so that the trunnion slots fit over the raised tracks on the disc guard.
2.Install a flat washer onto each of the two remaining handles. Insert the handle into the holes through the left and right trunnions. See Figure 4.
3.The gap between the sanding disc and the disc table should be a maximum of 1/16”. If it is larger than this, loosen the two socket head cap screws on the disc guard (one is shown in Figure 4) and slide the disc guard to achieve this gap measurement.
4.When finished, tighten the two socket head cap screws securely.
Installing Miter Gauge
Insert the miter gauge bar into one end of the miter slot in the disc table. See Figure 5.
The miter gauge can be used in either direction in the slot to achieve the most effective positioning of the workpiece against the abrasive disc.
Installing Tension Handle
1.Place the 1/4” hex nut onto the threads of the tension handle.
2.Screw the tension handle into the hole on the hub, then tighten the hex nut against the hub. See Figure 6.
Figure 3
Figure 4
Figure 5
Figure 6
10