Maintenance
Cleaning
Shutoff the machine before cleaning. Keep the exterior of the machine clean and free of chips. Use a brush for cleaning. Periodically empty grinding dust and particles from the dust collection system.
Lubrication
Lubrication of the grinder is not required. The drive motor and contact wheel are fitted with sealed bearings.
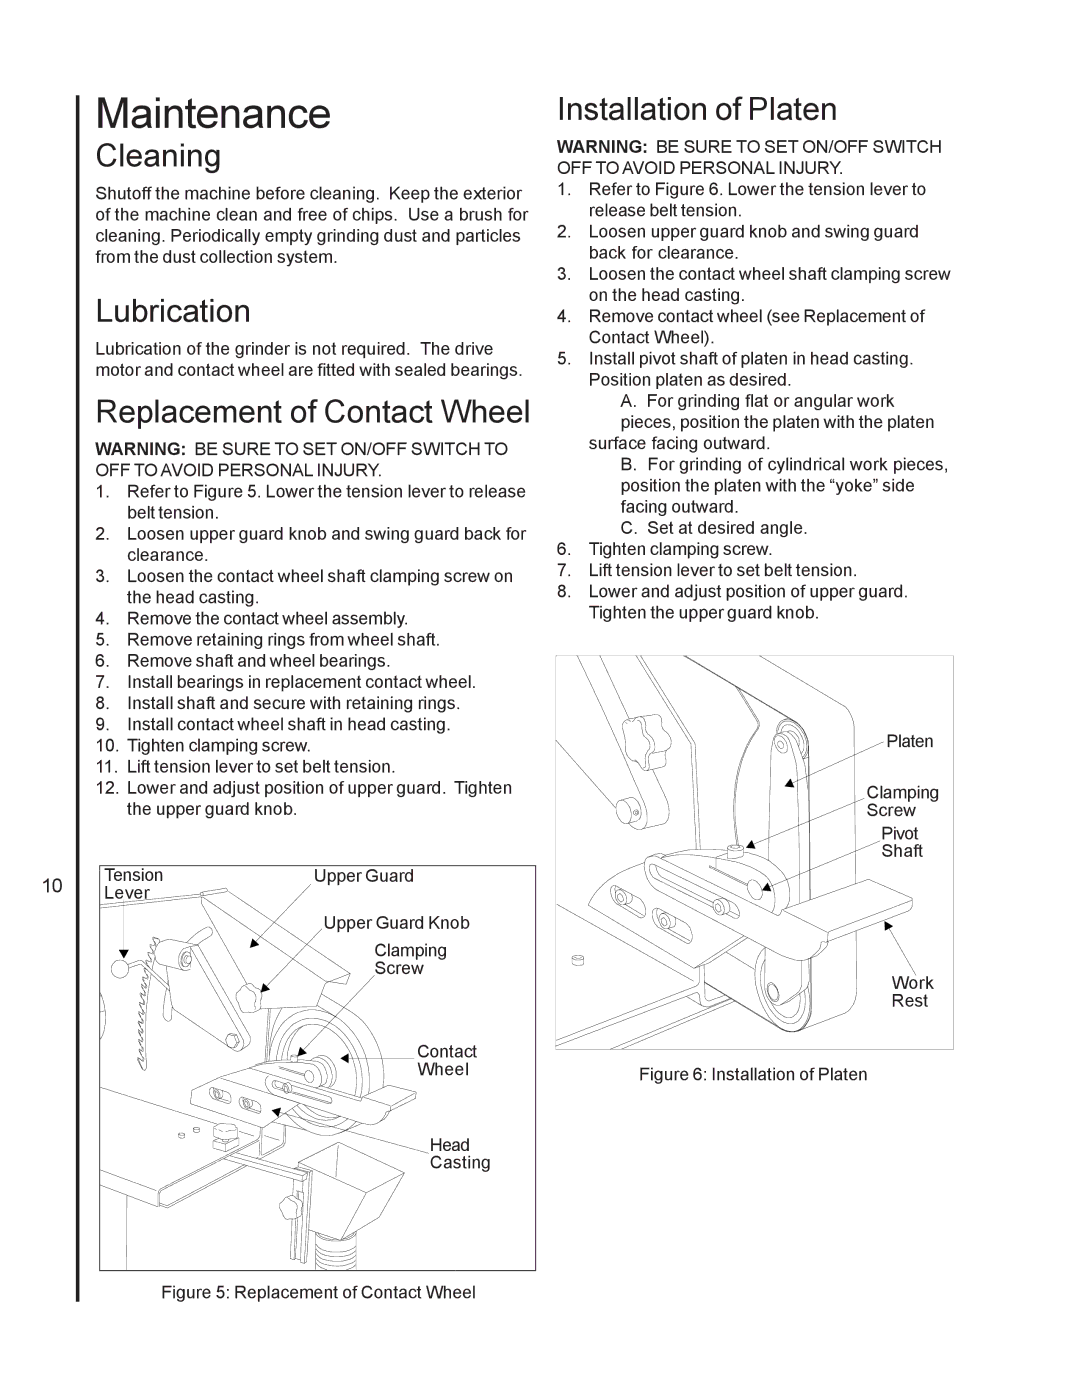
Replacement of Contact Wheel
WARNING: BE SURE TO SET ON/OFF SWITCH TO OFF TO AVOID PERSONAL INJURY.
1.Refer to Figure 5. Lower the tension lever to release belt tension.
2.Loosen upper guard knob and swing guard back for clearance.
3.Loosen the contact wheel shaft clamping screw on the head casting.
4.Remove the contact wheel assembly.
5.Remove retaining rings from wheel shaft.
6.Remove shaft and wheel bearings.
7.Install bearings in replacement contact wheel.
8.Install shaft and secure with retaining rings.
9.Install contact wheel shaft in head casting.
10.Tighten clamping screw.
11.Lift tension lever to set belt tension.
12.Lower and adjust position of upper guard. Tighten the upper guard knob.
10 | Tension | Upper Guard |
Lever |
| |
|
| Upper Guard Knob |
|
| Clamping |
|
| Screw |
|
| Contact |
|
| Wheel |
|
| Head |
|
| Casting |
Figure 5: Replacement of Contact Wheel
Installation of Platen
WARNING: BE SURE TO SET ON/OFF SWITCH OFF TO AVOID PERSONAL INJURY.
1.Refer to Figure 6. Lower the tension lever to release belt tension.
2.Loosen upper guard knob and swing guard back for clearance.
3.Loosen the contact wheel shaft clamping screw on the head casting.
4.Remove contact wheel (see Replacement of Contact Wheel).
5.Install pivot shaft of platen in head casting. Position platen as desired.
A. For grinding flat or angular work pieces, position the platen with the platen
surface facing outward.
B.For grinding of cylindrical work pieces, position the platen with the “yoke” side facing outward.
C.Set at desired angle.
6.Tighten clamping screw.
7.Lift tension lever to set belt tension.
8.Lower and adjust position of upper guard. Tighten the upper guard knob.
Platen
Clamping
Screw
Pivot
![]() Shaft
Shaft
Work
Rest