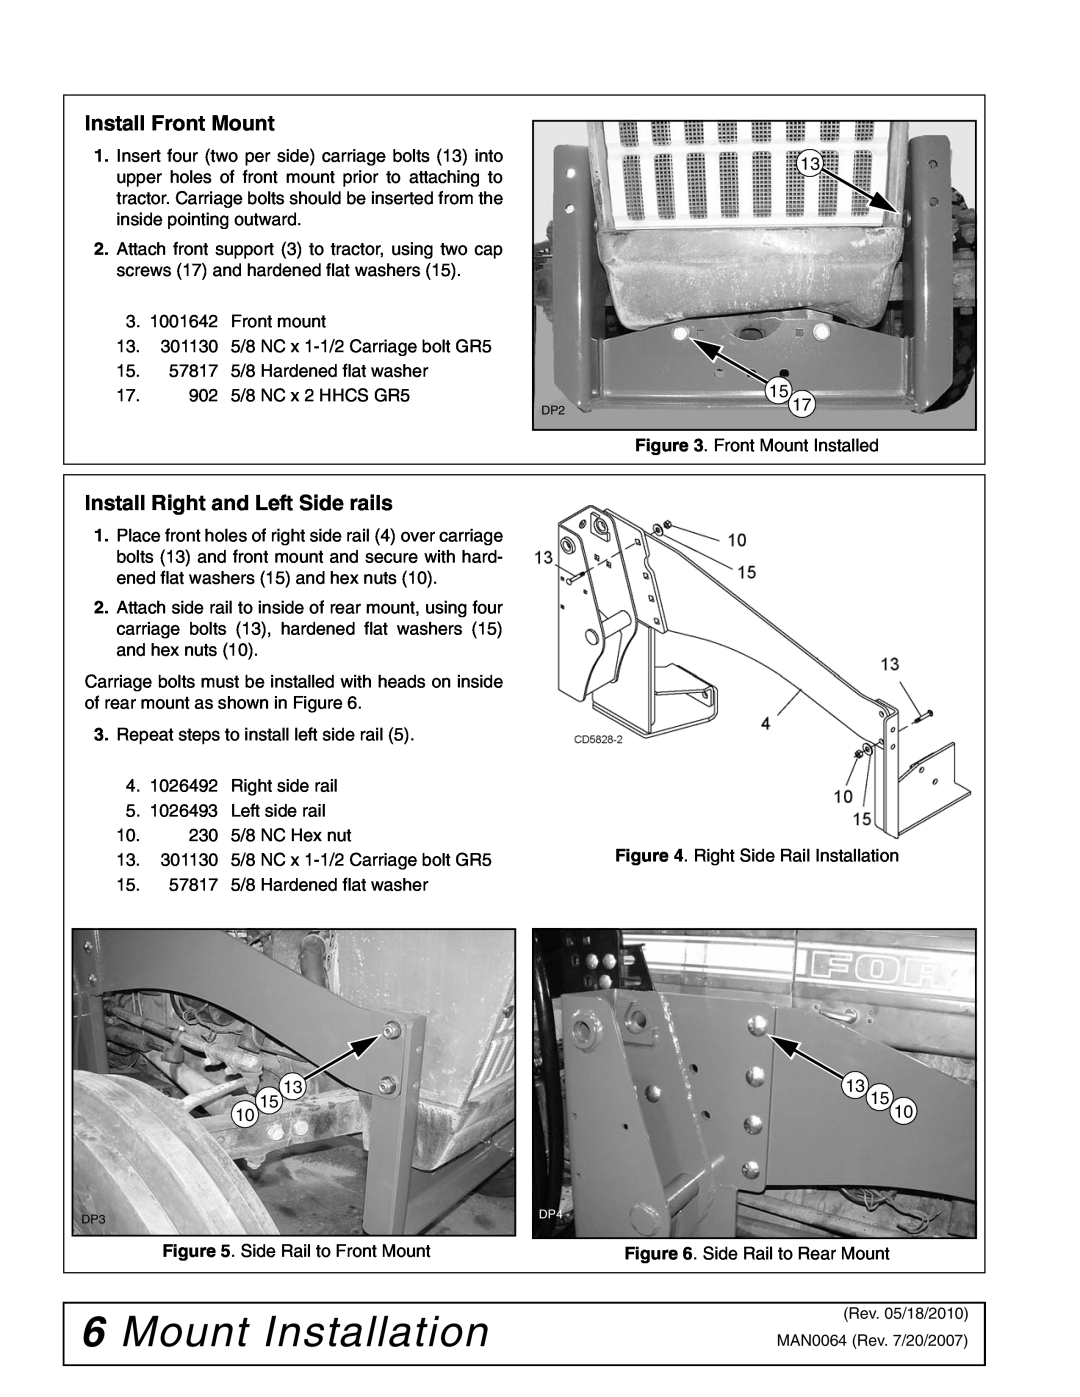
Install Front Mount
1.Insert four (two per side) carriage bolts (13) into upper holes of front mount prior to attaching to tractor. Carriage bolts should be inserted from the inside pointing outward.
2.Attach front support (3) to tractor, using two cap screws (17) and hardened flat washers (15).
3.1001642 Front mount
13.301130 5/8 NC x
15.57817 5/8 Hardened flat washer
17.902 5/8 NC x 2 HHCS GR5
![]() 13
13
15![]()
DP2 | 17 |
Figure 3. Front Mount Installed
Install Right and Left Side rails
1.Place front holes of right side rail (4) over carriage bolts (13) and front mount and secure with hard- ened flat washers (15) and hex nuts (10).
2.Attach side rail to inside of rear mount, using four carriage bolts (13), hardened flat washers (15) and hex nuts (10).
Carriage bolts must be installed with heads on inside of rear mount as shown in Figure 6.
3.Repeat steps to install left side rail (5).
4.1026492 Right side rail
5.1026493 Left side rail
10.230 5/8 NC Hex nut
13.301130 5/8 NC x
15.57817 5/8 Hardened flat washer
Figure 4. Right Side Rail Installation
![]() 13
13
15
10
DP3
13
DP4
15
10
Figure 5. Side Rail to Front Mount
Figure 6. Side Rail to Rear Mount
6 Mount Installation
(Rev. 05/18/2010)
MAN0064 (Rev. 7/20/2007)