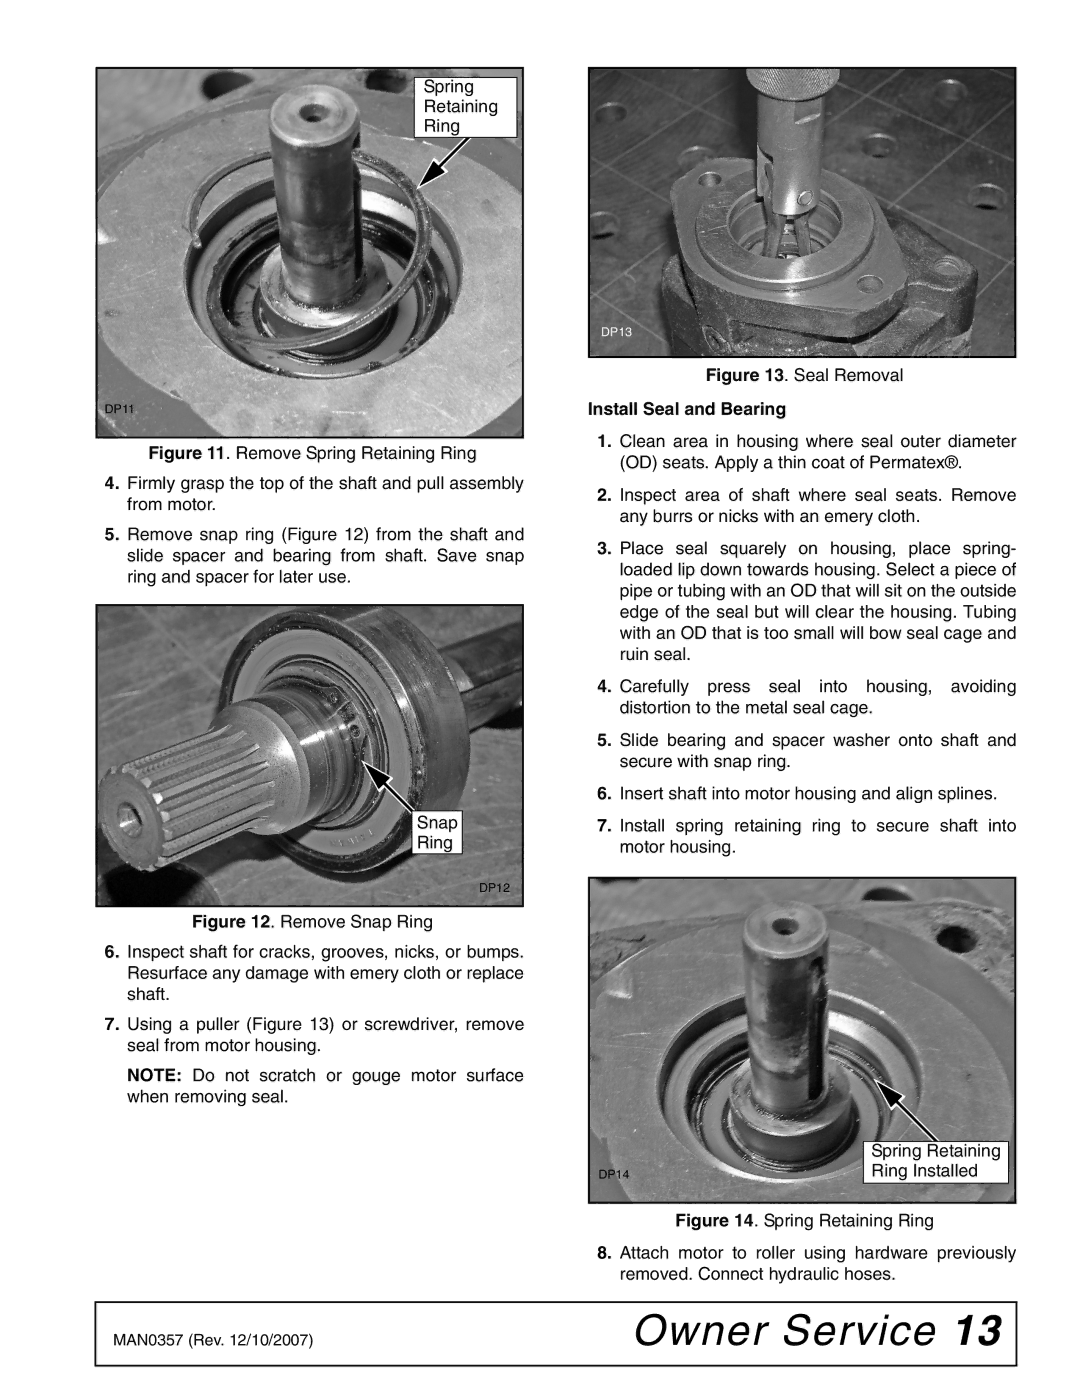
Spring
Retaining
Ring
DP11
Figure 11. Remove Spring Retaining Ring
4.Firmly grasp the top of the shaft and pull assembly from motor.
5.Remove snap ring (Figure 12) from the shaft and slide spacer and bearing from shaft. Save snap ring and spacer for later use.
Snap
Ring
DP12
Figure 12. Remove Snap Ring
6.Inspect shaft for cracks, grooves, nicks, or bumps. Resurface any damage with emery cloth or replace shaft.
7.Using a puller (Figure 13) or screwdriver, remove seal from motor housing.
NOTE: Do not scratch or gouge motor surface when removing seal.
DP13
Figure 13. Seal Removal
Install Seal and Bearing
1.Clean area in housing where seal outer diameter (OD) seats. Apply a thin coat of Permatex®.
2.Inspect area of shaft where seal seats. Remove any burrs or nicks with an emery cloth.
3.Place seal squarely on housing, place spring- loaded lip down towards housing. Select a piece of pipe or tubing with an OD that will sit on the outside edge of the seal but will clear the housing. Tubing with an OD that is too small will bow seal cage and ruin seal.
4.Carefully press seal into housing, avoiding distortion to the metal seal cage.
5.Slide bearing and spacer washer onto shaft and secure with snap ring.
6.Insert shaft into motor housing and align splines.
7.Install spring retaining ring to secure shaft into motor housing.
| Spring Retaining |
DP14 | Ring Installed |
Figure 14. Spring Retaining Ring
8.Attach motor to roller using hardware previously removed. Connect hydraulic hoses.
MAN0357 (Rev. 12/10/2007) | Owner Service 13 |
|
|