Model W1822 (For Machines Mfg. Since 9/10)
Crosscut Fence
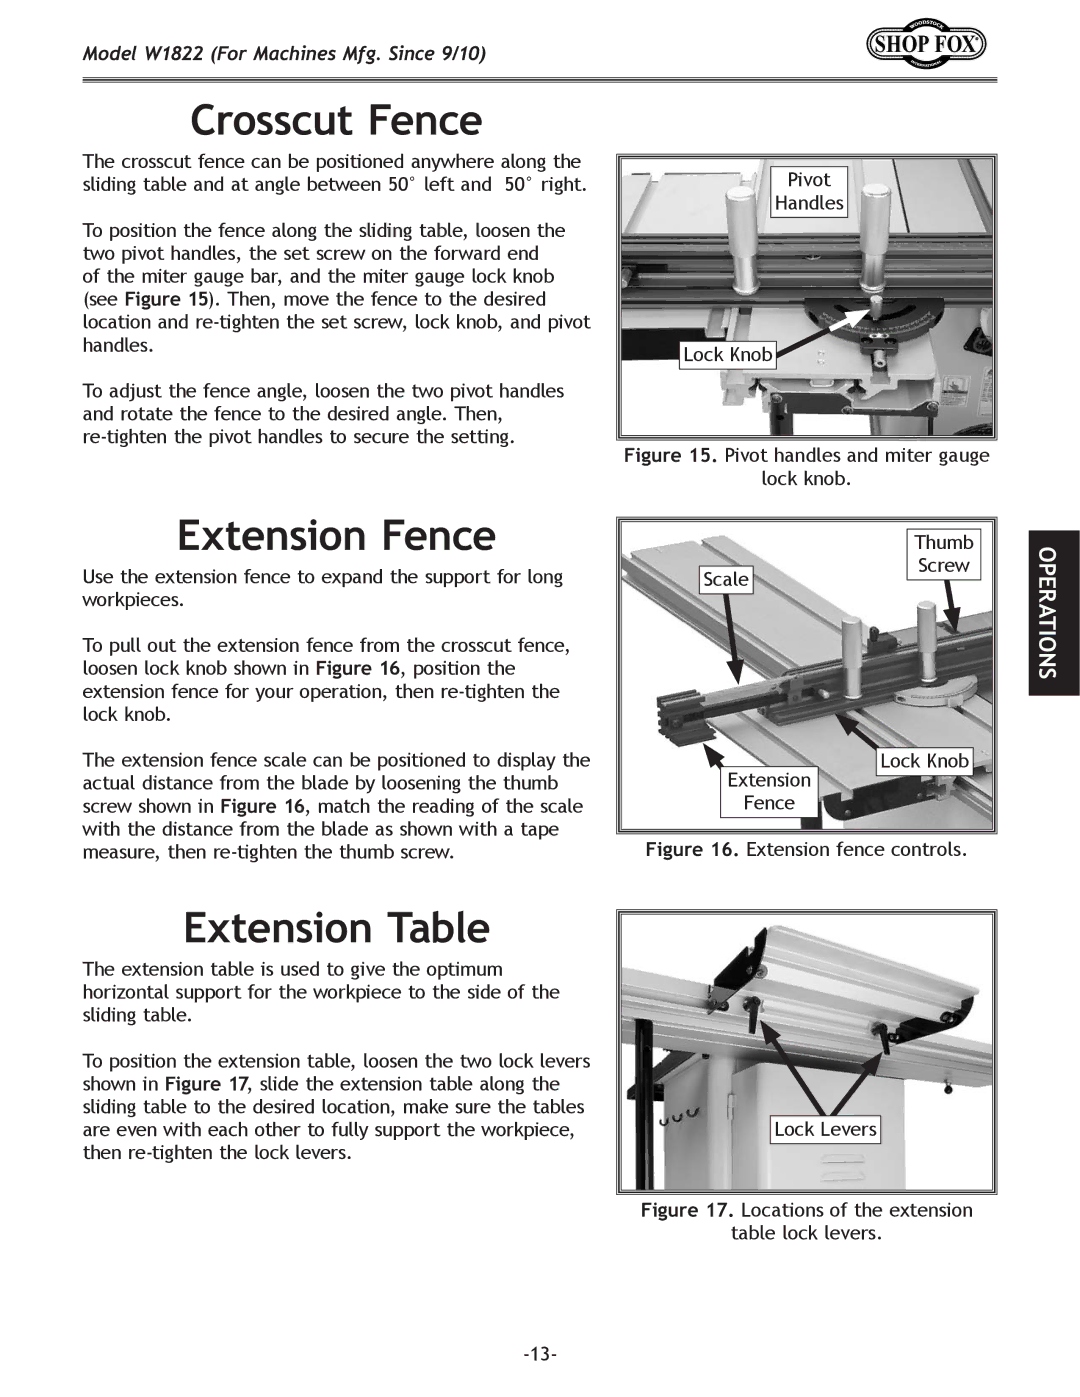
The crosscut fence can be positioned anywhere along the sliding table and at angle between 50° left and 50° right.
To position the fence along the sliding table, loosen the two pivot handles, the set screw on the forward end of the miter gauge bar, and the miter gauge lock knob (see Figure 15). Then, move the fence to the desired location and
To adjust the fence angle, loosen the two pivot handles and rotate the fence to the desired angle. Then,
Extension Fence
Pivot
Handles
Lock Knob![]()
Figure 15. Pivot handles and miter gauge
lock knob.
Thumb
Use the extension fence to expand the support for long workpieces.
To pull out the extension fence from the crosscut fence, loosen lock knob shown in Figure 16, position the extension fence for your operation, then re-tighten the lock knob.
Scale
Screw
OPERATIONS
The extension fence scale can be positioned to display the actual distance from the blade by loosening the thumb screw shown in Figure 16, match the reading of the scale with the distance from the blade as shown with a tape measure, then
Lock Knob
Extension
Fence
Figure 16. Extension fence controls.
Extension Table
The extension table is used to give the optimum horizontal support for the workpiece to the side of the sliding table.
To position the extension table, loosen the two lock levers shown in Figure 17, slide the extension table along the sliding table to the desired location, make sure the tables are even with each other to fully support the workpiece, then
Lock Levers