C. Safety Guard
The safety guard system consists of a clear plastic guard and arm which have been assembled at the fac- tory. There is also a height adjustment bar, mounting bracket with lock knob and bolt and washer. The clear plastic guard has been designed to fit over the router bit during operation and can be connected to a 3" flex- hose for dust collection purposes.
Step 1 - Mount the safety guard mounting bracket to the back of The Rebel® table with the two 1⁄4"- 28 x 1" socket head cap screws provided. Figure 6.
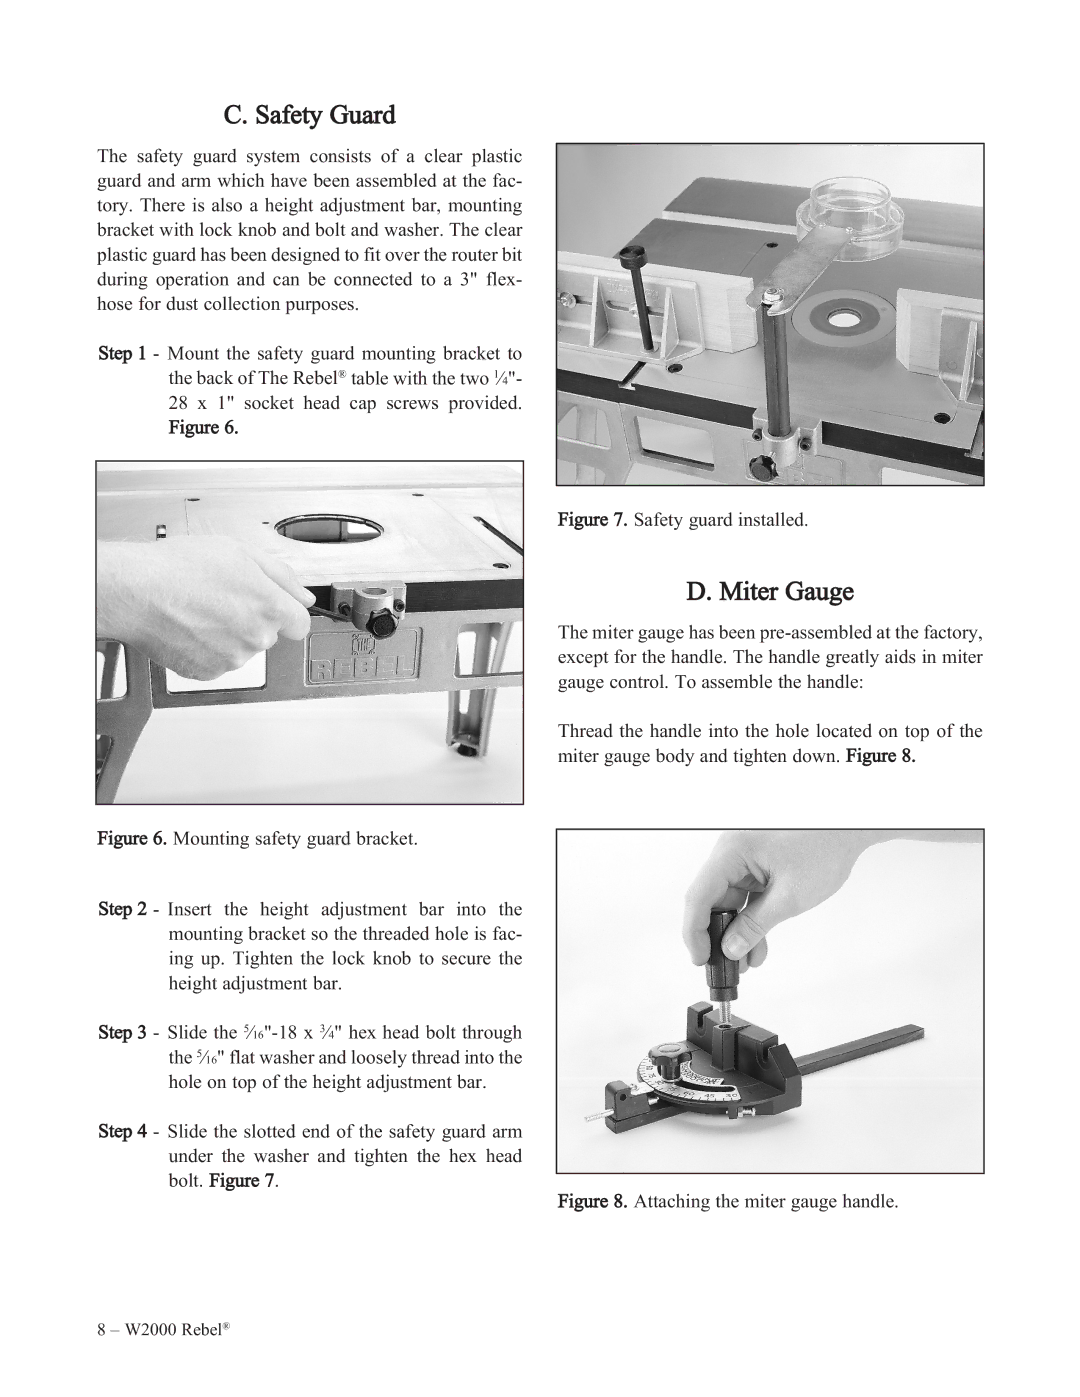
Figure 7. Safety guard installed.
Figure 6. Mounting safety guard bracket.
Step 2 - Insert the height adjustment bar into the mounting bracket so the threaded hole is fac- ing up. Tighten the lock knob to secure the height adjustment bar.
Step 3 - Slide the 5⁄16"-18 x 3⁄4" hex head bolt through the 5⁄16" flat washer and loosely thread into the hole on top of the height adjustment bar.
Step 4 - Slide the slotted end of the safety guard arm under the washer and tighten the hex head bolt. Figure 7.
D. Miter Gauge
The miter gauge has been
Thread the handle into the hole located on top of the miter gauge body and tighten down. Figure 8.
Figure 8. Attaching the miter gauge handle.
8 – W2000 Rebel®