Connecting the hob
•The electrical safety of this appliance can only be guaranteed if the latter is correctly and efficiently earthed, in compliance with regulations on electrical safety. Always ensure that this vital safety measure has been taken. If you have any doubts, call in a qualified technician to check the electrical system thoroughly.
•The manufacturer denies all responsibility for damage resulting from a system which has not been earthed correctly.
•Before powering the appliance, check whether the technical characteristics featured on the appliance data plate correspond with those of the mains electrical system.
•Check that the current load of the mains supply and of the power sockets is suitable for the maximum power of the appliance, indicated on the appliance data plate. If in doubt, contact a qualified professional.
Disconnect the appliance from the electricity supply before all operations.
Connect your hob to the electrical system by means of a junction box: if the appliance is connected permanently to the mains, an omnipolar circuit breaker, accessible if necessary, with a minimum contact opening of 3 mm should be installed.
Valid only for models with a power supply cable Some models are supplied with a
| Electrical | Voltage, Frequency | Fuses, | |||||
connections | Sections | |||||||
| ||||||||
|
|
|
|
|
|
|
| |
|
|
|
|
|
| GB | 25 A* | |
|
|
|
|
|
| |||
|
|
| 2,5 mm² | |||||
L N |
|
|
| |||||
|
|
| ||||||
|
|
|
|
|
|
|
| |
*Application of the simultaneity coefficient in accordance with cei
Valid only for models without a power supply cable
Some models are not fitted with a power supply cable, as the cable should be sized according to the type of electrical connection in use (see connection table below). To connect the cable, proceed as follows:
1. Open the terminal board by inserting a screwdriver into the side tabs of the cover. Use the screwdriver as a lever by pushing it down to open the cover (see diagram).
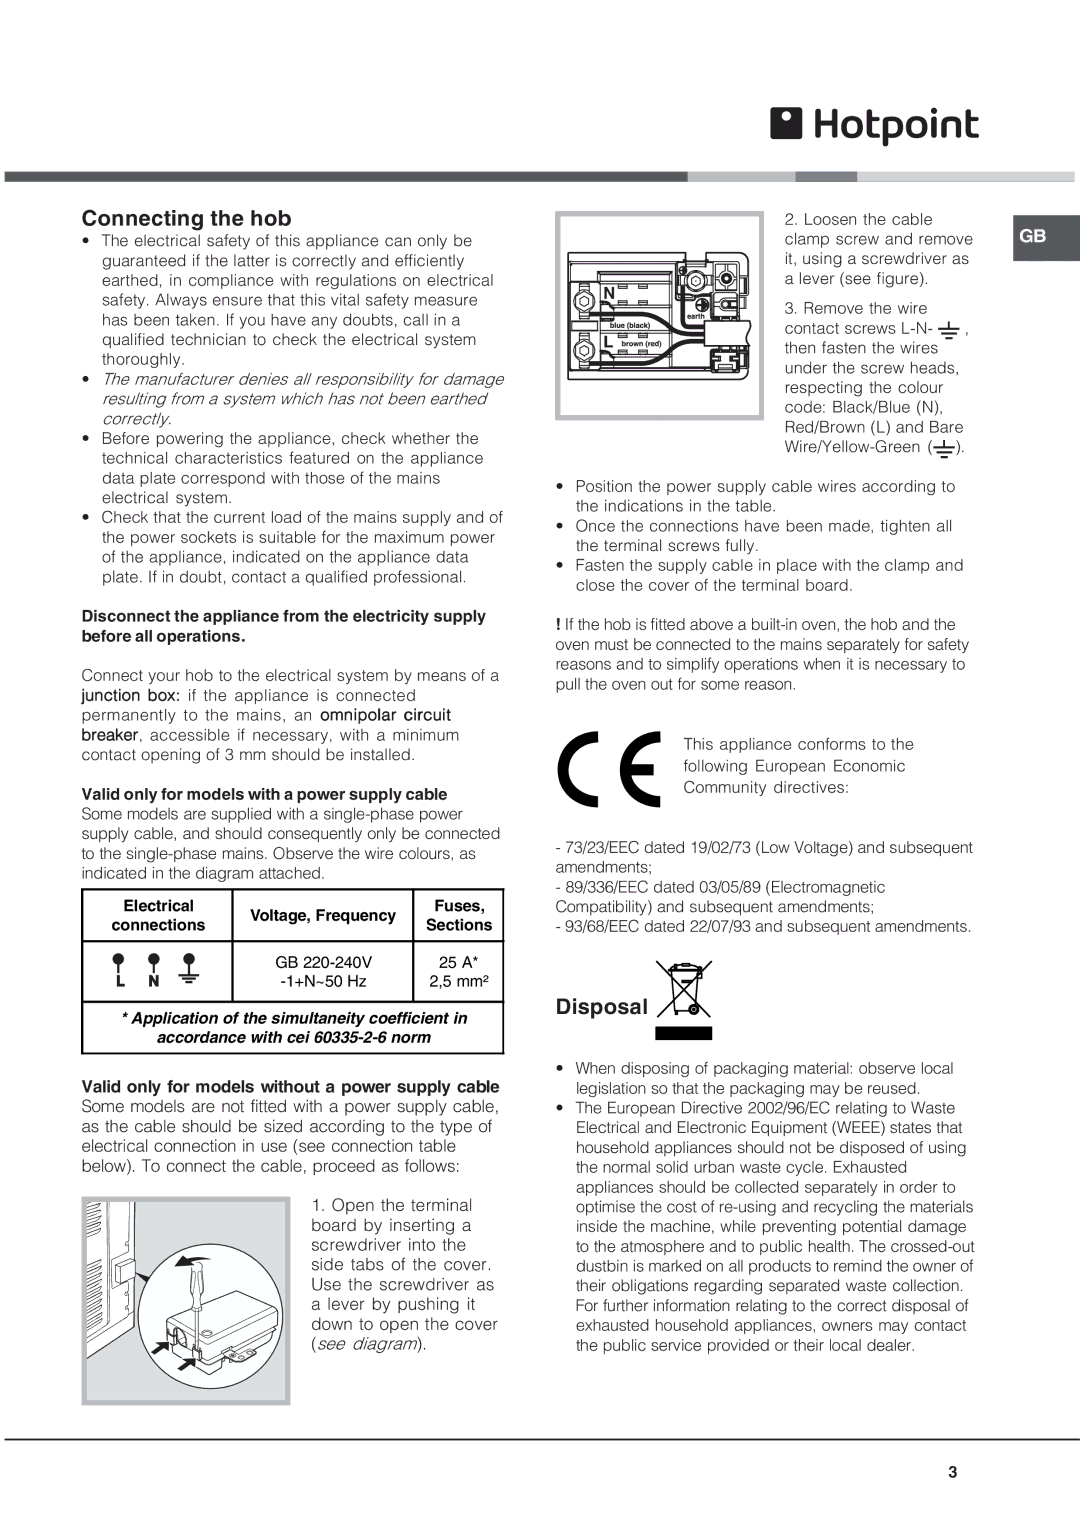
2. Loosen the cable
clamp screw and remove GB it, using a screwdriver as
a lever (see figure).
3. Remove the wire contact screws ![]() , then fasten the wires under the screw heads, respecting the colour code: Black/Blue (N), Red/Brown (L) and Bare
, then fasten the wires under the screw heads, respecting the colour code: Black/Blue (N), Red/Brown (L) and Bare ![]() ).
).
•Position the power supply cable wires according to the indications in the table.
•Once the connections have been made, tighten all the terminal screws fully.
•Fasten the supply cable in place with the clamp and close the cover of the terminal board.
!If the hob is fitted above a
This appliance conforms to the following European Economic Community directives:
-73/23/EEC dated 19/02/73 (Low Voltage) and subsequent amendments;
-89/336/EEC dated 03/05/89 (Electromagnetic Compatibility) and subsequent amendments;
-93/68/EEC dated 22/07/93 and subsequent amendments.
Disposal
•When disposing of packaging material: observe local legislation so that the packaging may be reused.
•The European Directive 2002/96/EC relating to Waste Electrical and Electronic Equipment (WEEE) states that household appliances should not be disposed of using the normal solid urban waste cycle. Exhausted appliances should be collected separately in order to optimise the cost of
3