(5)Remove key plates or snap rings from upper block sheave(s) and slide out upper block sheave pins, releasing upper block sheaves. Remove wire rope from sheaves.
(6)Make certain all personnel are clear of hoist and operate hoist â to completely unwind all wire rope from drum. Stop hoist so drum anchor slot(s) is accessible. Remove live rope and socket(s) from drum.
(7)TURN OFF POWER TO HOIST.
(8)Remove the bolt and lockwasher in the end of the rope anchor fitting. Remove rope from slot in top of anchor.
c.Installing new rope.
![]() WARNING
WARNING
Winding rope on rope drums with power can be hazardous. Keep hands safe distance from drum, wear gloves and use extreme care when handling rope.
SINGLE REEVED HOISTS
Stretch new cable on floor in one continuous length. Make certain there is no twist in rope.
(1)Place one end of rope in rope drum anchor slot. Be sure end fitting is properly seated.
(2)With all personnel clear of hoist — TURN ON POWER.
(3)Operate hoist á, guiding new rope into drum grooves with gloved hand, until the following lengths remain unwound:
(a)2 part single reeved — about
(b)4 part single reeved — about
(c)6 part single reeved — about
(4)Proceed with reeving as described in appropriate paragraph below and the reeving diagram for your hoist.
DOUBLE REEVED HOISTS
Stretch new cable on floor in one continuous length. Make certain there are no twists in rope.
(1)Pull far end of rope toward end of rope nearest hoist, until both ends are even and a loop is formed. Place fittings on both ends of rope in anchor slots on rope drum. Be sure end fittings are properly seated.
(2)With all personnel clear of hoist — TURN ON POWER.
(3)Operate hoist á guiding rope into grooves at both ends of drum, until the distance from the drum to the loop is
—about 28' for 2 part double reeved.
(4)Proceed with reeving as described in appropriate paragraph below and the reeving diagram for your hoist.
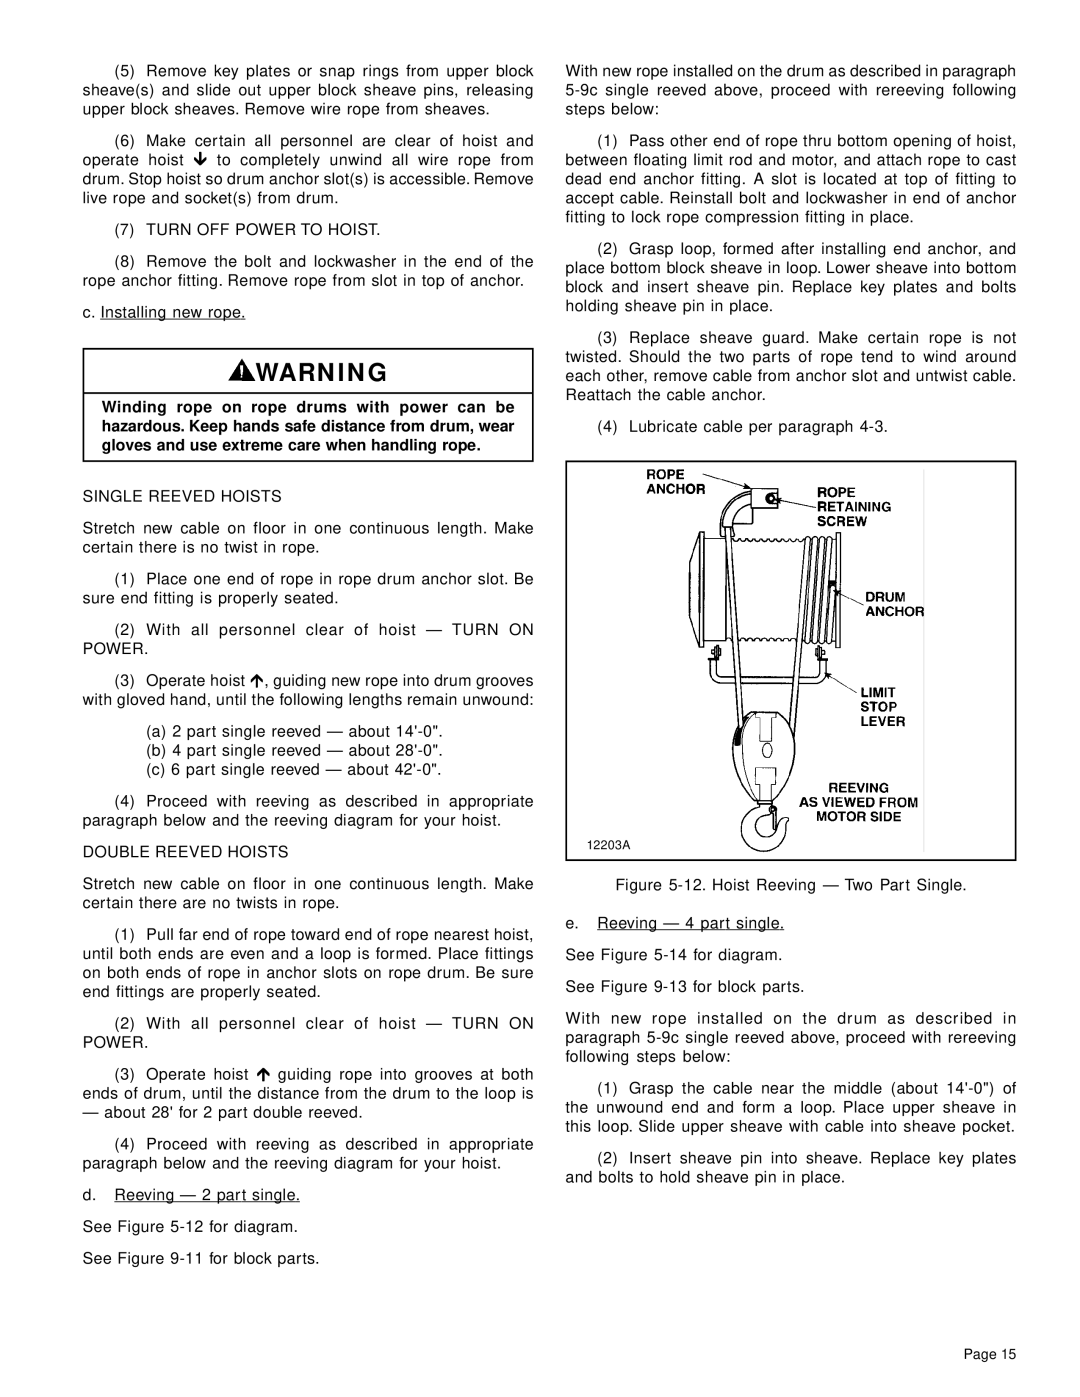
d.Reeving — 2 par t single. See Figure
With new rope installed on the drum as described in paragraph
(1)Pass other end of rope thru bottom opening of hoist, between floating limit rod and motor, and attach rope to cast dead end anchor fitting. A slot is located at top of fitting to accept cable. Reinstall bolt and lockwasher in end of anchor fitting to lock rope compression fitting in place.
(2)Grasp loop, formed after installing end anchor, and place bottom block sheave in loop. Lower sheave into bottom block and insert sheave pin. Replace key plates and bolts holding sheave pin in place.
(3)Replace sheave guard. Make certain rope is not twisted. Should the two parts of rope tend to wind around each other, remove cable from anchor slot and untwist cable. Reattach the cable anchor.
(4)Lubricate cable per paragraph
12203A
Figure 5-12. Hoist Reeving — Two Part Single.
e.Reeving — 4 par t single. See Figure 5-14 for diagram. See Figure 9-13 for block parts.
With new rope installed on the drum as described in paragraph 5-9c single reeved above, proceed with rereeving following steps below:
(1)Grasp the cable near the middle (about 14'-0") of the unwound end and form a loop. Place upper sheave in this loop. Slide upper sheave with cable into sheave pocket.
(2)Insert sheave pin into sheave. Replace key plates and bolts to hold sheave pin in place.
Page 15