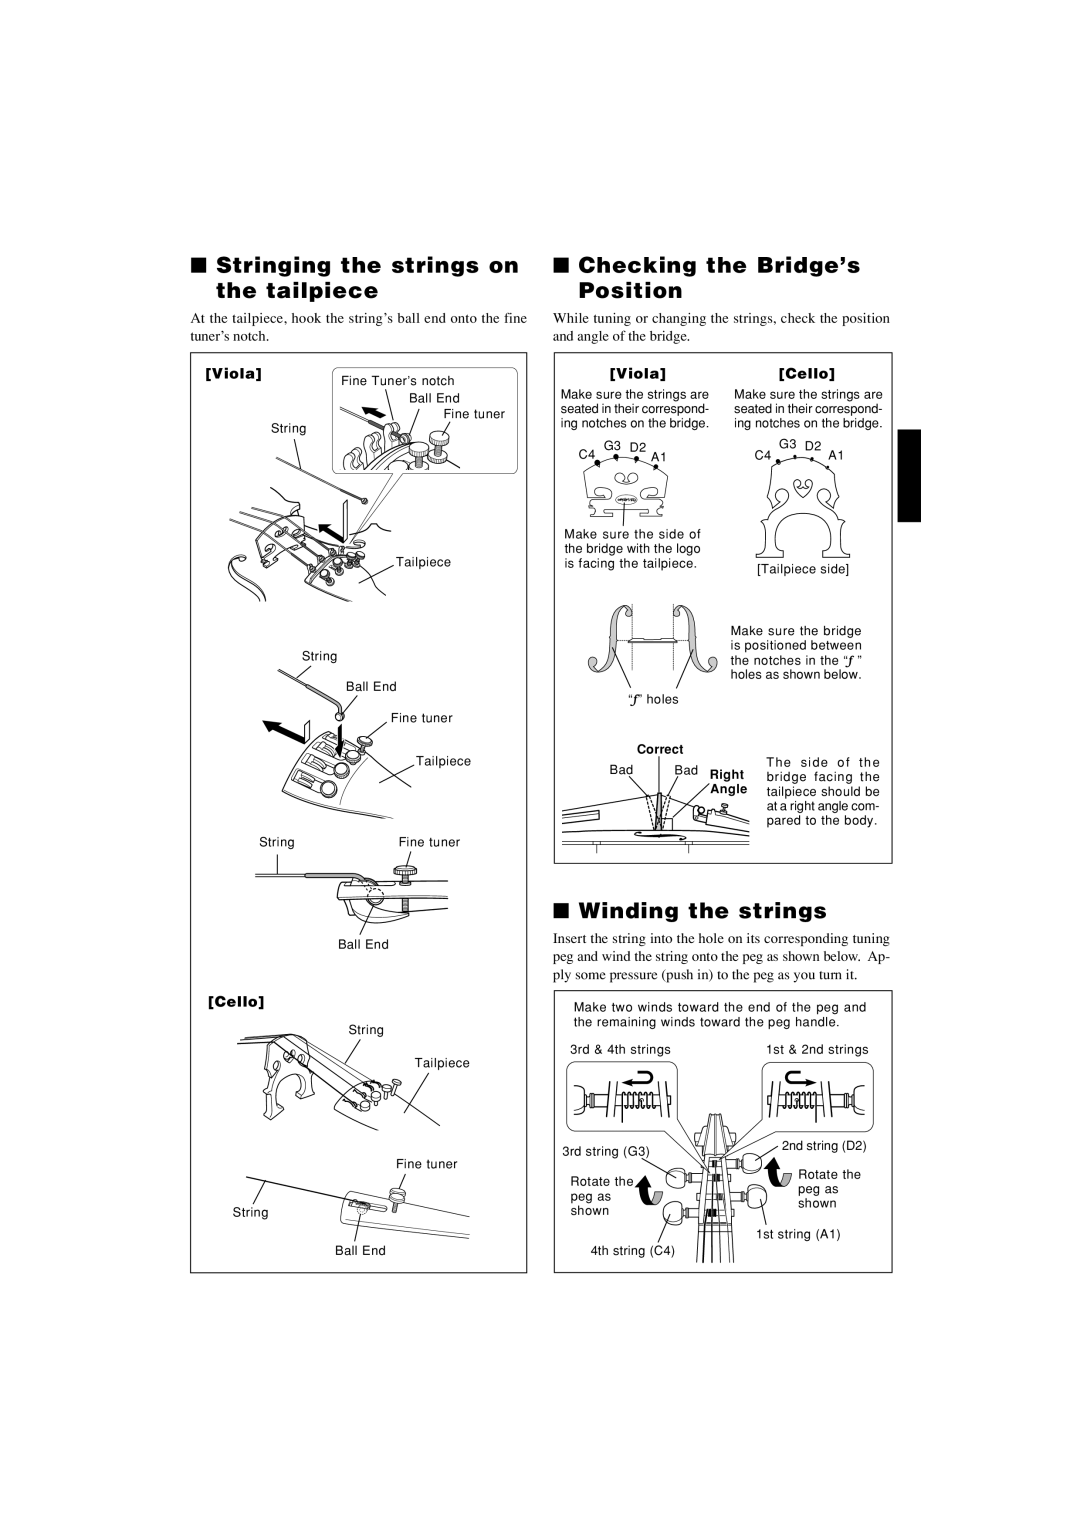
■Stringing the strings on
the tailpiece
At the tailpiece, hook the string’s ball end onto the fine tuner’s notch.
■Checking the Bridge’s
Position
While tuning or changing the strings, check the position and angle of the bridge.
[Viola] | Fine Tuner’s notch |
| |
| Ball End |
| Fine tuner |
| String |
| Tailpiece |
| String |
| Ball End |
[Viola]
Make sure the strings are seated in their correspond- ing notches on the bridge.
C4 G3 D2 A1
Make sure the side of the bridge with the logo is facing the tailpiece.
[Cello]
Make sure the strings are seated in their correspond- ing notches on the bridge.
G3 D2
C4 ![]() A1
A1
[Tailpiece side]
Make sure the bridge is positioned between the notches in the “f ” holes as shown below.
| Fine tuner |
| Tailpiece |
String | Fine tuner |
| Ball End |
[Cello] |
|
| String |
| Tailpiece |
“f” holes
Correct
Bad | Bad Right | The side of the |
bridge facing the | ||
| Angle | tailpiece should be |
|
| at a right angle com- |
|
| pared to the body. |
■Winding the strings
Insert the string into the hole on its corresponding tuning peg and wind the string onto the peg as shown below. Ap- ply some pressure (push in) to the peg as you turn it.
Make two winds toward the end of the peg and the remaining winds toward the peg handle.
3rd & 4th strings | 1st & 2nd strings |
Fine tuner |
String |
Ball End |
3rd string (G3)
Rotate the peg as shown
4th string (C4)
2nd string (D2)
Rotate the peg as shown
1st string (A1)