Manuals
/
Yard-Man
/
Lawn and Garden
/
Lawn Mower
Yard-Man
106D Assembling Your Lawn Mower, To Remove Unit From Carton, Tools Required, Wing Nut
Models:
106D
1
7
20
20
Download
20 pages
15.5 Kb
4
5
6
7
8
9
10
11
Install
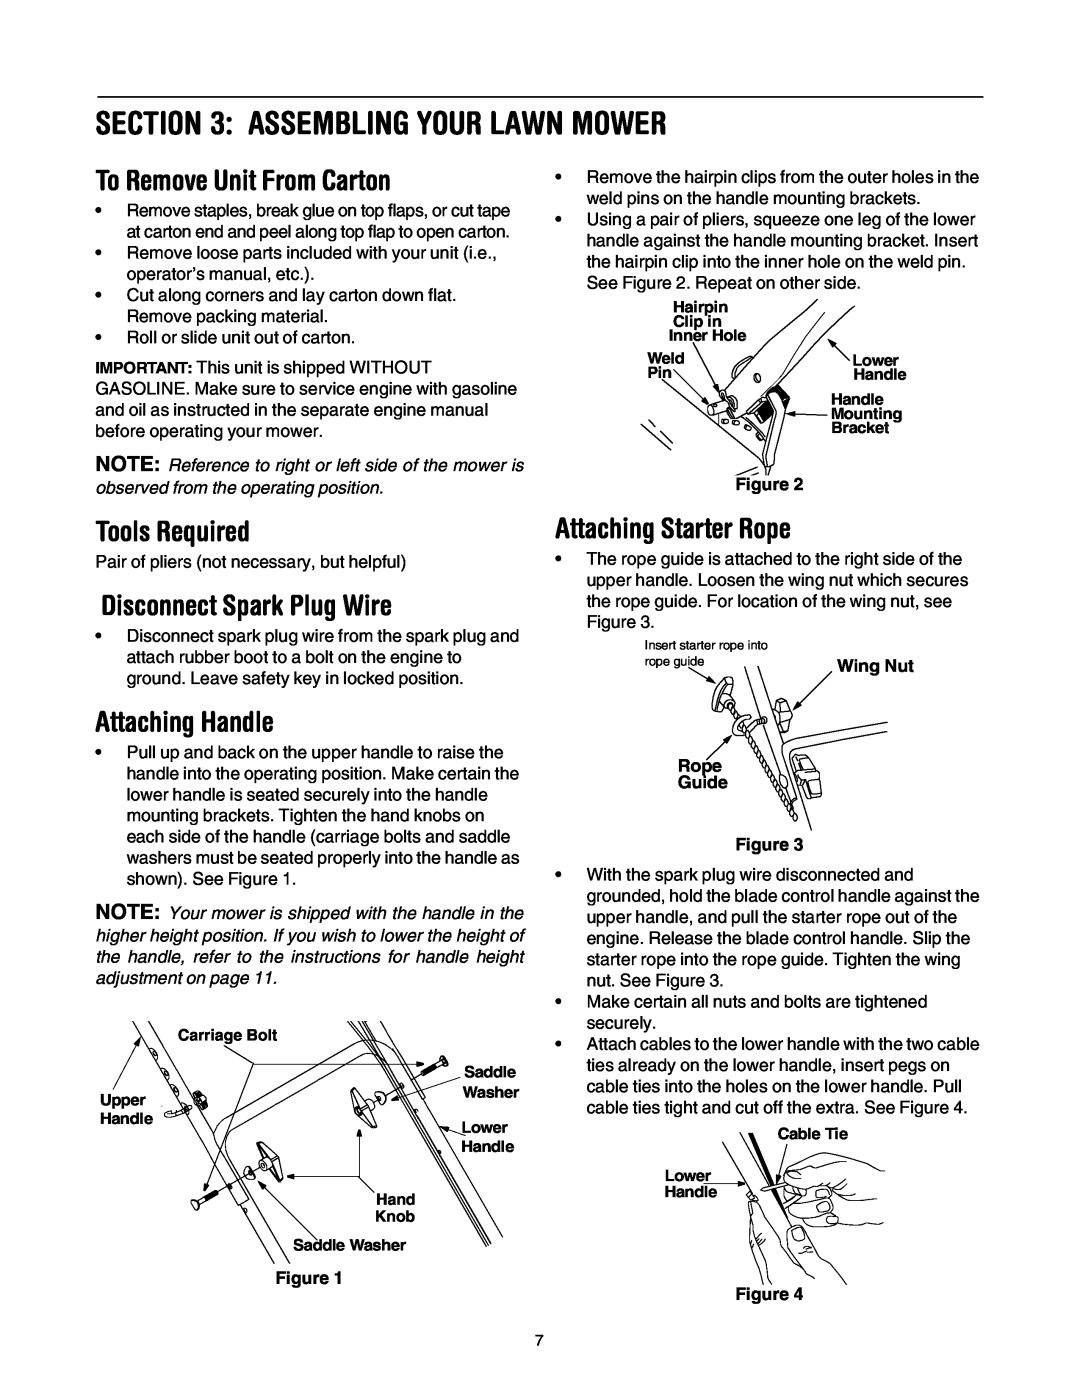
Disconnect Spark Plug Wire
Adjusting Cutting Height
Safety
Service
Using Your Rotary Mower
Page 7
Image 7
Page 6
Page 8
Page 7
Image 7
Page 6
Page 8
Contents
20 Self Starter Mulching Push Lawn Mower
MODEL 106D
MTD LLC, P.O. BOX 361131 CLEVELAND, OHIO
Operator’s Manual
ENGINE INFORMATION
TABLE OF CONTENTS
Content
FINDING MODEL NUMBER
General Operation
SECTION 1 IMPORTANT SAFE OPERATION PRACTICES
Children
Service
General Service
Slope Operation
WARNING STARTER
Your Responsibility
SECTION 2 SLOPE GAUGE
Tools Required
Disconnect Spark Plug Wire
SECTION 3 ASSEMBLING YOUR LAWN MOWER
To Remove Unit From Carton
Safety Key Mulching Plug Figure
Cutting Height Adjustment Lever
Safety Key
Cutting Height Adjustment Lever
Before Starting
Adjusting Cutting Height
SECTION 5 OPERATING YOUR LAWN MOWER
Gas and Oil Fill-Up
To Stop Engine And Blade
Using Your Rotary Mower
To De-EnergizeSelf Starter
Cutting Height
SECTION 6 MAKING ADJUSTMENTS
Handle Height
Carburetor
Cutting Blade
To Reinstall Blade
SECTION 7 MAINTAINING YOUR LAWN MOWER
Lubrication
Engine
Cutting Deck
SECTION 8 OFF-SEASONSTORAGE
Corrective Action
SECTION 9 TROUBLE SHOOTING GUIDE
Trouble
Possible Causes
Page
SECTION 10 PARTS LIST MODEL 106D
Ref. No
Model 106D
Description
Page
Page
MANUFACTURER’S LIMITED WARRANTY FOR
Top
Page
Image
Contents