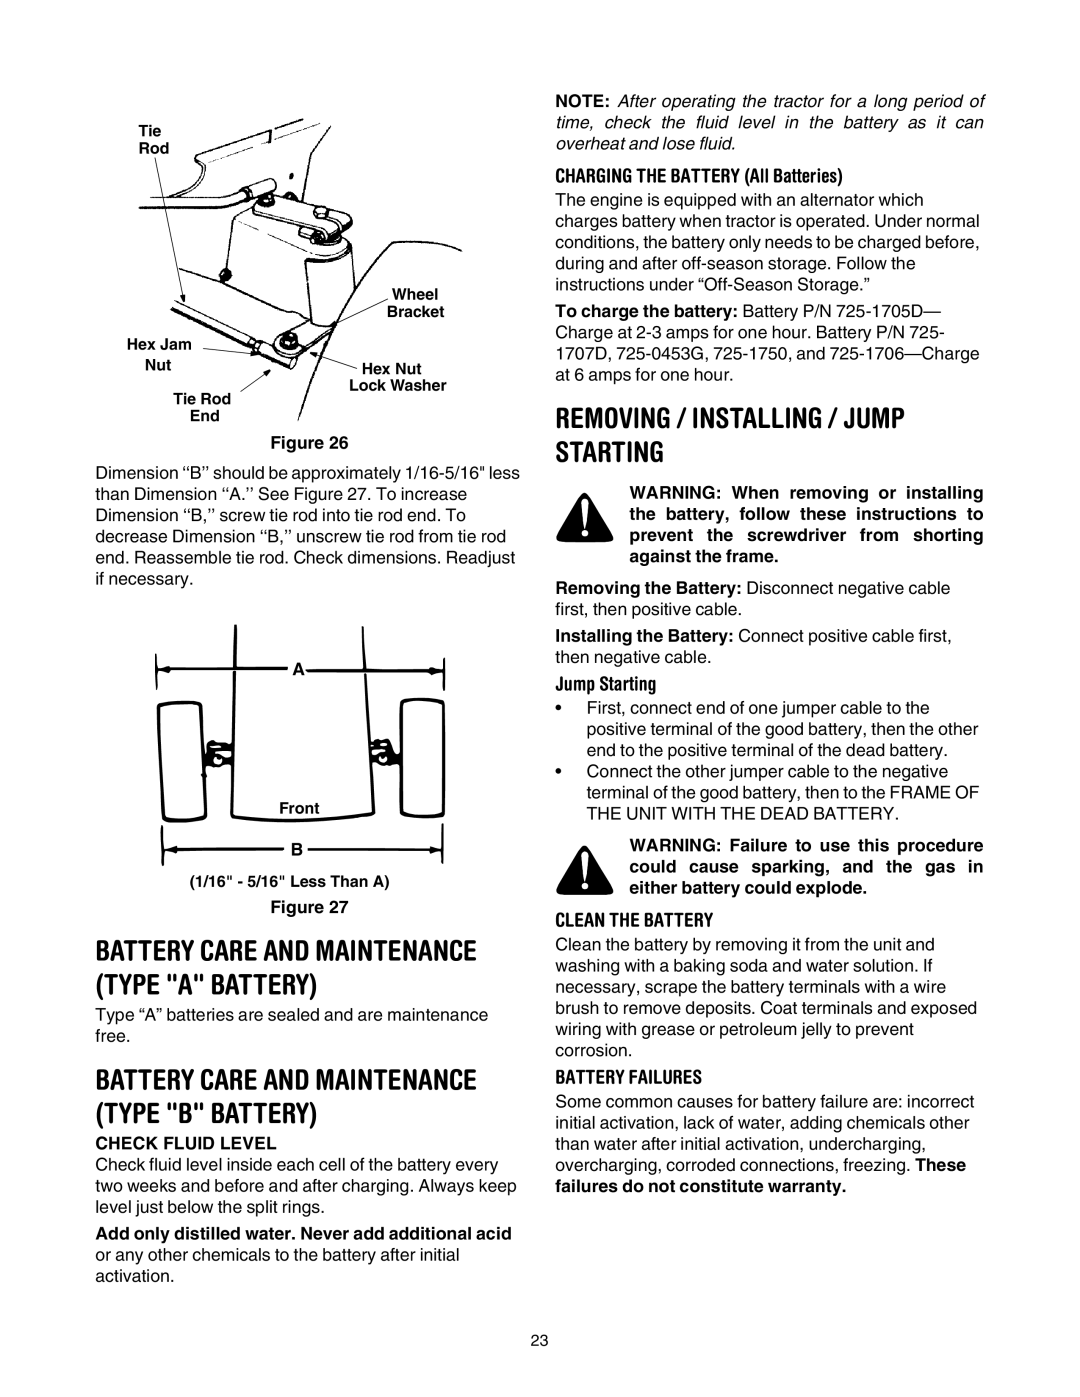
Tie
Rod
| Wheel |
| Bracket |
Hex Jam |
|
Nut | Hex Nut |
Tie Rod | Lock Washer |
| |
End |
|
Figure 26
Dimension ‘‘B’’ should be approximately
A
Front
![]() B
B ![]()
(1/16" - 5/16" Less Than A)
Figure 27
BATTERY CARE AND MAINTENANCE (TYPE "A" BATTERY)
Type “A” batteries are sealed and are maintenance free.
BATTERY CARE AND MAINTENANCE (TYPE "B" BATTERY)
CHECK FLUID LEVEL
Check fluid level inside each cell of the battery every two weeks and before and after charging. Always keep level just below the split rings.
Add only distilled water. Never add additional acid or any other chemicals to the battery after initial activation.
NOTE: After operating the tractor for a long period of time, check the fluid level in the battery as it can overheat and lose fluid.
CHARGING THE BATTERY (All Batteries)
The engine is equipped with an alternator which charges battery when tractor is operated. Under normal conditions, the battery only needs to be charged before, during and after
To charge the battery: Battery P/N
REMOVING / INSTALLING / JUMP STARTING
WARNING: When removing or installing the battery, follow these instructions to prevent the screwdriver from shorting against the frame.
Removing the Battery: Disconnect negative cable first, then positive cable.
Installing the Battery: Connect positive cable first, then negative cable.
Jump Starting
•First, connect end of one jumper cable to the positive terminal of the good battery, then the other end to the positive terminal of the dead battery.
•Connect the other jumper cable to the negative terminal of the good battery, then to the FRAME OF THE UNIT WITH THE DEAD BATTERY.
WARNING: Failure to use this procedure could cause sparking, and the gas in either battery could explode.
CLEAN THE BATTERY
Clean the battery by removing it from the unit and washing with a baking soda and water solution. If necessary, scrape the battery terminals with a wire brush to remove deposits. Coat terminals and exposed wiring with grease or petroleum jelly to prevent corrosion.
BATTERY FAILURES
Some common causes for battery failure are: incorrect initial activation, lack of water, adding chemicals other than water after initial activation, undercharging, overcharging, corroded connections, freezing. These failures do not constitute warranty.
23