Use
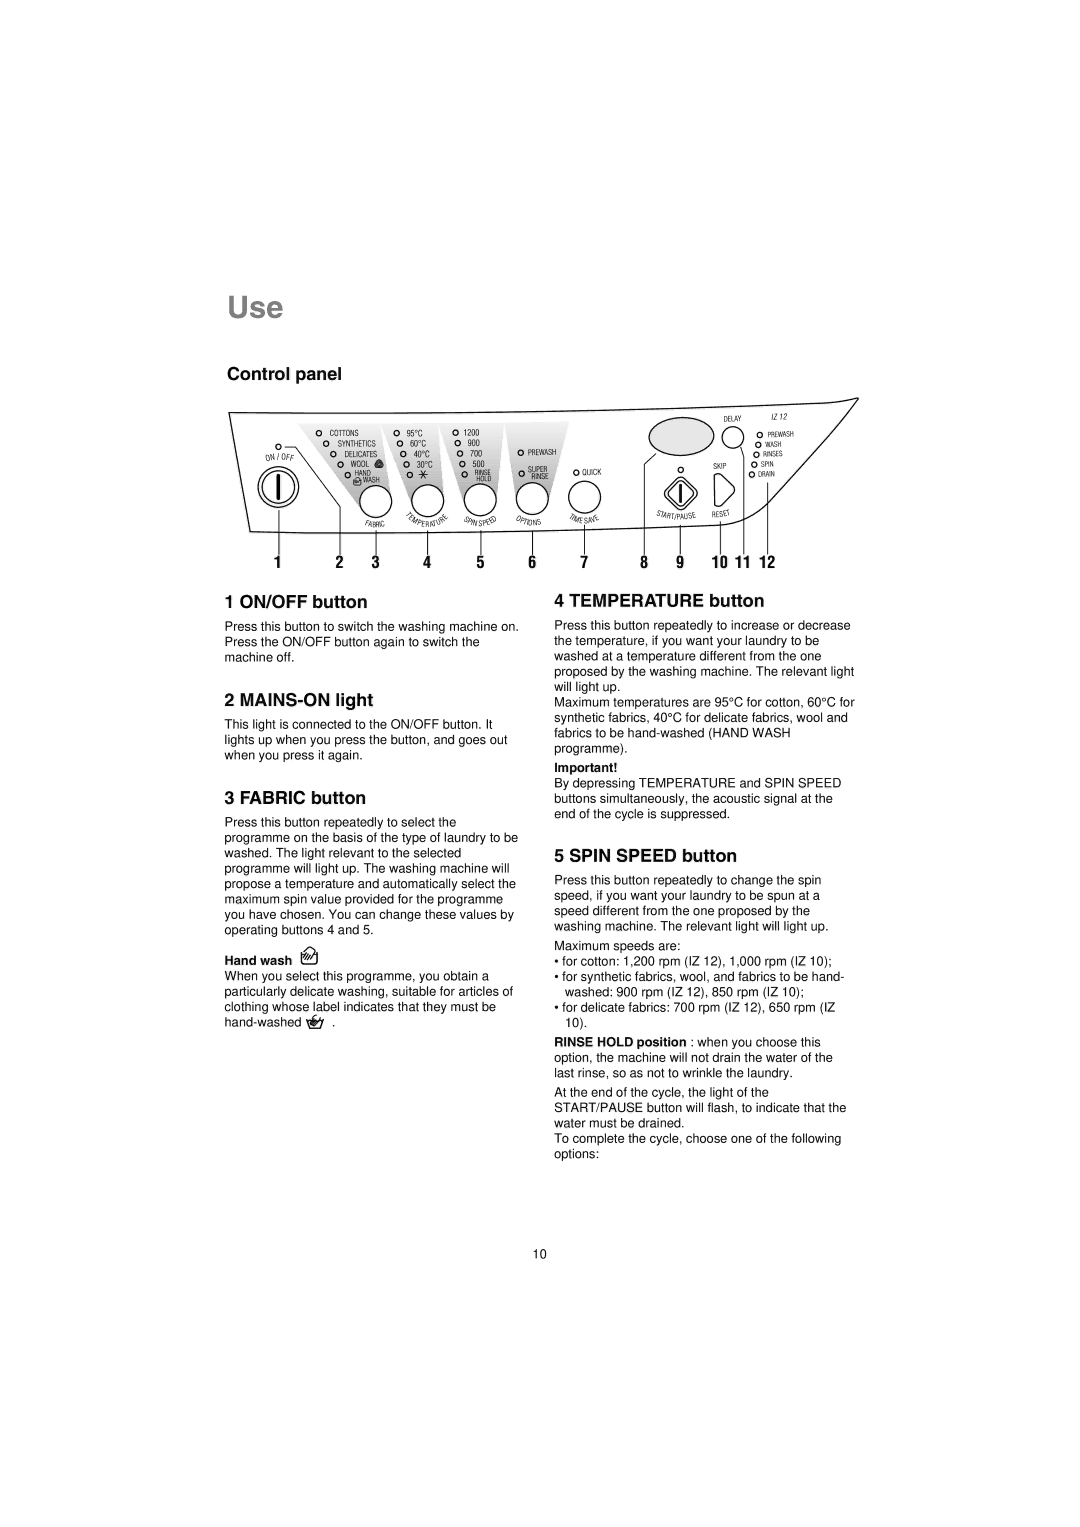
Control panel
1 ON/OFF button
Press this button to switch the washing machine on. Press the ON/OFF button again to switch the machine off.
2 MAINS-ON light
This light is connected to the ON/OFF button. It lights up when you press the button, and goes out when you press it again.
3 FABRIC button
Press this button repeatedly to select the programme on the basis of the type of laundry to be washed. The light relevant to the selected programme will light up. The washing machine will propose a temperature and automatically select the maximum spin value provided for the programme you have chosen. You can change these values by operating buttons 4 and 5.
Hand wash
When you select this programme, you obtain a particularly delicate washing, suitable for articles of clothing whose label indicates that they must be
![]() .
.
4 TEMPERATURE button
Press this button repeatedly to increase or decrease the temperature, if you want your laundry to be washed at a temperature different from the one proposed by the washing machine. The relevant light will light up.
Maximum temperatures are 95°C for cotton, 60°C for synthetic fabrics, 40°C for delicate fabrics, wool and fabrics to be
Important!
By depressing TEMPERATURE and SPIN SPEED buttons simultaneously, the acoustic signal at the end of the cycle is suppressed.
5 SPIN SPEED button
Press this button repeatedly to change the spin speed, if you want your laundry to be spun at a speed different from the one proposed by the washing machine. The relevant light will light up.
Maximum speeds are:
•for cotton: 1,200 rpm (IZ 12), 1,000 rpm (IZ 10);
•for synthetic fabrics, wool, and fabrics to be hand- washed: 900 rpm (IZ 12), 850 rpm (IZ 10);
•for delicate fabrics: 700 rpm (IZ 12), 650 rpm (IZ 10).
RINSE HOLD position : when you choose this option, the machine will not drain the water of the last rinse, so as not to wrinkle the laundry.
At the end of the cycle, the light of the START/PAUSE button will flash, to indicate that the water must be drained.
To complete the cycle, choose one of the following options:
10
