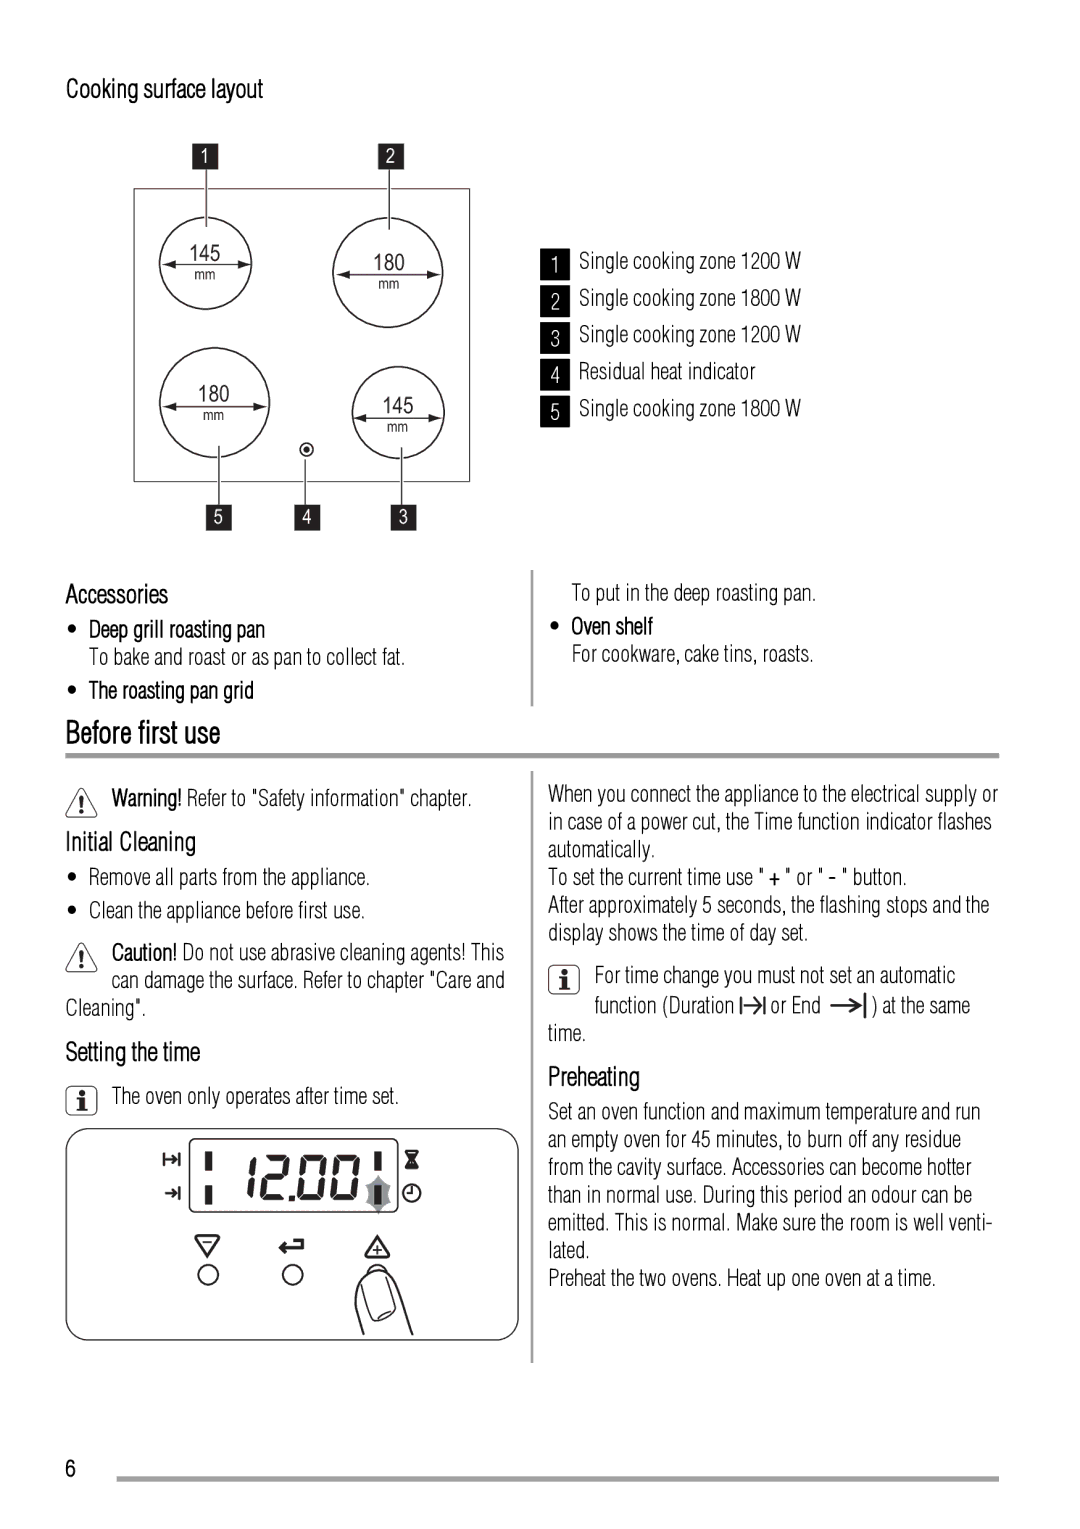
Cooking surface layout
12
145 |
|
|
|
|
|
|
| 180 |
|
|
|
| Single cooking zone 1200 W | ||||
|
|
|
|
|
|
|
|
|
| 1 | |||||||
mm |
|
|
|
|
|
|
|
|
| ||||||||
|
|
|
|
|
|
|
|
|
| mm |
|
|
| Single cooking zone 1800 W | |||
|
|
|
|
|
|
|
|
|
|
|
| 2 | |||||
|
|
|
|
|
|
|
|
|
|
|
|
|
|
|
| ||
|
|
|
|
|
|
|
|
|
|
|
|
|
|
|
| Single cooking zone 1200 W | |
|
|
|
|
|
|
|
|
|
|
|
|
|
|
|
| 3 | |
|
|
|
|
|
|
|
|
|
|
|
|
|
|
|
| Residual heat indicator | |
180 |
|
|
|
|
|
|
| 145 |
|
|
| 4 | |||||
|
|
|
|
|
|
|
|
|
|
| Single cooking zone 1800 W | ||||||
|
|
|
|
|
|
|
|
|
| 5 | |||||||
mm |
|
|
|
|
|
|
|
|
| ||||||||
|
|
|
|
|
|
|
|
|
| mm |
|
|
| ||||
|
|
|
|
|
|
|
|
|
|
|
|
|
|
|
| ||
|
|
|
|
|
|
|
|
|
|
|
|
|
|
|
|
|
|
|
|
|
|
|
|
|
|
|
|
|
|
|
|
|
|
|
|
| 5 |
|
| 4 |
|
|
| 3 |
|
|
|
|
| ||||
Accessories
•Deep grill roasting pan
To bake and roast or as pan to collect fat.
•The roasting pan grid
Before first use
To put in the deep roasting pan.
•Oven shelf
For cookware, cake tins, roasts.
Warning! Refer to "Safety information" chapter.
Initial Cleaning
•Remove all parts from the appliance.
•Clean the appliance before first use.
Caution! Do not use abrasive cleaning agents! This
When you connect the appliance to the electrical supply or in case of a power cut, the Time function indicator flashes automatically.
To set the current time use " + " or " - " button.
After approximately 5 seconds, the flashing stops and the display shows the time of day set.
![]() can damage the surface. Refer to chapter "Care and Cleaning".
can damage the surface. Refer to chapter "Care and Cleaning".
Setting the time
time.
For time change you must not set an automatic
function (Duration ![]()
![]()
![]() or End
or End ![]()
![]() ) at the same
) at the same
The oven only operates after time set.
Preheating
Set an oven function and maximum temperature and run an empty oven for 45 minutes, to burn off any residue from the cavity surface. Accessories can become hotter than in normal use. During this period an odour can be emitted. This is normal. Make sure the room is well venti- lated.
Preheat the two ovens. Heat up one oven at a time.
6