Important! Failure to ensure the correct assembly will cause leakage of gas.

Important! Make sure that the gas supply pressure of the appliance obeys the recommended values.

Rigid connection:

Carry out connection by using metal rigid pipes (copper with mechanical end).

Injectors replacement

1.Remove the pan supports.

2.Remove the caps and crowns of the burner.

3.With a socket spanner 7 remove the injectors and re- place them with the ones which are necessary for the type of gas you use (see table in Technical Data sec- tion).

4.Assemble the parts, follow the same procedure back- wards.

5.Replace the rating label (it is near the gas supply pipe) with the one for the new type of gas supply. You can find this label in the package of the injectors sup-

plied with the appliance.

If the supply gas pressure is changeable or different from the necessary pressure, you must fit an applicable pres- sure adjuster on the gas supply pipe.

Adjustment of minimum level

To adjust the minimum level of the burners:

1.Light the burner.

2.Turn the knob on the minimum position.

3.Remove the control knob.

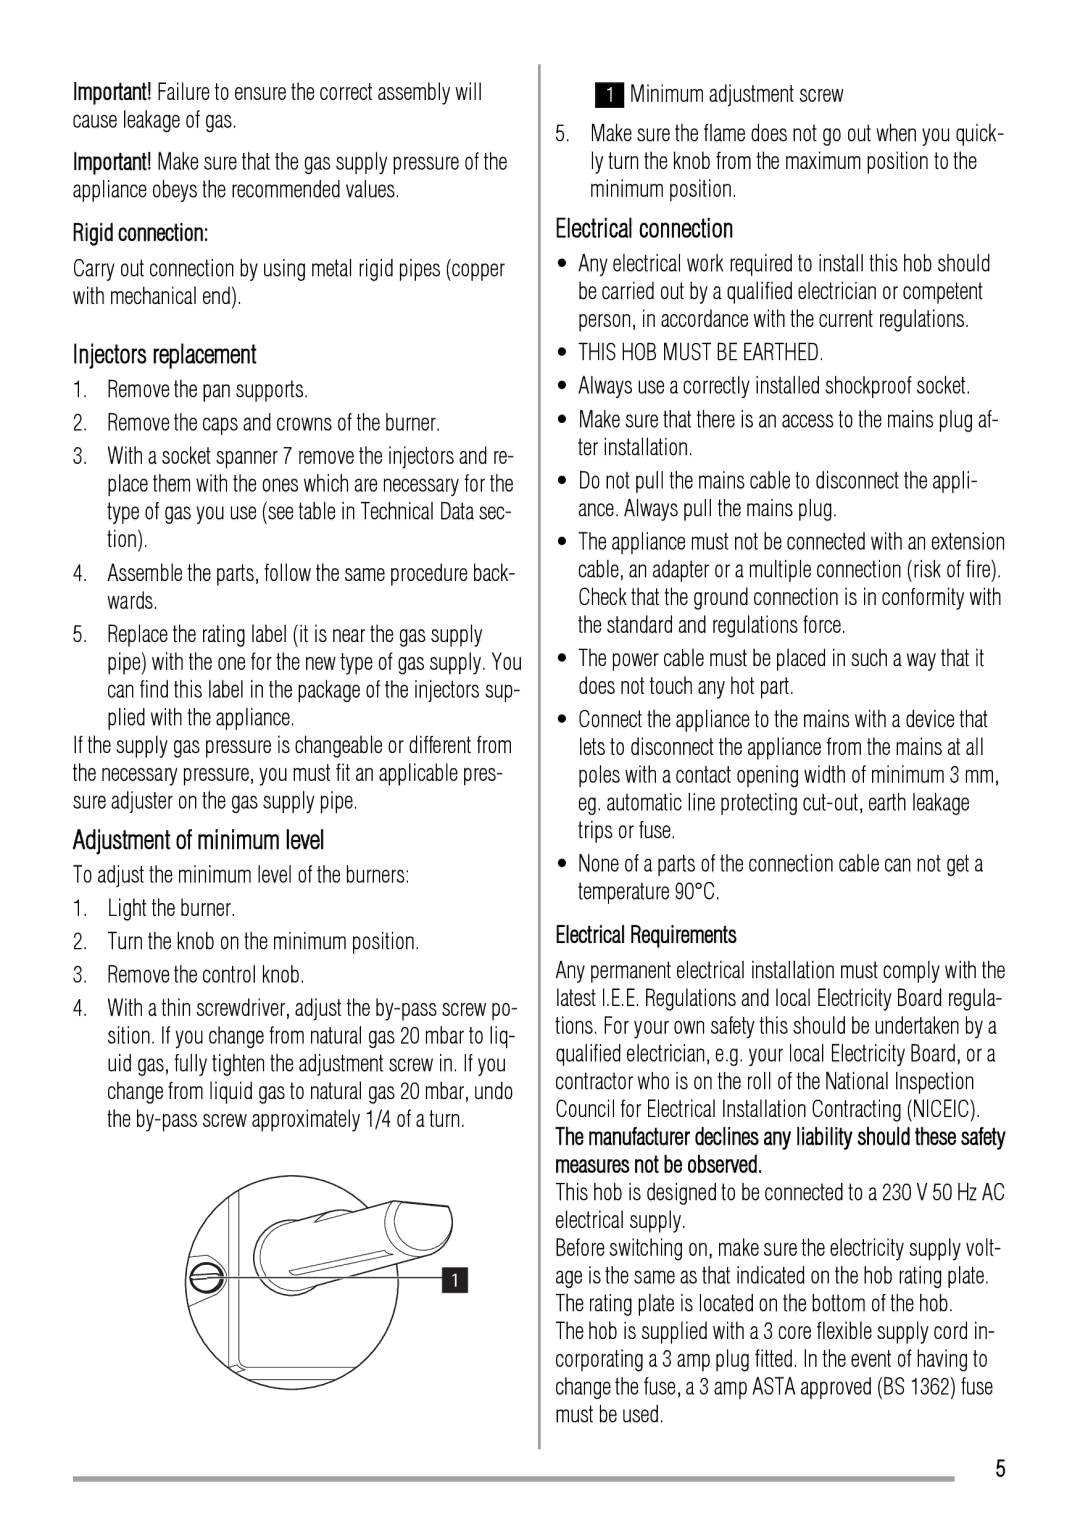
4.With a thin screwdriver, adjust the by-pass screw po- sition. If you change from natural gas 20 mbar to liq- uid gas, fully tighten the adjustment screw in. If you change from liquid gas to natural gas 20 mbar, undo the by-pass screw approximately 1/4 of a turn.

1

1Minimum adjustment screw

5.Make sure the flame does not go out when you quick- ly turn the knob from the maximum position to the minimum position.

Electrical connection

Any electrical work required to install this hob should be carried out by a qualified electrician or competent person, in accordance with the current regulations.

THIS HOB MUST BE EARTHED.

Always use a correctly installed shockproof socket.

Make sure that there is an access to the mains plug af- ter installation.

Do not pull the mains cable to disconnect the appli- ance. Always pull the mains plug.

The appliance must not be connected with an extension cable, an adapter or a multiple connection (risk of fire). Check that the ground connection is in conformity with the standard and regulations force.

The power cable must be placed in such a way that it does not touch any hot part.

Connect the appliance to the mains with a device that lets to disconnect the appliance from the mains at all poles with a contact opening width of minimum 3 mm, eg. automatic line protecting cut-out, earth leakage trips or fuse.

None of a parts of the connection cable can not get a temperature 90°C.

Electrical Requirements

Any permanent electrical installation must comply with the latest I.E.E. Regulations and local Electricity Board regula- tions. For your own safety this should be undertaken by a qualified electrician, e.g. your local Electricity Board, or a contractor who is on the roll of the National Inspection Council for Electrical Installation Contracting (NICEIC).

The manufacturer declines any liability should these safety measures not be observed.

This hob is designed to be connected to a 230 V 50 Hz AC electrical supply.

Before switching on, make sure the electricity supply volt- age is the same as that indicated on the hob rating plate. The rating plate is located on the bottom of the hob.

The hob is supplied with a 3 core flexible supply cord in- corporating a 3 amp plug fitted. In the event of having to change the fuse, a 3 amp ASTA approved (BS 1362) fuse must be used.

5

Page 5
Image 5
Zanussi ZGL62IT user manual Injectors replacement, Adjustment of minimum level, Electrical connection

ZGL62IT specifications

The Zanussi ZGL62IT is a versatile and efficient gas hob that brings contemporary design and high performance to your kitchen. With its sleek, stainless steel finish and sophisticated features, this appliance is not just functional; it also enhances the aesthetic appeal of any modern cooking space.

One of the standout features of the Zanussi ZGL62IT is its powerful burners. This hob is equipped with four gas burners of varying sizes, providing the flexibility needed to prepare multiple dishes simultaneously. The high-efficiency burner delivers rapid heat for boiling and frying, while the simmer burner allows for low-temperature cooking, making it perfect for sauces or delicate dishes. Each burner is designed to distribute heat evenly, ensuring consistent cooking results.

An essential technology in the Zanussi ZGL62IT is its automatic ignition system. This feature allows users to ignite burners easily with a simple push of a knob, eliminating the need for matches or lighters, and improving safety and convenience in the kitchen. The control knobs are located at the front, making them easily accessible while cooking, and they provide precise temperature control for each burner.

Safety is a top priority in the design of the Zanussi ZGL62IT. The hob is equipped with a flame failure device that automatically cuts the gas supply if the flame goes out, providing peace of mind while cooking. This safety feature combined with the robust construction ensures that the hob is not only reliable but also safe for everyday use.

Cleaning and maintenance are made easy with the Zanussi ZGL62IT. The removable cast iron pan supports provide stability for pots and pans while being easy to clean. The stainless steel surface is designed to resist stains and corrosion, allowing it to maintain its attractive appearance even with everyday use.

In terms of dimensions, the Zanussi ZGL62IT fits seamlessly into most kitchen layouts, making it an ideal choice for both small and large kitchens. Its modern design complements various kitchen styles, from contemporary to traditional.

Overall, the Zanussi ZGL62IT combines efficiency, safety, and style, making it a valuable addition to any home. With its robust features, ease of use, and sleek design, this gas hob is an excellent choice for anyone looking to enhance their cooking experience. Whether you are a novice cook or an experienced chef, the Zanussi ZGL62IT can cater to your culinary needs with finesse and reliability.