3.Connecting a computer to the projector
The procedure for connecting a computer to the projector is the same for all types of computers.
1.Make sure the computer, monitor and projector are switched off.
2.Identify the RGB out connector on the back of your computer (where you connect a monitor to the computer).
3.Connect the RGB output from the computer using a 15 pin VGA type cable (not includ- ed) to the connector on the projector labeled “monitor in”.You can optionally use the gold BNC connectors to connect to your computer.
4.Turn on the projector and then the com- puter. The computer image should now be projected from the projector. If the com- puter’s image is not displayed simulta- neously on the monitor, see the attached section “what to do if”.
4.Connecting a video source to the projector
The procedure for connecting a video source to the projec- tor is the same for
SECAM, PAL N and PAL M modes are manually selected by pressing the “Green Button“. If the right format is not found the first time, press again. The video format is stored separately for each connector.
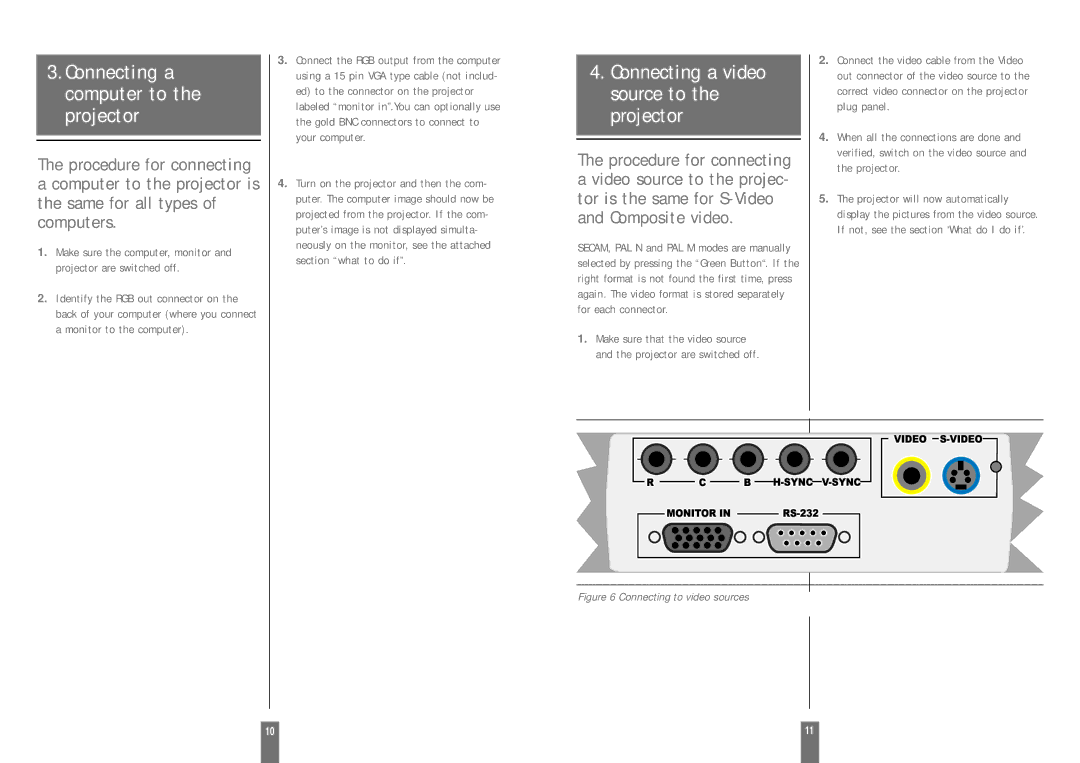
1.Make sure that the video source and the projector are switched off.
2.Connect the video cable from the Video out connector of the video source to the correct video connector on the projector plug panel.
4.When all the connections are done and verified, switch on the video source and the projector.
5.The projector will now automatically display the pictures from the video source. If not, see the section ‘What do I do if’.
 R
R MONI
MONI

 TOCRIN
 B
B H
H -RSSYNC-23
 2V
2V -SYNC
-SYNC


MONIFigure 6 Connecting to video sources
10 |
| 11 |
|
|
|