English
6. Set up
SE1
SE2
(1)
SE3
SE4
SE5
■HT2200
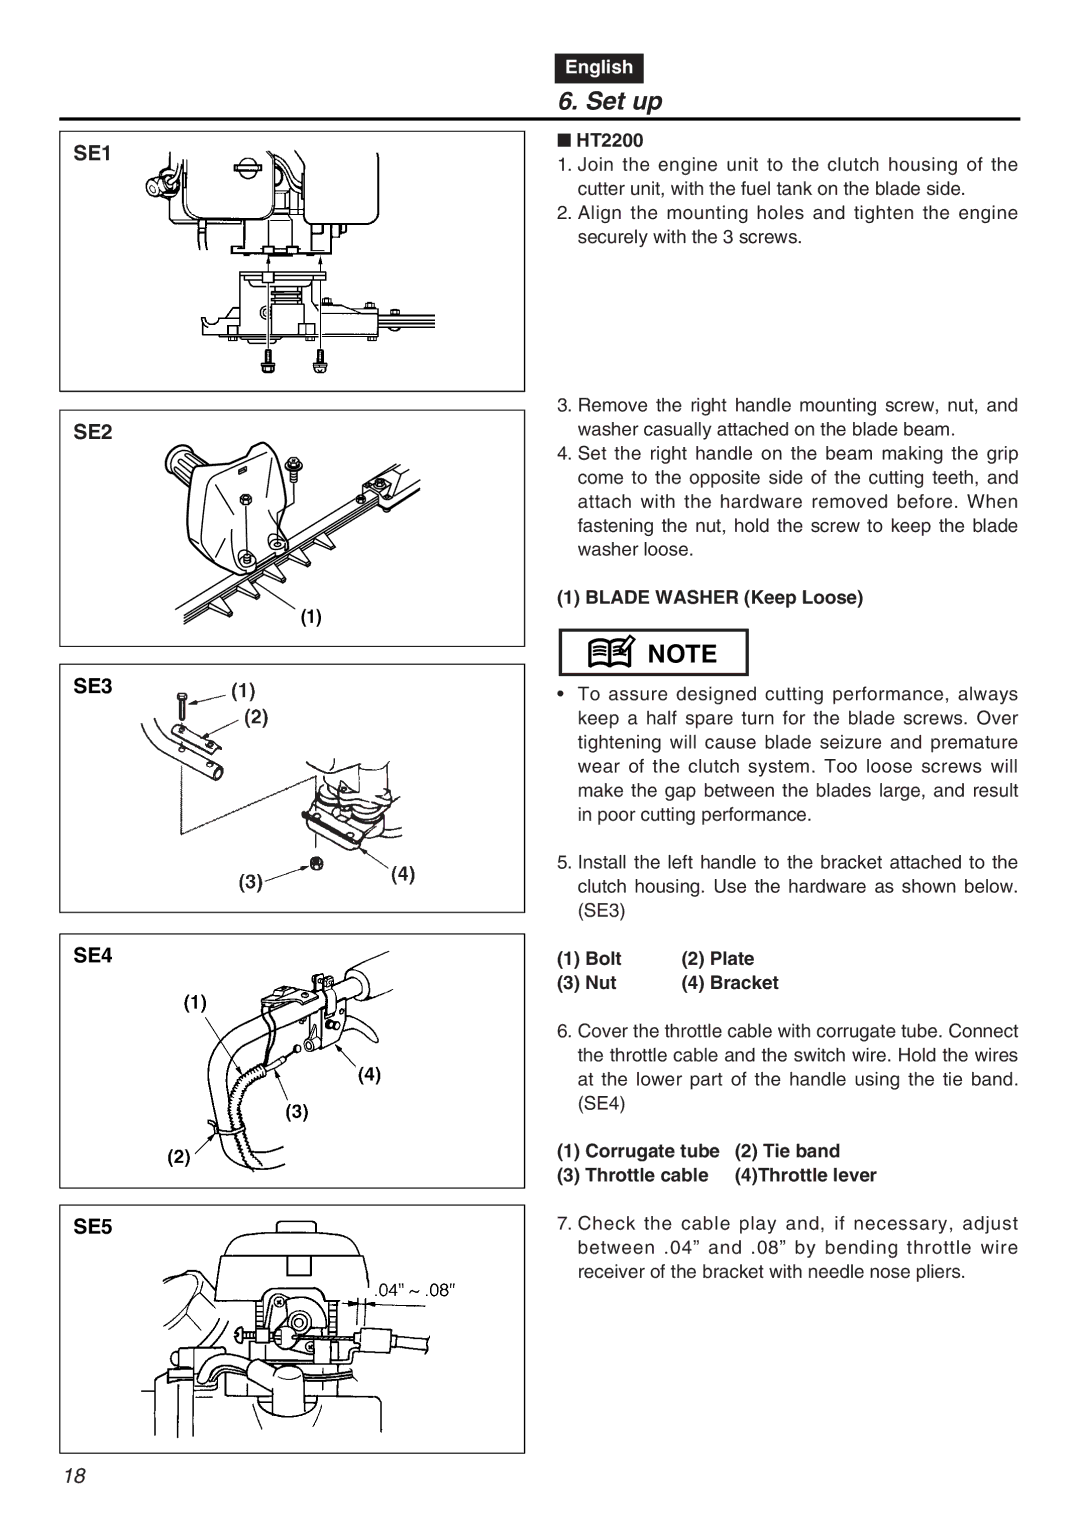
1.Join the engine unit to the clutch housing of the cutter unit, with the fuel tank on the blade side.
2.Align the mounting holes and tighten the engine securely with the 3 screws.
3.Remove the right handle mounting screw, nut, and washer casually attached on the blade beam.
4.Set the right handle on the beam making the grip come to the opposite side of the cutting teeth, and attach with the hardware removed before. When fastening the nut, hold the screw to keep the blade washer loose.
(1) BLADE WASHER (Keep Loose)
![]() NOTE
NOTE
•To assure designed cutting performance, always keep a half spare turn for the blade screws. Over tightening will cause blade seizure and premature wear of the clutch system. Too loose screws will make the gap between the blades large, and result in poor cutting performance.
5.Install the left handle to the bracket attached to the clutch housing. Use the hardware as shown below. (SE3)
(1) | Bolt | (2) | Plate |
(3) | Nut | (4) | Bracket |
6.Cover the throttle cable with corrugate tube. Connect the throttle cable and the switch wire. Hold the wires at the lower part of the handle using the tie band. (SE4)
(1) Corrugate tube (2) Tie band
(3) Throttle cable (4)Throttle lever
7.Check the cable play and, if necessary, adjust between .04” and .08” by bending throttle wire receiver of the bracket with needle nose pliers.
18
