– Mounting the Range Hood
|
|
| www.zephyronline.com | |
! CAUTION: At least two installers are |
|
|
| |
required due to the weight and size of the |
| C/L |
| |
hood. |
|
| ||
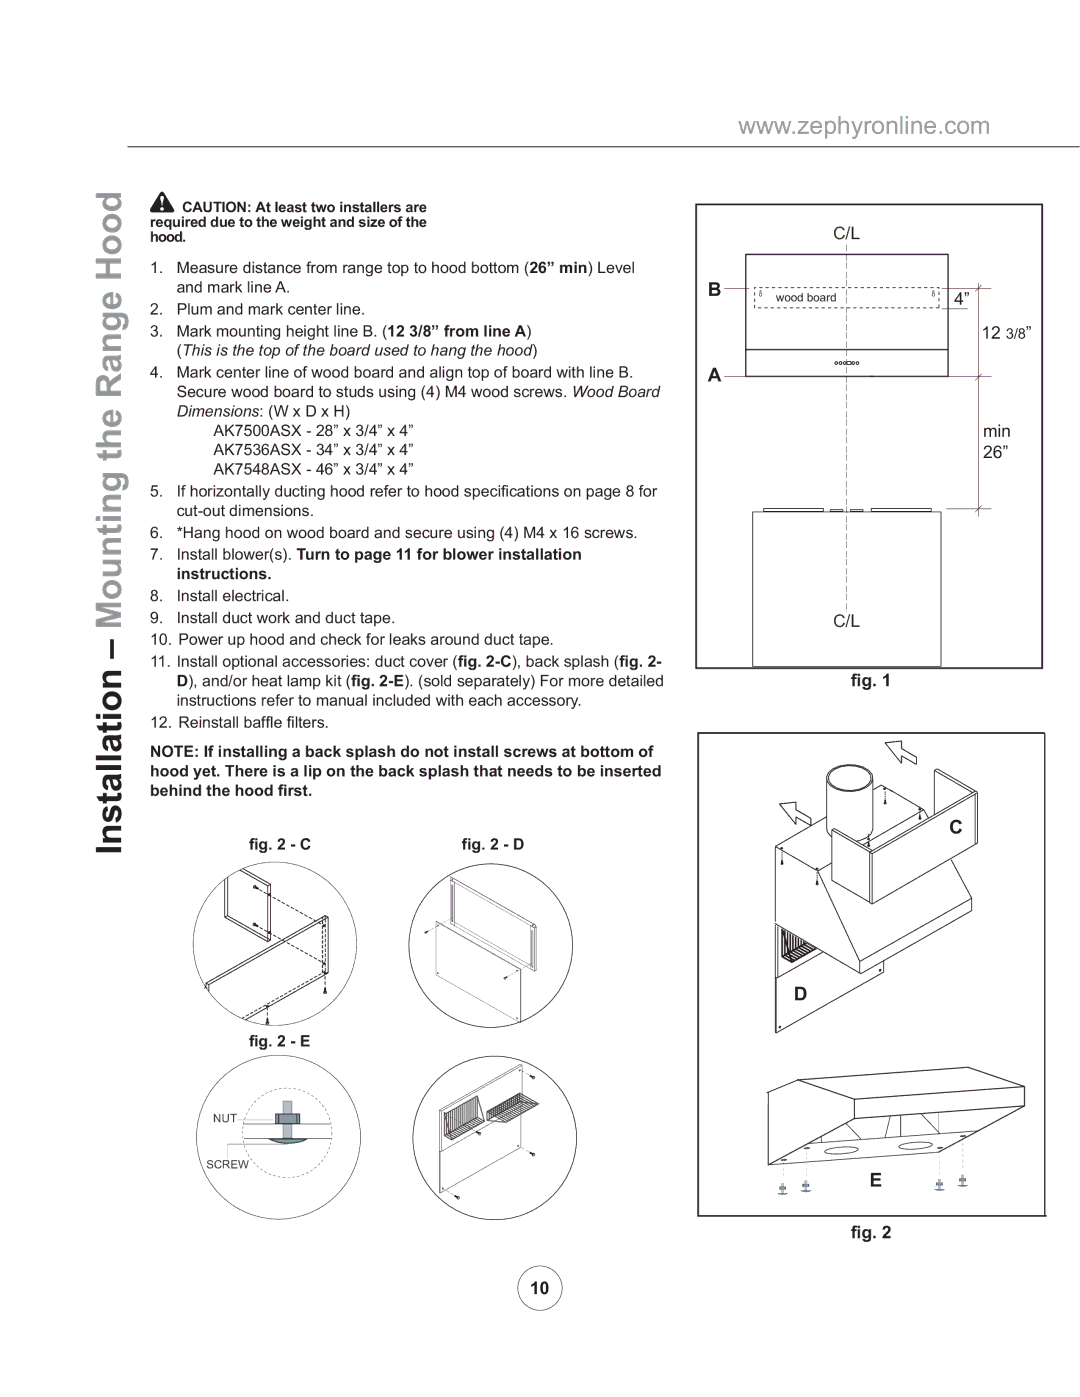
1. | Measure distance from range top to hood bottom (26” min) Level | B |
|
|
| and mark line A. | wood board | 4” | |
2. | Plum and mark center line. |
| ||
|
|
| ||
3. | Mark mounting height line B. (12 3/8” from line A) |
|
| 12 3/8” |
| (This is the top of the board used to hang the hood) |
|
|
|
4. | Mark center line of wood board and align top of board with line B. | A |
|
|
| Secure wood board to studs using (4) M4 wood screws. Wood Board |
|
|
|
| Dimensions: (W x D x H) |
|
| min |
| AK7500ASX - 28” x 3/4” x 4” |
|
| |
| AK7536ASX - 34” x 3/4” x 4” |
|
| 26” |
| AK7548ASX - 46” x 3/4” x 4” |
|
|
|
5. | If horizontally ducting hood refer to hood specifi cations on page 8 for |
|
|
|
|
|
|
| |
6. | *Hang hood on wood board and secure using (4) M4 x 16 screws. |
|
|
|
7. | Install blower(s). Turn to page 11 for blower installation |
|
|
|
| instructions. |
|
|
|
8. | Install electrical. |
|
|
|
9. | Install duct work and duct tape. |
| C/L |
|
10. Power up hood and check for leaks around duct tape. |
|
|
| |
11. | Install optional accessories: duct cover (fig. |
|
|
|
D), and/or heat lamp kit (fig. | fig. 1 |
instructions refer to manual included with each accessory. |
|
12. Reinstall baffl e fi lters.
Installation
NOTE: If installing a back splash do not install screws at bottom of hood yet. There is a lip on the back splash that needs to be inserted behind the hood first.
fig. 2 - C | fig. 2 - D |
fig. 2 - E
NUT
SCREW
C
D
E |
fig. 2
10
