Ceiling
CL
Mounting
Holes
![]()
![]() Marking for Coupler
Marking for Coupler
![]() Narrow End
Narrow End
CL
Tabs
Add Blockings
![]() Tabs
Tabs
Ceiling Bracket
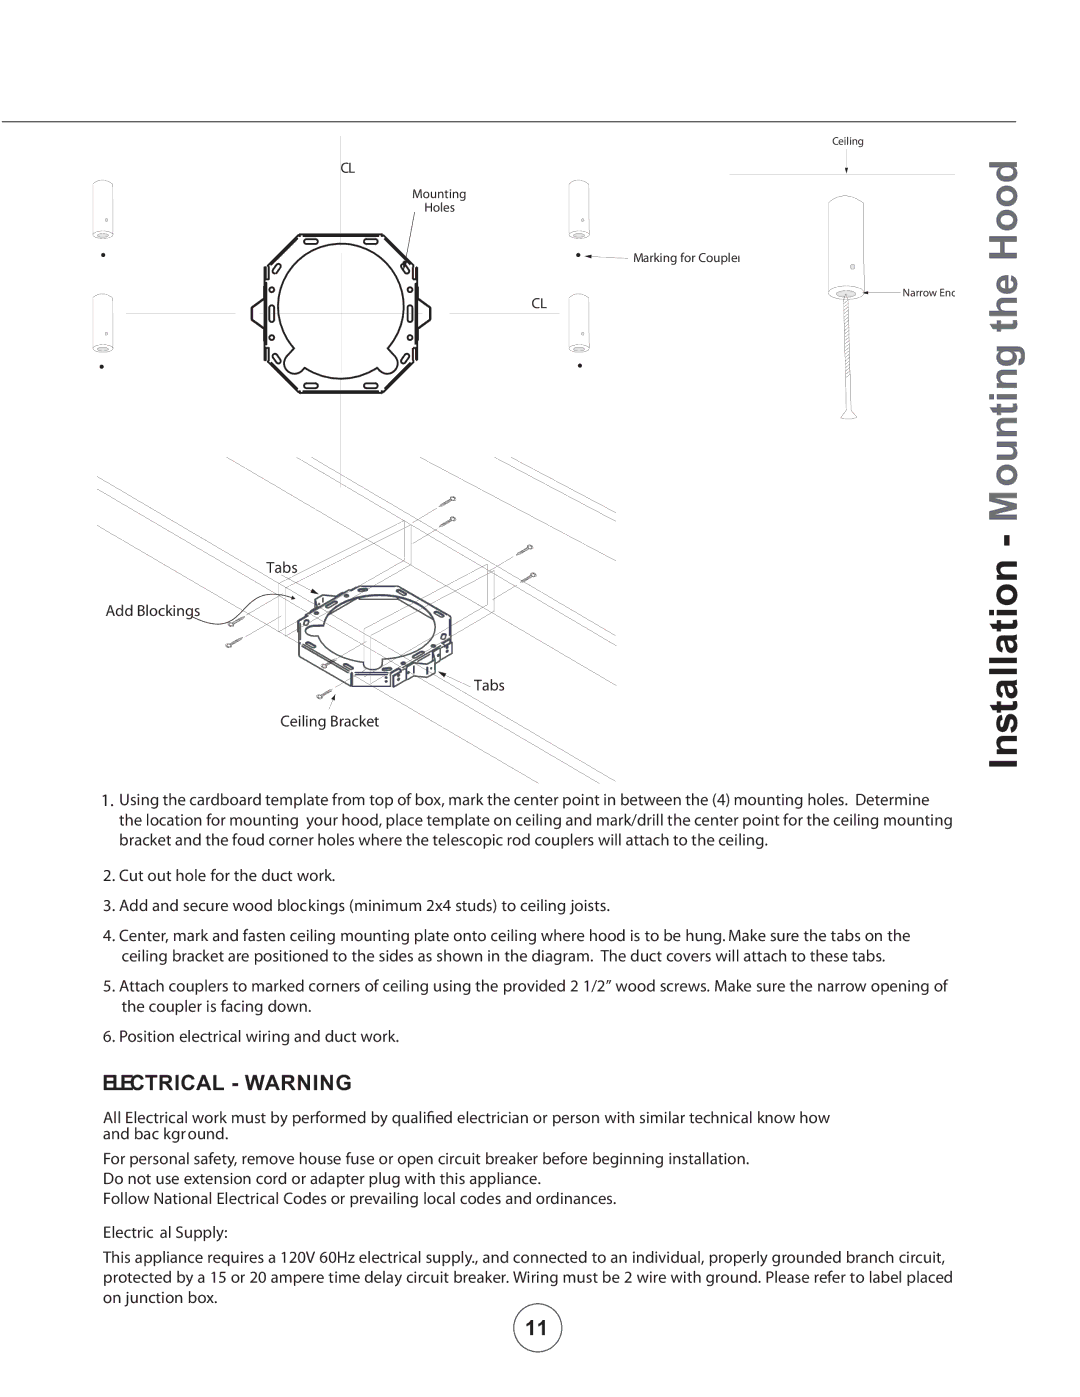
1.Using the cardboard template from top of box, mark the center point in between the (4) mounting holes. Determine the location for mounting your hood, place template on ceiling and mark/drill the center point for the ceiling mounting bracket and the foud corner holes where the telescopic rod couplers will attach to the ceiling.
2.Cut out hole for the duct work.
3.Add and secure wood blockings (minimum 2x4 studs) to ceiling joists.
4.Center, mark and fasten ceiling mounting plate onto ceiling where hood is to be hung. Make sure the tabs on the ceiling bracket are positioned to the sides as shown in the diagram. The duct covers will attach to these tabs.
5.Attach couplers to marked corners of ceiling using the provided 2 1/2” wood screws. Make sure the narrow opening of the coupler is facing down.
6.Position electrical wiring and duct work.
ELECTRICAL - WARNING
All Electrical work must by performed by qualified electrician or person with similar technical know how and bac kgr ound.
For personal safety, remove house fuse or open circuit breaker before beginning installation. Do not use extension cord or adapter plug with this appliance.
Follow National Electrical Codes or prevailing local codes and ordinances.
Electric al Supply:
This appliance requires a 120V 60Hz electrical supply., and connected to an individual, properly grounded branch circuit, protected by a 15 or 20 ampere time delay circuit breaker. Wiring must be 2 wire with ground. Please refer to label placed on junction box.
Installation - Mounting the Hood
11