Lenovo 8329, 8288, 8342, 8297, 8380, 8326 manual Installing internal drives, Drive specifications

Page 32

Installing internal drives

This section provides information and instructions for installing and removing internal drives.

Internal drives are devices that your computer uses to read and store data. You can add drives to your computer to increase storage capacity and to enable your computer to read other types of media. Some of the different drives that are available for your computer are:

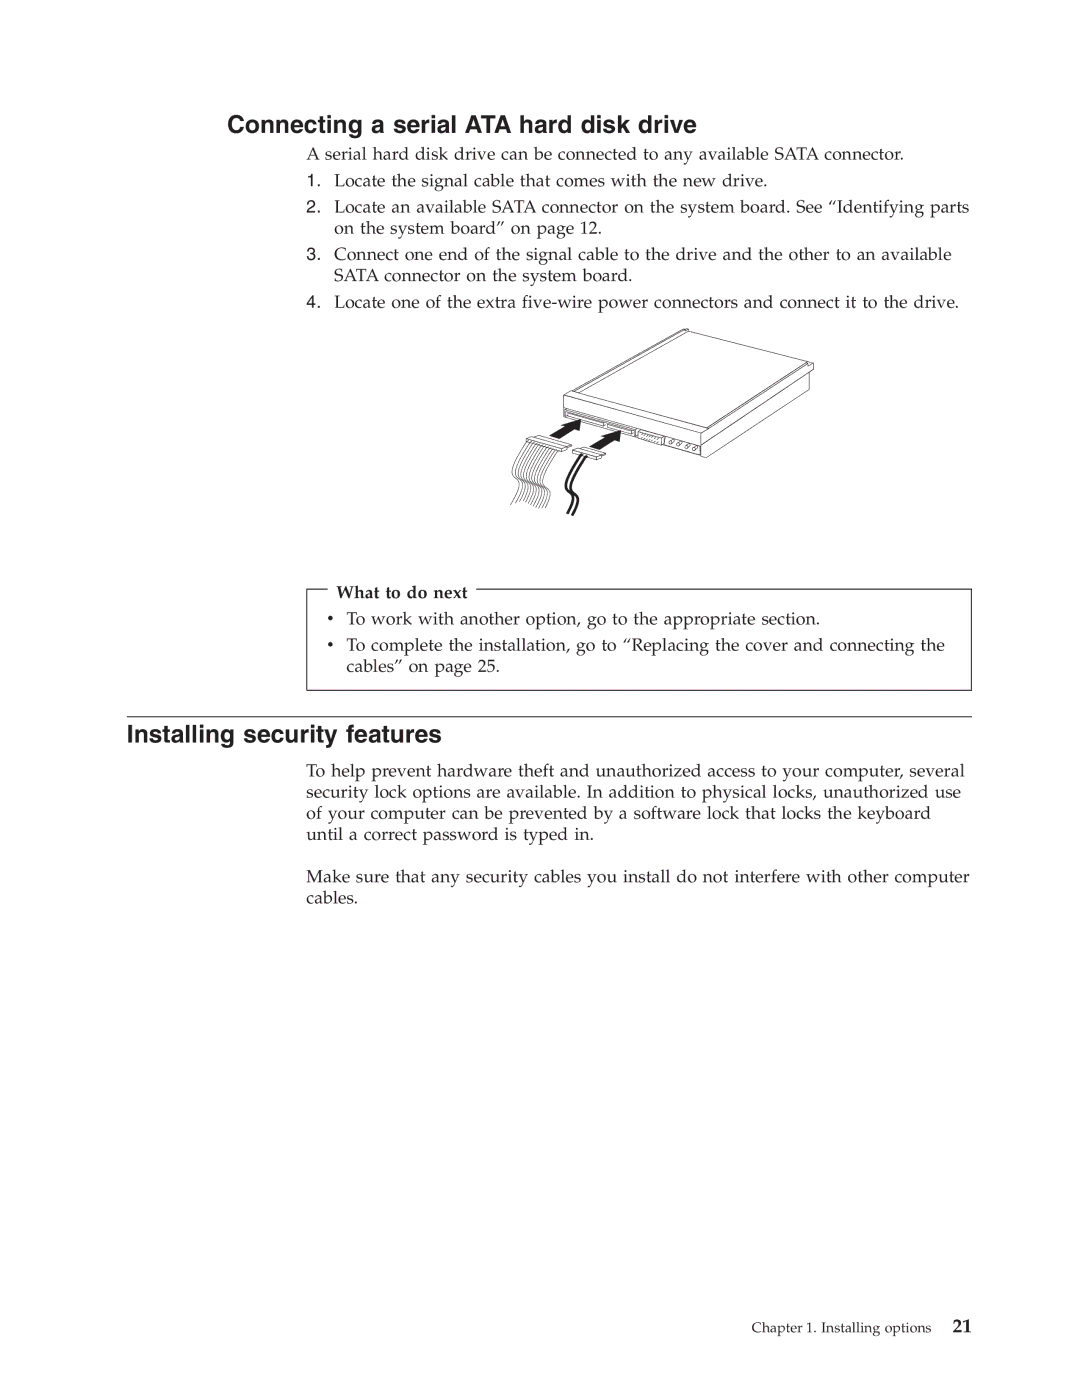
vSerial ATA hard disk drives

vParallel ATA hard disk drives

vOptical drives, such as CD drives or DVD drives

vRemovable media drives

Note: These different drives are also referred to as integrated drive electronics (IDE) drives.

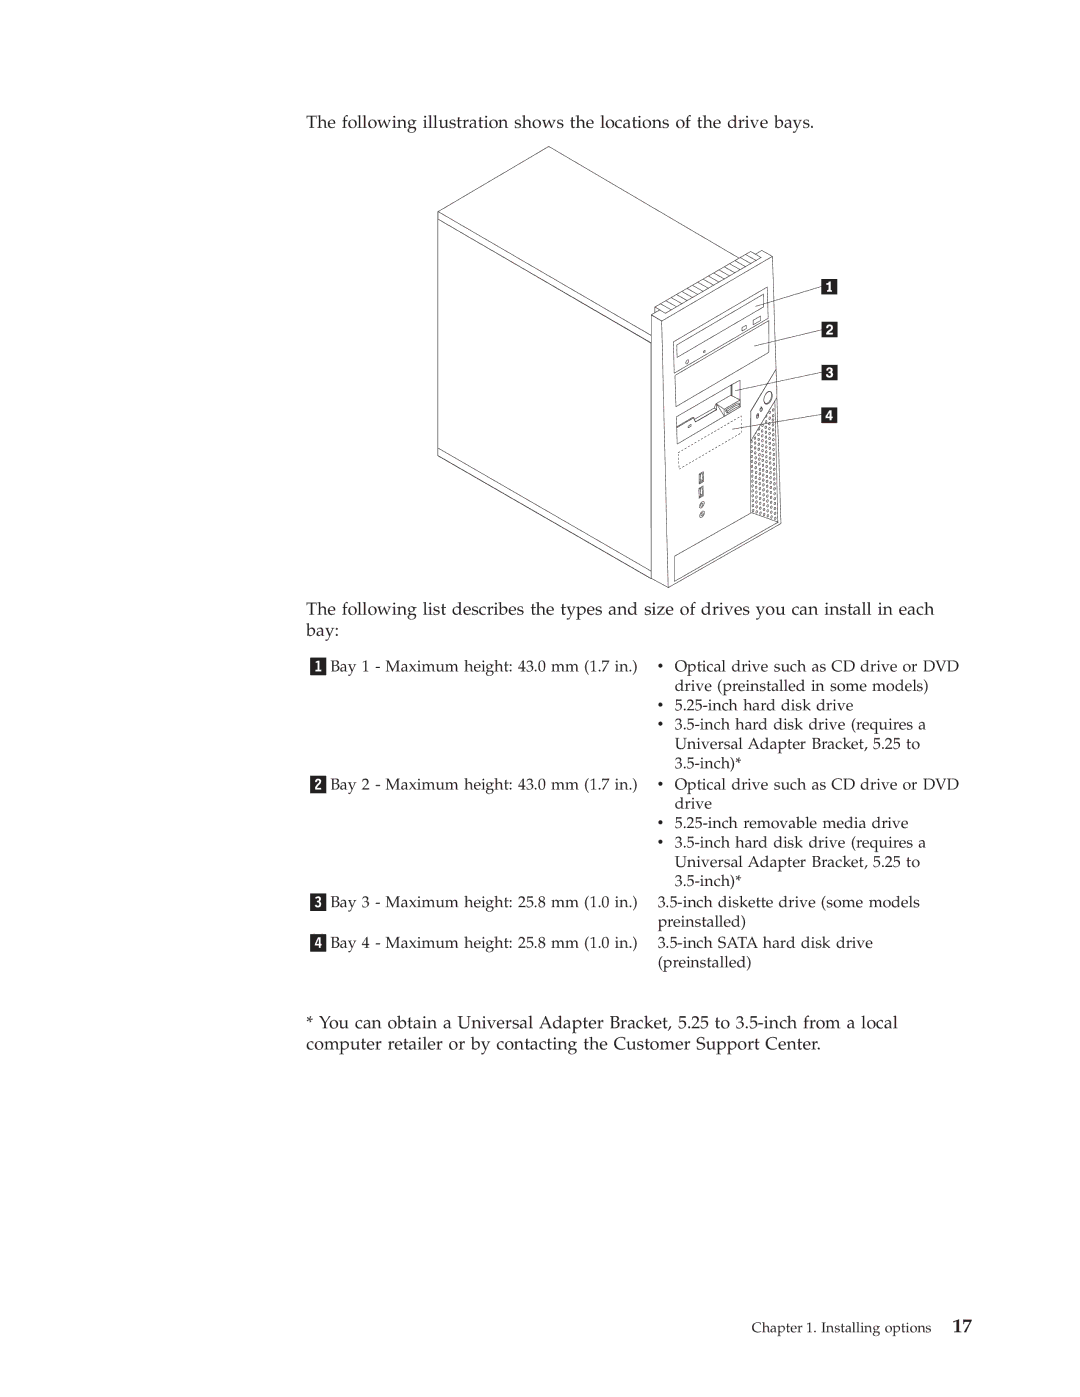
Internal drives are installed in bays. In this book, the bays are referred to as bay 1, bay 2, and so on.

When you install an internal drive, it is important to note what type and size of drive that you can install in each bay. Also, it is important to correctly connect the internal drive cables to the installed drive.

Drive specifications

Your computer comes with the following factory-installed drives:

vAn optical drive in bay 1 (some models)

vA 3.5-inch diskette disk drive in bay 3 (some models)

vA 3.5-inch hard drive in bay 4

Any bay that does not have a drive installed has a static shield and bay panel installed.

16User Guide

Image 32
Contents User Guide Types 8288, 8297 Types 8329, 8342 Page User Guide Types 8288, 8297 Types 8329, 8342 Page Contents Iv User Guide Important safety information Conditions that require immediate actionGeneral safety guidelines ServicePower cords and power adapters Batteries Extension cords and related devicesPlugs and outlets CD and DVD drive safety Heat and product ventilationTo connect To disconnect Additional safety informationLithium battery notice Modem safety information Laser compliance statementPower supply statement Overview Information resourcesXiv User Guide Installing options FeaturesVideo subsystem Operating systems preinstalled varies by model type Specifications Available options Tools requiredInstalling external options Handling static-sensitive devicesLocating the connectors on the front of your computer Locating the connectors on the rear of your computer Connector Description Obtaining device driversRemoving the cover Locating components Identifying parts on the system board Installing memory What to do nextInstalling adapters What to do next Installing internal drives Drive specificationsInstalling options Installing a drive in bay 1 or bay Installing options Connecting drives Connecting the first optical driveConnecting a serial ATA hard disk drive Installing security featuresIntegrated cable lock Padlock Password protectionChanging the battery Erasing a lost or forgotten password clearing Cmos Replacing the cover and connecting the cables User Guide Using the Setup Utility Starting the Setup Utility programViewing and changing settings Using passwordsUser Password Administrator PasswordSetting, changing, and deleting a password Using Security Profile by DeviceChanging the startup device sequence Selecting a startup deviceSelecting a temporary startup device Advanced settings Exiting from the Setup Utility programSystem programs Updating flashing Bios from a diskette or CD-ROMAppendix A. Updating system programs Updating flashing Bios from your operating system Recovering from a POST/BIOS update failureCleaning a mouse with a ball Appendix B. Cleaning the mouseCleaning an optical mouse User Guide Appendix C. Manual modem commands Basic AT commandsLow speaker volume Set Pulse dial as defaultSet Tone Dial as default Internal speaker on until carrier detectedExtended AT commands MNP/V.42/V.42bis/V.44 commands Fax Class 1 commands Fax Class 2 commandsVoice commands Appendix C. Manual modem commands User Guide Appendix D. Notices Television output notice TrademarksIndex Password lost or forgotten Page Part Number 41D4435