Paradyne 4000E installation instructions Installation in a Rack

Page 5

Installation in a Rack

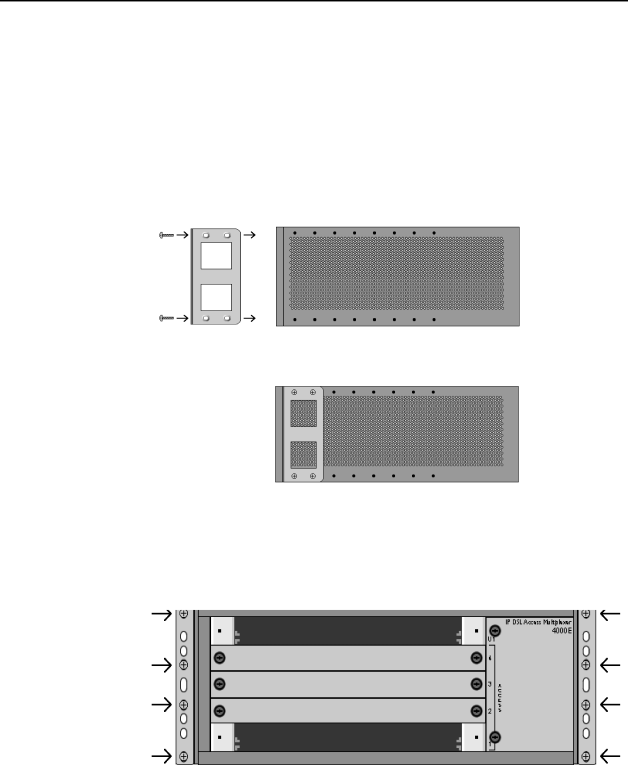
Using a Phillips Screwdriver, attach the two [2] provided rack mount brackets to the sides of the 4000E with eight [8] of the ten [10] provided bracket screws. There are seven position options for the rack brackets; position them as best suited to the space available for your chassis on the rack being utilized.

RACK MOUNT

4000E SIDE VIEW

BRACKET


Front

Rear

Mount the chassis onto the rack and secure the rack mount brackets to the sides of the rack using one of the two provided sets of eight [8] rack screws (whichever size fits the rack being utilized).

4000E FRONT VIEW

Check the rack for stability, ensuring that installation of the 4000E has not caused the rack to become top-heavy.

IPD4-A2-GZ40-10

July 2005

5

Image 5 Contents
Software and Firmware License Agreement ContentsJuly IPD4-A2-GZ40-10 Unpacking and Inspecting the Equipment IntroductionInstallation on a Tabletop Installation OptionsInstallation in a Rack Installing a Management Module Installing Your Management ModuleInstalling Your Interface Modules Interface Module Powering Up Your 4000E BLC DC Power Terminal DC Power Subscriber Lines Uplink ConnectionsInterface Module B Interface Module a Connectors July IPD4-A2-GZ40-10 Configuration and Management Securing the Connecting CablesFan Module Product Documentation Online SpecificationsImportant Safety Instructions United States EMI Notice Canada EMI Notice Warranty, Sales, Service, and Training Information
Related manuals
Manual 20 pages 19.04 Kb Manual 20 pages 48.14 Kb