Mitsubishi Electronics DV1248ST Working with Images, Adjusting Images, To re-align a photo

Page 59

Working with Images

Adjusting Images

After you have acquired an image from a scanner or digital camera, it may need some adjustments. Photo Express provides you with the perfect tool for adjusting your photos: the Transform tool.

To re-align a photo:

1.After scanning the photo, open it from either Album or from File directly into the workspace if you haven’t already scanned it directly there.

2.Put your mouse over the Edit category button and select Adjust from the pop-up submenu. The Adjust tools appear on the Toolbar.

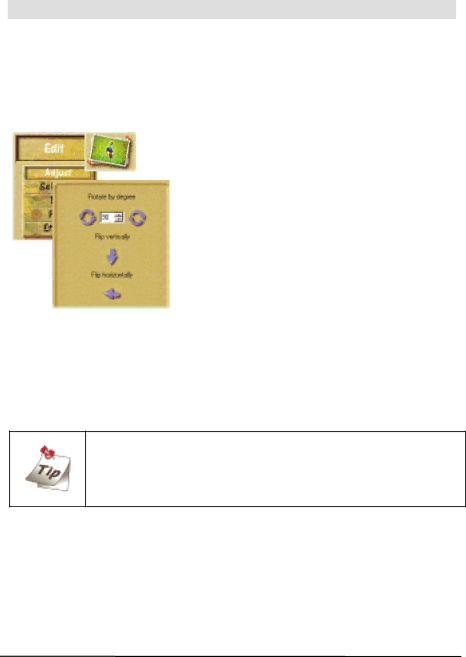
3.Click the Transform button on the Adjust toolbar. The Transform options appear in the Options panel.

!To freely rotate a photo, select the spin wheel in the upper right or lower left corner of the photo and rotate into position.

!To position it more accurately, enter an order of degrees in the Options panel and then click either Rotate Left or Rotate Right to implement it.

!To flip the photo, click either Flip Horizontally or Flip Vertically.

You can re-size an image during transformation by clicking and dragging the handles on the upper left or lower right corners. You can also move the image in the workspace by dragging it with your mouse cursor.

Image 59
Contents Diamond View DV1248ST Page Contents Photo Express Troubleshooting and FAQ Important Safety Instructions Page FCC Information Diamond View Scanner Driver Screen Installing the Scsi Interface Card Setting UP Your ScannerCheck the Package Contents Unlock the Protection Switches Connect the Scanner to Your Computer Install the Transparency UnitTest the Scanner Driver & Application Installation Page Introduction to Scanning Diamond View Main Screen Scanning reflective originals Scanning Reflective and Transparent OriginalsPage Scanning Mounted Slides Scanning transparent originalsScanning Positive Films Scanning Film StripsPage File submenu Understanding Diamond VIEW’S FunctionsMenu Bar Scan Size… Settings Sub-menuMonitor Gamma Help Sub-menu Transparent Combo BoxesOriginal Box Reflective FlatbedLine Art Image Type BoxColour RGB GreyHigh Speed and High Quality 24 bit modes Scan Mode BoxResolution Box High Quality 48 bit modeScenarios for using a High Resolution Scan Filter Box Scaling BoxSharpen more Descreen Box Film Wizard Colour Wizard BoxAuto Density Photo MagicOutput Device Color MatchingJob List Job List and Command ButtonsPreview Button Duplicate ButtonInfo Button Delete ButtonSelection Button Preview AreaTool Bar Zoom Button New Frame ButtonHand Button Histogram Level ButtonColour Channel box Image Threshold Output Level box Input Level boxTonal Map Curve ButtonInput/Output Status Area Channel Adjustment AreaColour Balance Button Entry Box Colour Adjustment buttonColour Wheel Lightness BarContrast control Brightness/Contrast buttonBrightness control Threshold button Mirror button Invert buttonAuto Rotate buttonAuto Crop Auto buttonImage Information Area Status AreaPixel Display Box Pixel Information AreaIntroduction Photo ExpressTool Bar Workspace Getting StartedPage To create a new Album Getting ImagesWorking with Album Printing album thumbnails To add new images to an albumTo re-align a photo Adjusting ImagesWorking with Images To trim your photo To re-size your photo To print an image Sharing ImagesPrinting Images To save a photo Saving ImagesTo create calendars Express YourselfCreate Calendars To morph an image Morphing PhotosTo Begin a New Project Working in Project ModeTo move one object over another Working with TemplatesTo replace images in a template To add frame to a photo object Adding DecorationTo add special edge effects to a photo object To print a template as name cards Printing TemplatesTo output a template as a Web Sharing TemplatesTo e-mail a template To fax a templateDiamond View Copier Adjusting Copier SettingsCopier Parameters IconsNumber of Copies Information WindowBrightness and Contrast Buttons How to Use Copier Memo Finereader Sprint OCR To recognize a document using the Scan&Read button Scan Push the Scan&Read buttonSave the result Recognize the scanned imageTips for Improving Recognition Quality Introduction to Scan Button Scan ButtonButton View Scan Button SettingsQuick Scan Scan to FAX Scan to FileScan to Printer Scan to OCRScan to Application Troubleshooting Troubleshooting and FAQTPO lamp goes out when I lift the TPO unit Packing Directions Service and Support InformationReturning Your Scanner for Service APPENDIX. Diamond View Main Screen Guide Diamond View Main Driver Screen Guide