LG Electronics LST-4200A owner manual Option Menu Features, Clock

Page 22

Option Menu Features

Clock

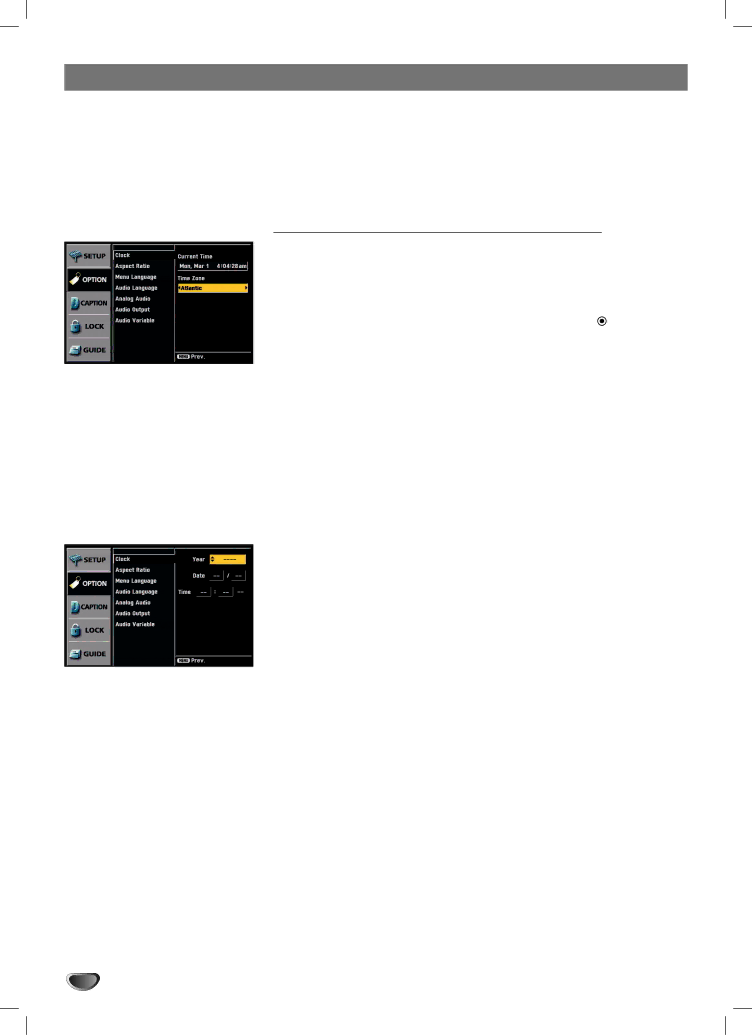
Enables the user to set up the clock information. Normally, your clock is set using signals transmitted by DTV stations. Choosing your time zone sets the current time automatically. But if the Ant In jack on the connection panel is connected to a cable service, you must set the clock manually.

Clock Setup for over-the-air antenna reception.

1Press MENU to display the on-screen menu.

2Select the OPTION menu using 3 / 4 then press (SELECT) or 2.


Use 3 / 4 to select the Clock option then press 2 or (SELECT) to

3 move to the third level.

4

Use 1 / 2 to set Time Zone: (New F.land, Atlantic, Eastern, Central,

Mountain, Pacific, Alaska, Hawaii)

5 Press MENU to return to the previous menu or press EXIT on the Remote Control to return to TV viewing.

ote

There are cases where the TV station does not send, or sends wrong date and/or time information causing the HDTV Receiver to set an incorrect time.

Clock Setup for CATV/CADTV service.

ote

You cannot manually set the clock using the TV/DTV band.

1Press MENU to display the on-screen menu.

2Select the OPTION menu using 3 / 4 then press (SELECT) or 2.

3 Use 3 / 4 to select the Clock option then press 2 or (SELECT) to move to the third level.

4Use 3 / 4 to set Year, then press 2 to move to the next option.

5 Set the Year, Date and Time using 3, 4 , and 2 buttons then press (SELECT) to confirm your changes.

Press MENU or 1 to return to the previous menu or press EXIT on

6 the Remote Control to return to TV viewing.

22

Image 22
Contents High Definition Television Receiver Safety Precautions Regulatory Information FCC PartImportant Safety Instructions Setup Checklist Table of Contents Power Front Panel Controls and Display WindowRemote Control Key Functions Unpacking Hdtv Receiver and Accessories/Connection Overview Connection Panel Overview Antenna Connections Antenna ConnectionsTV or Other Device Connection Panel Display Formats Overview ConnectionsAnalog Monitor Connections Cable TV Wall Jack Panel TV Connection PanelConnections HD Monitor Component YPbPr Connections Cable TV Wall Jack Panel HD Ready TV Connection PanelConnections HD Monitor RGB Connections Connections HD Monitor DVI-HDTV Connections Connections VCR Connections VCR Connection PanelConnections Audio Amplifier Receiver Connections Amplifier Receiver Connection PanelSelect Display Format Display Format SetupDisplay Format Setup SelectionHelp Function Menu OverviewTypical Menu Operation SelectEZ Scan Channel Search Setup Menu OptionsEZ Add To move page by Ch. Edit Channel EditTo move one by one To add or delete a channelManual Channel Add/Delete EZ DemoOption Menu Features ClockAspect Ratio Aspect Ratio Summary Program Format Output Format Available Aspect RatiosAudio Language Menu LanguageAnalog Audio Audio Output Audio VariableCaption Menu Options DTV CaptionsDTV Caption Style StyleAnalog Captions CaptionLock Parental Control Menu Options Set PasswordTo the second level If you have not entered a password yet Lock SystemTo move one-by-one If you have already entered a passwordBlock Ch. Channel To move page-by-pageMovie Rating Lock Parental Control Menu Options TV Rating-Children TV Rating-General Lock Parental Control Menu Options Station Guide Guide OptionsProgram Guide Press MenuInformation Displays Channel Banner DisplayDatePress Info while watching a program K l m Program Information DisplayF g Normal OperationProgram and Station Guide SurfIps To Tune to another channel on the Full Information windowNormal Operation Volume AdjustmentSignal Channel SelectionProgramming the Remote Control to Operate Other Devices TV Codes Remote Control Codes for Other DevicesVCR Codes AUX CD Codes DVD CodesAUX Audio Codes STB CodesTroubleshooting Symptom SolutionsSpecifications This Limited Warranty does not Apply to Customer INTER-ACTIVE Center Numbers