Using the Remote Control
Using the INPUT Button
Input source
VCR1 | ON • OFF | TV |
DVD | VCR2 AUX | SAT • CABLE |
MUTE |
| FORMAT |
| CH + |
|
L |
| V |
O |
| O |
V |
| L |
CLEAR
1 ![]()
4![]()
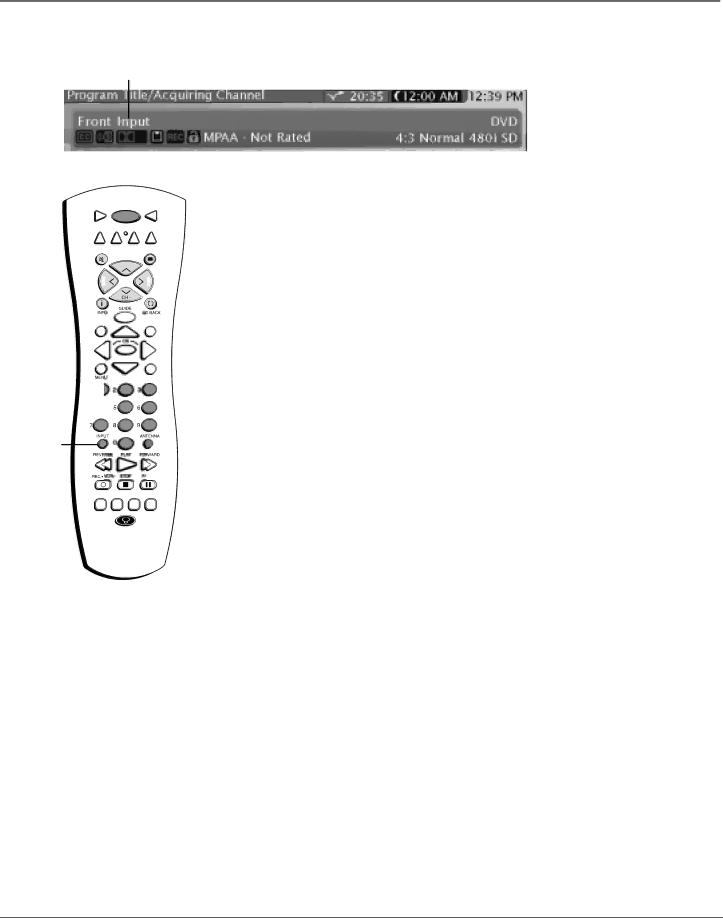
INPUT button
AUSE
PIP SWAP CH CTRL SKIP
Note: Watch the channel banner to see the input sources change each time you press the INPUT button.
1.Repeatedly press the INPUT button to scroll through the available input sources until you find the input associated with the component (such as VCR or DVD player) you want to view.
2.Once you have found the input source you want, stop pressing INPUT.
•If you tune to INPUT 1 and your DVD is connected to that input, you will be able to view your VCR. To play, stop, or rewind the VCR tape using the remote that came with your TV, you must first press the VCR1, VCR2, or AUX button to put the remote control in VCR mode.
There are other ways of selecting an input channel:
•Program the component (VCR, DVD, etc.) buttons on the remote control to automatically tune to the correct input channel when pressed. For more details on Auto Tuning, see Chapter 3.
•When viewing an input, to go back to viewing channels, press ANTENNA, or press INPUT until you see your channel, or use the number keys to enter the channel number.
32 | Chapter 2 |