JVC HR-XVC25U manual Problems and troubleshooting/Video head cleaning, Auto Clock Setting

Page 63

Problems and troubleshooting/Video head cleaning


SYMPTOMS

POSSIBLE SOLUTIONS

PAGE


No picture, or the screen is blurred

• The S-VIDEO/COMPONENT selecter is not set correctly.

18


or divided into two parts.

• The progressive scanning mode is active through the unit is

60


connected to a TV via the VIDEO OUT jack.


Stopping playback, search, slow-


motion play, repeat play, or program

• Some discs may not do some of the functions.


play, etc. cannot be performed.


No 4:3 (16:9) picture

• The setup does not match your TV.

57


No on-screen display

• Select Display On.

58


No surround sound

• The setup does not match your stereo system.

19


The unit or remote operation key

• Turn off the unit and unplug the AC power cord for several


is not functioning.

minutes, then replug it.


Playback does not start when the

• Check the Parental setup.

52


title is selected.


Audio soundtrack and/or subtitle


language is not changed when you

• Multilingual language is not recorded on the DVD disc.

55,56


play back a DVD.


No subtitle

• Some discs have no subtitles.

51


• Subtitles are cleared. Press SUBTITLE.


Angle cannot be changed.

Multi-angles are not recorded on the DVD disc.

51


appears on the screen.

• The function is prohibited with the unit or the disc.

39


Video head cleaning

Video head clogging


The video heads are the means by which the DVD/VCR reads


the picture from the tape during playback. In the unlikely event


that the heads become dirty enough to be clogged, no picture


will be played back. This can easily be determined if, during


playback of a known good tape, there is good sound, but no


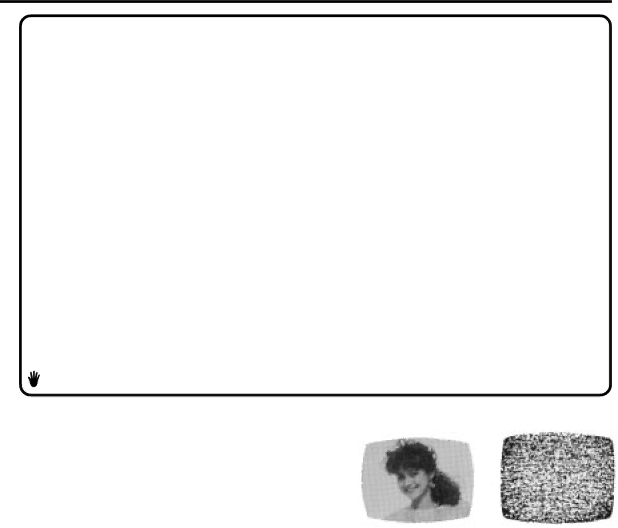
picture (picture is extremely snowy). If this is the case, have

Good Picture

Snowy Picture

the DVD/VCR checked by qualified service personnel.

NOTES: • DO NOT ATTEMPT TO CLEAN THE VIDEO HEADS OR SERVICE THE UNIT BY REMOVING THE REAR COVER.

Video heads may eventually wear out and should be replaced when they fail to produce clear pictures.

To help prevent video head clogging, use only good quality VHS tapes. Discard worn out tapes.

Notes

Auto Clock Setting

Notes for Canadian customers regarding the clock feature of your DVD/VCR.

The XDS signals are carried only by certain broadcast television stations (for example, the signal is carried by most Public Broadcasting Service stations). You must be able to receive a station carrying the XDS signal to use the Auto Clock Setting to set your DVD/VCR’s internal clock. If you live in an area that does not broadcast XDS signals, you must set the clock manually. Please see page 25 for instructions on how to manually set your DVD/VCR’s clock.

Special note for residents of Newfoundland:

The Auto Clock Setting cannot be used to set the DVD/VCR’s internal clock to Newfoundland time. The time zone command does not include a setting for the Newfoundland time zone. Trying to use the Auto Clock Setting in the Newfoundland time zone could result in an incorrect time setting or no setting at all. Please set your DVD/ VCR’s clock using the Manual Clock Setting.

63

Image 63
Contents DVD/CD Player Risk of Electric Shock Do not Open Location of the required MarkingPOWER-CORD Protection CleaningAccessories Power SourcesSafety Check Power LinesDamage Requiring Service Replacement PartsDisc Power sourceTo USE AC Power Source Laser BeamDVD Section FeaturesDVD/CD Player/Video Cassette Recorder VCR SectionContents Parts and functions FrontRear Explanation for On-Screen-Symbol DVD DisplayDisplay window Remote control Inserting Batteries Remote controlBattery precautions Remote control basicsPreparation TV multi-brand remote controlControl four JVC VCRs Power PlayBasic connections Combination VHF/UHF Antenna with 75 ohm Coaxial CableSeparate VHF and UHF Antennas Ohm Coaxial Cable supplied Splitter Basic connectionsDescrambler Catv Cable TV connectionsIncoming Cable ConverterSplitter Descrambler Incoming Converter CableDescrambler SwitchCatv Cable TV connections Cable DescramblerPlayback connections Connect to a TV with Audio/Video OutputConnect to a TV with S-Video Output for DVD/CD playback Connect to an AV Amplifier with built-in digital surround Connecting the optical digital cablePlayback connections Connect to a Stereo Amplifier with Audio OutputEnter Setting the video channel/Setting the languageSetting the Video Channel Setting the languageMemory Tuner settingSetting channels automatically TV/CATV SelectionTo ADD/DELETE channels/Noise elimination To ADD/DELETE channelsNoise elimination Zone, then press the Enter Press To select the System Setup menu, then Press EnterStandard Time option, then Press To select your TimeDaylight Saving Time setting Auto clock settingTo make corrections any time during the process Press or to select the Clock SET option, then pressPress or to set the month Then press Enter buttonLoading and Unloading a cassette tape To rewind the tape or forward it rapidly Forward/Reverse picture search modeCassette tape playback To stop playbackSpecial playback DISPLAY-button Zero Return function/Video Index Search systemZero Return function Video Index Search systemRecording a TV program Recording and viewing the same TV programAppear on the display Recording a TV program Instant Timer Recording ITR To cancel ITRPress Number keys or VCR CH +/-to Timer recording If the clock symbol blinks whenSet the start time, end time, channel Case timer programs-overlap Timer-recordingTimer recording special case Confirmation / Cancellation of the timer recordingListening to SAP Stereo Recording and PlaybackSeparate Audio Program SAP Output selectionConnection with Camcorder Duplicating a video tapeDuplicating a disc material onto a video tape Connection with second VCRDisc Setup language can be selected Preparation Setting setup languagePress OPEN/CLOSE Playback procedureFrame Advance Fast Forward PlaybackReview Playback Still PlaybackZooming/Locating desired scene ZoomingLocating desired scene Press Play Mode during playback or stop mode Repeat playbackRepeat playback of Title, Chapter and Track You can arrange the order of tracks on the disc Program playback/Random playback CDProgram playback Random playbackMP3/WMA/JPEG playback MP3/WMA/JPEG CD informationMP3/WMA CD playback Jpeg CD playback Press OPEN/CLOSE. The disc tray will openAbout file menu Seconds Setting the Jpeg IntervalSetting the Jpeg Interval OffPictures Only Setting the Select FilesAll Music OnlyZoom mode, press Zoom repeatedly to return to a 11 view Off Zooming/Changing angles Jpeg CDChanging angles This unit will allow you to zoom in on the Jpeg imageReturning to the scenes To cancel the markMarking desired scenes Marking the scenesCase of Video CD playback Changing soundtrack language/Karaoke playbackChanging soundtrack language Karaoke playbackDVD Menu Subtitles/Changing angles/Title selection/DVD menuTurning the Subtitles On and Off Title SelectionParental control Parental control settingTo unlock the Parental Control Setting CancelTemporary disabling of rating level by DVD disc Press To select your Desired Language, then press Setting menu languagePress or Enter To select Then press Menu Or EnterAutomatic Setting subtitle languageMode To select Press Language OtherTo cancel Surround mode Setting audio soundtrack languageSetting surround sound Power offPan scan Setting the aspect ratio of TV screenYou can select the aspect ratio for your TV Preparation Letter boxVideo Setting on screen display/Status display of discStatus display of disc DVDEnter to Dynamic Range ControlProgressive scan About Scanning ModeLanguage code list Problems and troubleshooting Symptoms Possible Solutions DVD/VCRVCR Symptoms Possible Solutions Problems and troubleshooting/Video head cleaningVideo head cleaning Auto Clock SettingDVD section SpecificationsGeneral VCR sectionNew Maple Avenue Pine Brook, NJ For Servicing Only in U.S.AWhat WE will do What YOU Must do for Warranty ServiceWhat is not Covered For customer useMemo J2C51201B U 03/05