Vizio M420KD warranty

Page 40

Changing the Names of the Inputs

To make it easier to recognize the different devices attached to the inputs on your TV, you can rename the inputs. For example, if you have a DVD player connected to the Component input, you can rename that input to display “DVD Player”.

To change the name of an input:

1.Press the MENU button on the remote. The on-screen menu is displayed.

2.Use the Arrow buttons on the remote to highlight the Settings icon and press OK. The Settings menu is displayed.

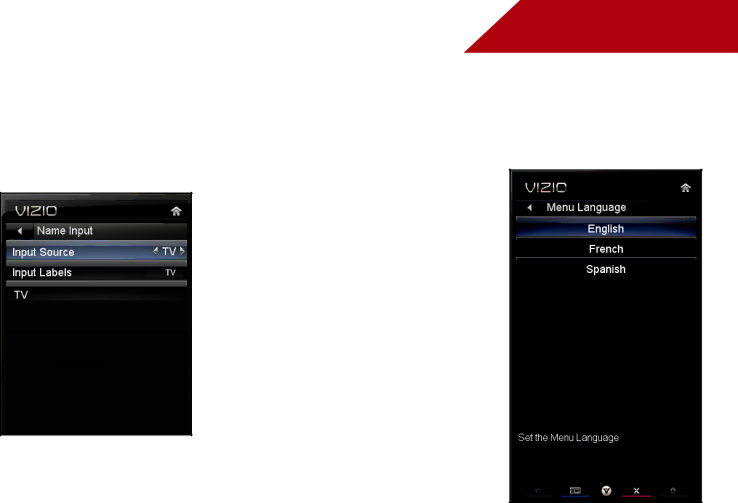
3.Use the Arrow buttons on the remote to highlight Name Input and press OK. The Name Input menu is displayed.

4.Highlight Input Source and press OK. Highlight the input you want to rename and press OK.

5.If you would like to use a preset input label, highlight Input Labels and press OK. Highlight the input label you want to use and press OK.

6.When you have finished naming your input, press the EXIT button on the remote.

5

Changing the On-Screen Menu Language

Your TV can display the on-screen menu in different languages.

To change the on-screen menu language:

1.Press the MENU button on the remote. The on-screen menu is displayed.

2.Use the Arrow buttons on the remote to highlight the Settings icon and press OK. The Settings menu is displayed.

3.Use the Arrow buttons on the remote to highlight Menu Language and press OK. The Menu Language menu is displayed.

4.Highlight your preferred language (English, French, or Spanish) and press OK.

5.Press the EXIT button on the remote.

33

Image 40
Contents User Guide LLC When Reading this Manual Important Safety InstructionsWelcome Thank You for Choosing VizioPage Page DTV Transition Advisory Television Antenna Connection Protection Table of Contents Using the USB Media Player Inspecting the Package Contents Installing the TVInstalling the TV Page M420KD Controls and Connections Rear PanelSide Panel Front Panel Remote Control Front Remote Control Back ShiftAaabattery Batteryaaa Connecting Your Devices Connecting a DeviceConnecting a PC Connecting an audio device Connecting to your network Completing the First-Time Setup Using the On-Screen Menu Navigating the On-Screen MenuChanging the Input Source Changing the Screen Aspect RatioSetting Up Closed Captioning Activating the Sleep Timer Adjusting the Picture SettingsPage Page Adjusting the Audio Settings Advanced Audio See Adjusting the Advanced Audio Settings on Page Using the Network Connection Menu Page Changing the TV Settings Page Page Page Page Page Page Using the Help Menu Page Using the Info Window Using the USB Media Player Using the USB Media PlayerMusic Player Photo Viewer Using the VIA Shortcut Buttons Using Vizio Internet AppsUsing the VIA Dock Creating and Managing User Profiles Page Restoring the VIA Dock to the Factory Default Settings Troubleshooting & Technical Support LET US HelpPage See Changing the Screen Aspect Ratio on Specifications Limited Warranty On Parts and LaborLegal & Compliance UK BASE/BSVizio Software License Agreement Page YOU MAY Also have Other Rights Which Vary by Jurisdiction Vizio INC. All rights reserved OC-A