Samsung BN68-03004B-02, UC5000-ZC Software Upgrade, HD Connection Guide, Contact Samsung

Page 24
or
USB Drive
TV Rear Panel

Basic Features

Software Upgrade

Software Upgrade can be performed by network connection or downloading the latest firmware from “www. samsung.com,” to a USB memory device.

Current Version - the software already installed in the TV. Software is represented as “Year/Month/Day_Version”.

Software Upgrade

Current Version

2010/01/18_000001


By USB

By Online


Alternative Software

----/--/--_------


UMove E Enter R Return

Installing the Latest Version

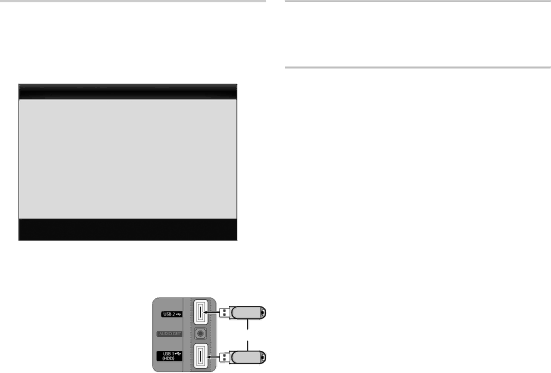
■■ By USB: Insert a USB drive containing the firmware

upgrade file, downloaded from “www.samsung.com,” into the TV. Please be careful not to disconnect the power

or remove the USB drive until upgrades are complete.

The TV will be turned off and

on automatically after completing the firmware upgrade. When software is upgraded, video and audio settings you have made will return to their default settings. We advise you to to write down your settings so that you can easily reset them after the upgrade.

■■ By Online: Upgrade the software using the Internet.

First, configure your network. For detailed procedures on using the Network Setup, refer to the "Network Connection" instructions.

If the internet connection doesn’t operate properly, the connection may be broken. Please retry downloading. If the problem persists, download by USB and upgrade.

■■ Alternative Software (backup): Displays the software version downloaded through By Online. During the software upgrading, When the Upgrade will discontinue from last step, this function be activated.

HD Connection Guide

Refer to this information when connecting external devices to the TV.

Contact Samsung

View this information when your TV does not work properly or when you want to upgrade the software. You can find information regarding our call centers and how to download products and software.

24 English

Image 24
Contents Samsung Electronics Canada Inc., Customer Service Contact Samsung WorldwideSecuring the Installation Space Installation with a standInstallation with a wall-mount Still image warningContents List of Features AccessoriesCleaning Cloth BN63-01798B Getting StartedInstall the Stand See separate guide for installing the standStand 1EA Follow the steps below to connect the TV to the standButtons on the remote control Speakers Remote control sensorViewing the Control Panel Product color and shape may vary depending on the modelViewing the Remote Control StartedConnecting to an Antenna Plug & Play Initial SetupEnjoy your TV Press the or button, then press the ENTEREbutton. SelectConnecting to an AV Device ConnectionsConnections Connecting to an Audio Device Digital Audio OUT OpticalConnecting to a PC Using an HDMI/DVI Cable or a D-sub CableMode Resolution Horizontal Frequency Vertical Frequency Sync PolarityBasic Features How to Navigate MenusSource List Edit NameChannel List Add to Favorite / Delete from FavoriteAntenna Air / Cable t Auto ProgramOther Features Clear Scrambled ChannelProgrammed Editing ChannelsMode t Eco SolutionAdvanced Settings Fine TunePicture Options Picture OptionsOff Turns the Expert Pattern function off OO MENUm→ Picture → Picture Options →Picture Reset OK / Cancel Auto Adjustment tSetting up the TV with Your PC ScreenAuto Volume Off / Normal / Night SRS TruSurround HD Off / On tSRS TruDialog Off / On SRS TheaterSound tSound Reset OK / Cancel Speaker Select External Speaker / TV SpeakerSpdif Output TimeTimer To be played when the TV is turned on automatically. NoteOO MENUm → Setup → Security → Entere SecurityMenu Language CaptionGeneral PIP t Legal NoticeSelf Diagnosis Picture In Picture PIPSoftware Upgrade Software UpgradeHD Connection Guide Contact SamsungAdvanced Features Connecting to a Wired NetworkNetwork Connection Modem Port on the WallNetwork Setup Auto Network Setup ManualNetwork Setup Network Type Wired Network Setup Network TestConnecting to a Wireless Network Network Setup Samsung Auto Configuration Boot upNetwork Setup PBC WPS How to set up automaticallyThen press the ENTEREbutton. Press the or Displays a list of the available networksNetwork Setup Ad-Hoc SWL Samsung Wireless Link SWL connectTo connect Connecting a USB Device Connecting to your PC through a networkMedia Play USB Mass Storage Class MSC devicePage Sorting standard is different depending on the contents VideosScreen Display But you cannot play the Game itselfAdvanced Features English Yy Supported Video FormatsMusic List section using the Green button PhotosPlaying Multiple Files Media Play Additional FunctionsSettings Videos/Music/Photos Play Option menuPress the Tools button What is Anynet+? t Advanced To connect to a Samsung Home Theater FeaturesAnynet+ Home Theater Anynet+Setting Up Anynet+ Switching between Anynet+ DevicesRecording Troubleshooting for Anynet+ Listening through a ReceiverSetup Setting Up AllShareMessage / Media / ScreenShare About AllShareMy Mobile Other Information Assembling the CablesInstalling the Wall Mount Blanking BracketAnti-theft Kensington Lock Securing the TV to the Wall TV-Holder Kit Sold SeparatelyTV-Holder BN96-15753A Screw M8 x L19Troubleshooting Issues Solutions and ExplanationsOther Information English Storage and Maintenance Degree connectorsCaption must be activated on the external device p Every time the TV is turned offLicense Specifications Dimensions Front view / Side viewUnit inches Favorite Channel Film Mode Fine Tune Flesh Tone Frequency IndexAllShare Amplify Antenna Anynet+ Téléviseur DEL Modèle De sérieSécurisation de l’espace d’installation Installation sur un support Installation muraleAvertissement relatif à limage fixe FrançaisVérifiez le symbole Table des matièresAccessoires Mise en routeCaractéristiques Installation de la base Vis 10EAVis M4 X L12 Guide du support Support Vue de dessus AvantPrésentation du panneau de commande Présentation de la télécommande Permet de régler le volumeInsertion des piles piles AAA Branchement à une antenne Prêt à l’emploi Mise en marche initialePuissance consommée Branchements Branchement à un appareil audiovisuelBranchement à un appareil audio Mode Résolution Branchement d’un PCLaide dun câble HDMI/DVI ou câble D-sub Fonctions de base Liste sourceEntrer le nom Modification de la source dentréeListe des canaux Ajouter aux favoris / Effacer des favoris tAntenne Air / Câble t Prog. autoEffacer les canaux brouillés Enregistrement par minuterieModification des canaux Autres fonctionsSolution Eco Syn. PréciseMode Réglages avancésOptions dimage Options dimageActivé uniquement sur DTV / Composant / Hdmi OO MENUm→ Image → Options dimage → EntereConfiguration du téléviseur avec un PC Réinitialisation de limage OK / AnnulerRéglage Auto t ÉcranVolume auto Off / Normal / Nuit Langue privilégiéeSRS TheaterSound ÉgaliseurSélect. le haut-parleur Haut-p. externe / Haut-parleur TV Sortie SpdifRéinitialisation du son OK / Annuler HeureSécurité Exclusion automatique de programmesMinuterie Langue menu Sous-titresGénéral Autodiagnostic ISI tAvis juridique Fonction image sur image ISIInstallation de la version la plus récente Mise à niveau du logicielGuide de connexion HD Mise à niveau du logicielFonctions avancées Connexion à un réseau câbléConnexion au réseau Port LAN muralRéglage du réseau Auto Réglage du réseau ManuelRéseau Réglage du réseauConnexion à un réseau sans fil Réglage du réseau Configuration automatique Samsung Placez le point daccès à lemplacement souhaitéAvis Méthode nConfiguration à l’aide de la fonction PBC WPS Appuyez sur le bouton rouge de la télécommandeRéglage du réseau PBC WPS Code de sécuritéTélécommande Réglage du réseau Ad HocComment brancher un appareil Ad hoc existant SWLSamsung Wireless Link Connexion SWL’appareil à connecter Disparaît automatiquementBranchement d’un dispositif USB Branchement à un PC par lentremise dun réseauDe grande capacité MSC MENUm→ Application → Media Play →Français Vidéos Page-écranLe critère de classement varie En fonction du contenu Yy Formats vidéo compatibles Extension de FréquenceCompression En charge Ou laudio sans perteMusique Appuyez sur la touche Lecture / EntereLecture de plusieurs fichiers Fonctions supplémentaires Media PlayDans l’ordre Lecture des fichiers vidéo/musicaux/photos sélectionnésParamètres De vidéo sur demande à l’aide de la fonction Media PlayFormats audio sont lus Qu’est-ce qu’Anynet+? t Pourvu, vérifiez la présence dun logo Anynet+ sur celui-ciBranchement à une chaîne de cinéma maison Samsung Configuration de la fonction Anynet+ Permutation entre appareils Anynet+Enregistrement Écoute par lintermédiaire dun récepteur Dépannage de la fonction Anynet+Configuration Configuration dAllShareMessage / Média / ScreenShare Propos de AllShareAlarme darrivée dun appel Alarme calendrierUtilisation de la fonction Média Utilisation de la fonction ScreenShareAutre information Disposition des câblesInstallation de l’ensemble de fixation murale Support dobturationUtilisation du verrou antivol Kensington PoucesVis standard Quantité Amples renseignements et lutiliser de façon appropriéeStabilisation du téléviseur par rapport au mur Problèmes Solutions et explications DépannageTélécommande Essayez loption Test réseau du menu Configuration pTéléviseur, ou ne règle pas le volume Pas dimage Le téléviseur ne s’allume pasEntreposage et entretien Cette odeur est normale et disparaîtra avec le tempsPrêt à lemploi→ ENTEREp POP apparaît à lécran Vous à la section Prêt à lemploi pLicence Avis de licence relative à la source libreSpécifications techniques Vue avant / Vue latérale Panneau des prises / vue arrière15.7 36.0 11.2 11.5 Samsung Electronics America, Inc FrançaisAutodiagnostic Balance G/D Réglage du réseau Résolution optimale RotationVeille Vidéos Volume Français Aff. de base AllShare Amplification Antenne Anynet+