

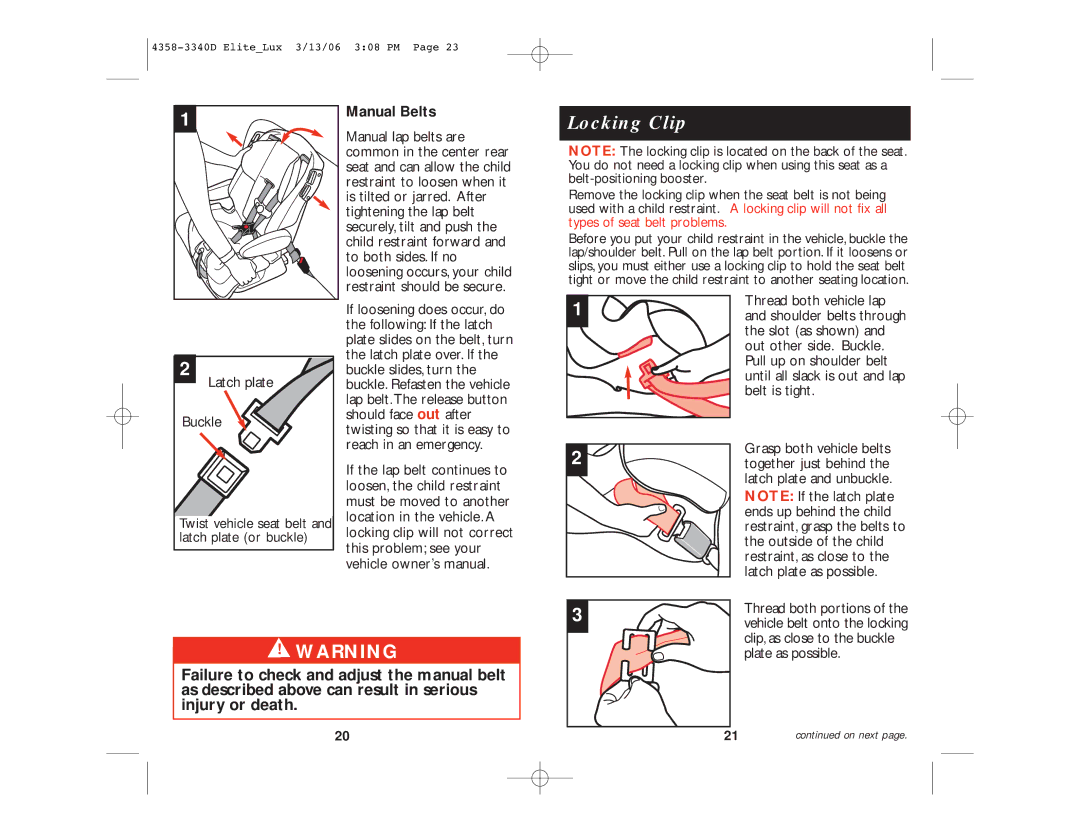


Rear-Facing Installation
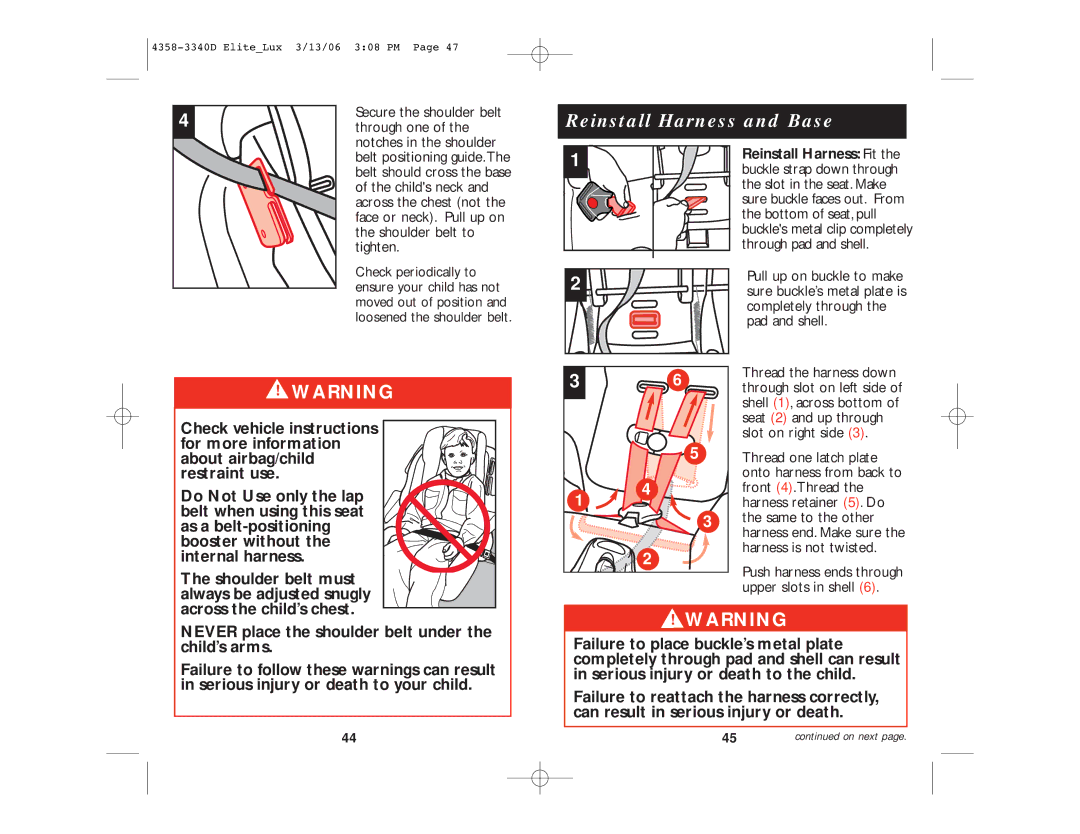
After deciding whether to use your Vehicle Belts or LATCH, be sure to read the warnings below as they
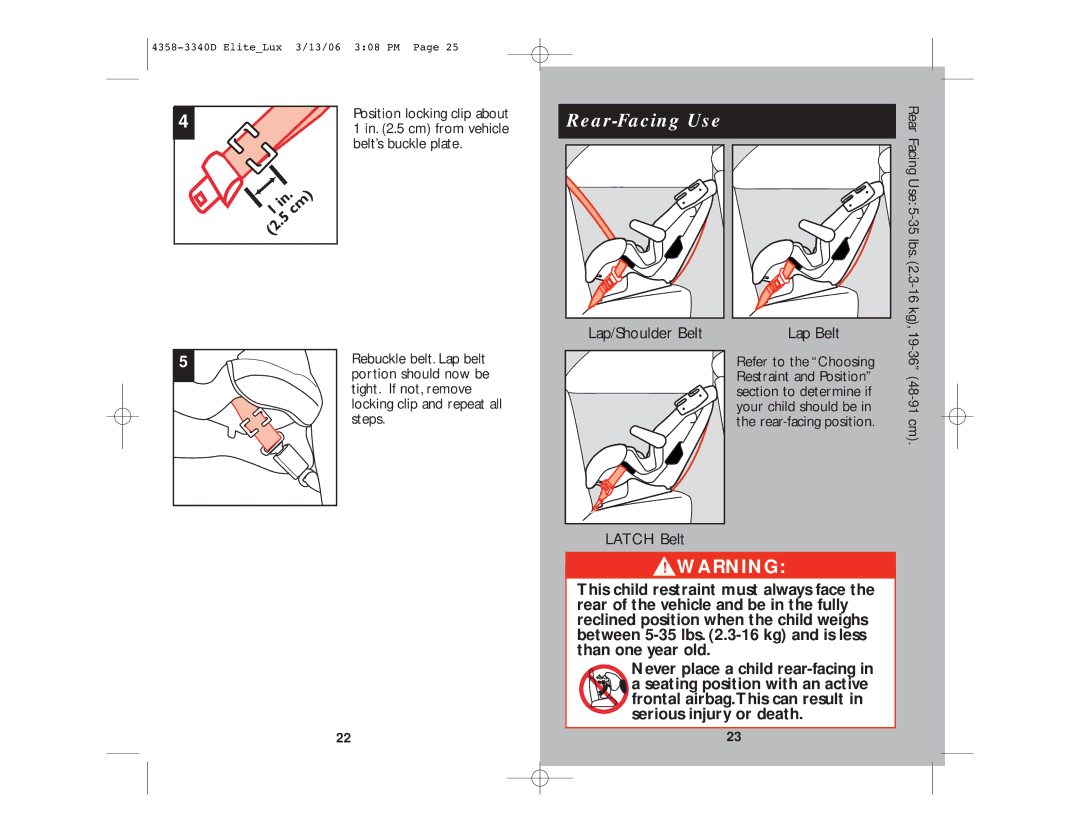
Rear-Facing Installation with Vehicle Belt:
Rear Facing
pertain to both systems.
You may need to remove the base for narrow vehicle seats or airline use. See “Removing Base” in Belt- Positioning Booster section.
To use the child restraint
NOTE: Do not use the top anchorage strap in the
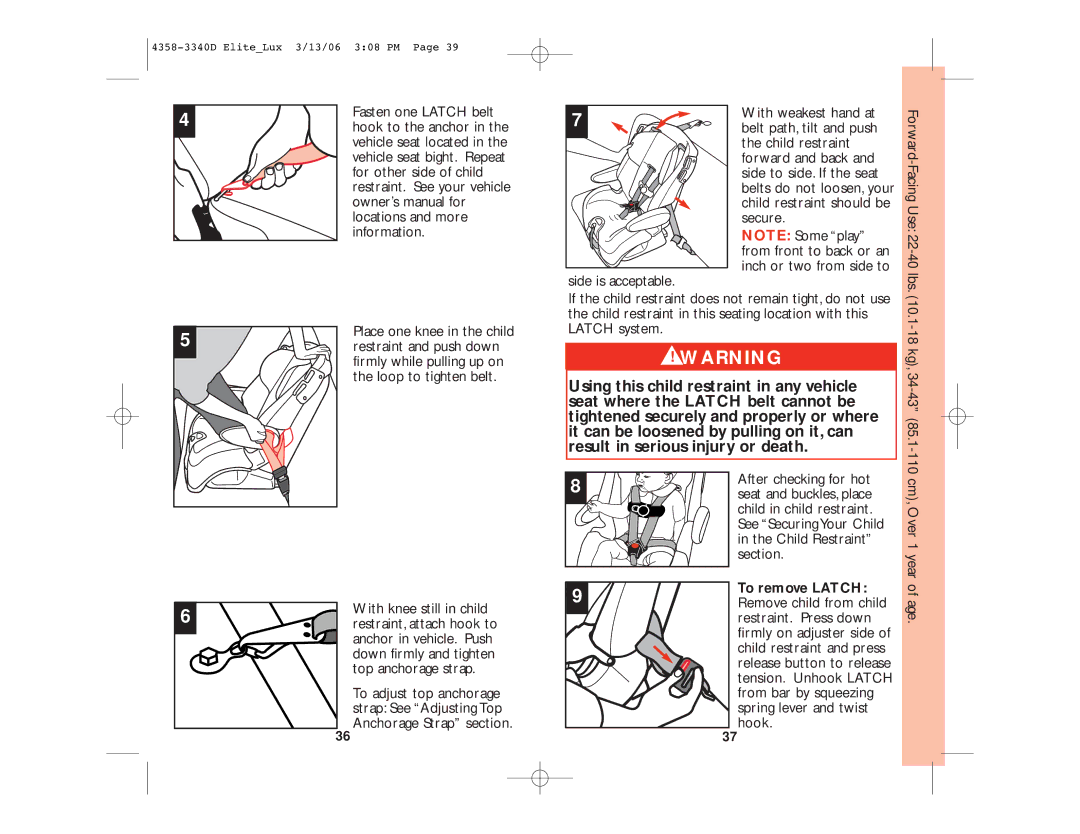
When LATCH is not available, fasten belt hooks together behind the child restraint as shown.
1
LEVEL
TO GROUND
2
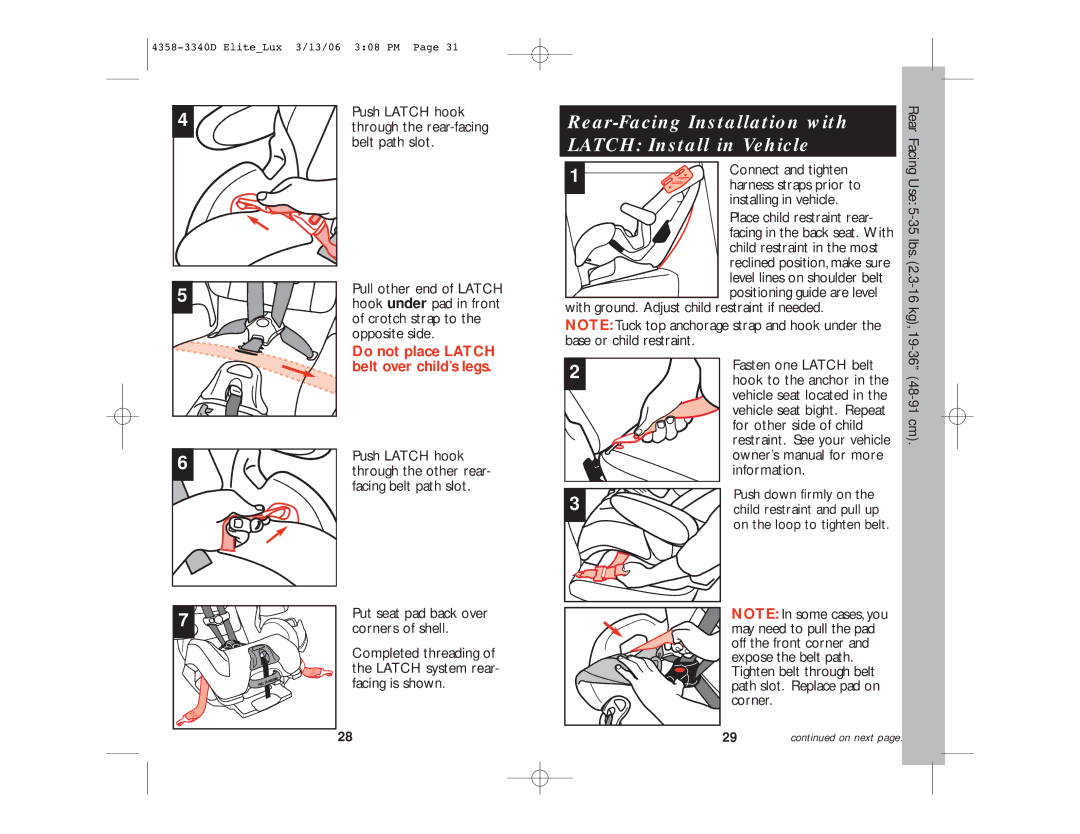
Connect and tighten harness straps prior to installing in vehicle.
Place child restraint rear- facing in the back seat. With child restraint in the most reclined position, make sure level lines on shoulder belt positioning guide are level with ground. Adjust child restraint if needed.
NOTE: Tuck top anchorage strap and hook under the base or child restraint.
Thread the vehicle lap or lap/shoulder belt combination through the
Use:
!WARNING:
A loose top anchorage (tether) strap can result in serious injury or death.
A loose LATCH system can result in serious injury or death.
24
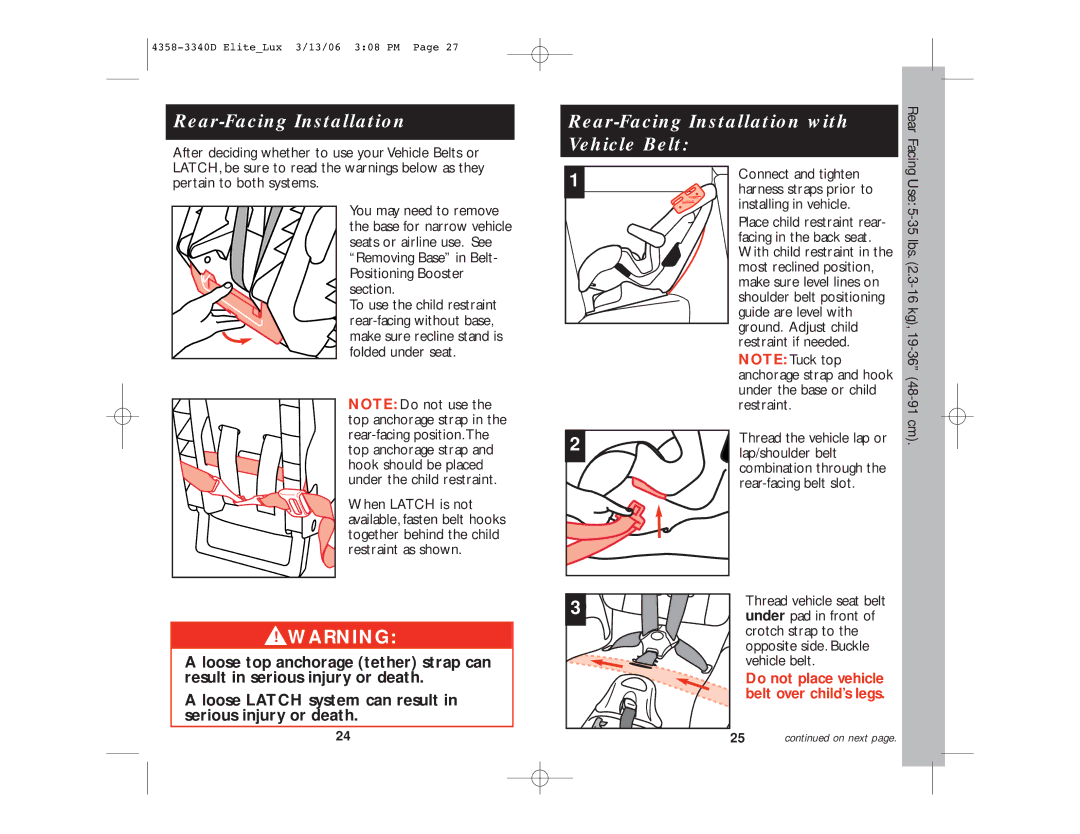
3 | Thread vehicle seat belt | |
under pad in front of | ||
| ||
| crotch strap to the | |
| opposite side. Buckle | |
| vehicle belt. | |
| Do not place vehicle | |
| belt over child’s legs. | |
25 | continued on next page. |