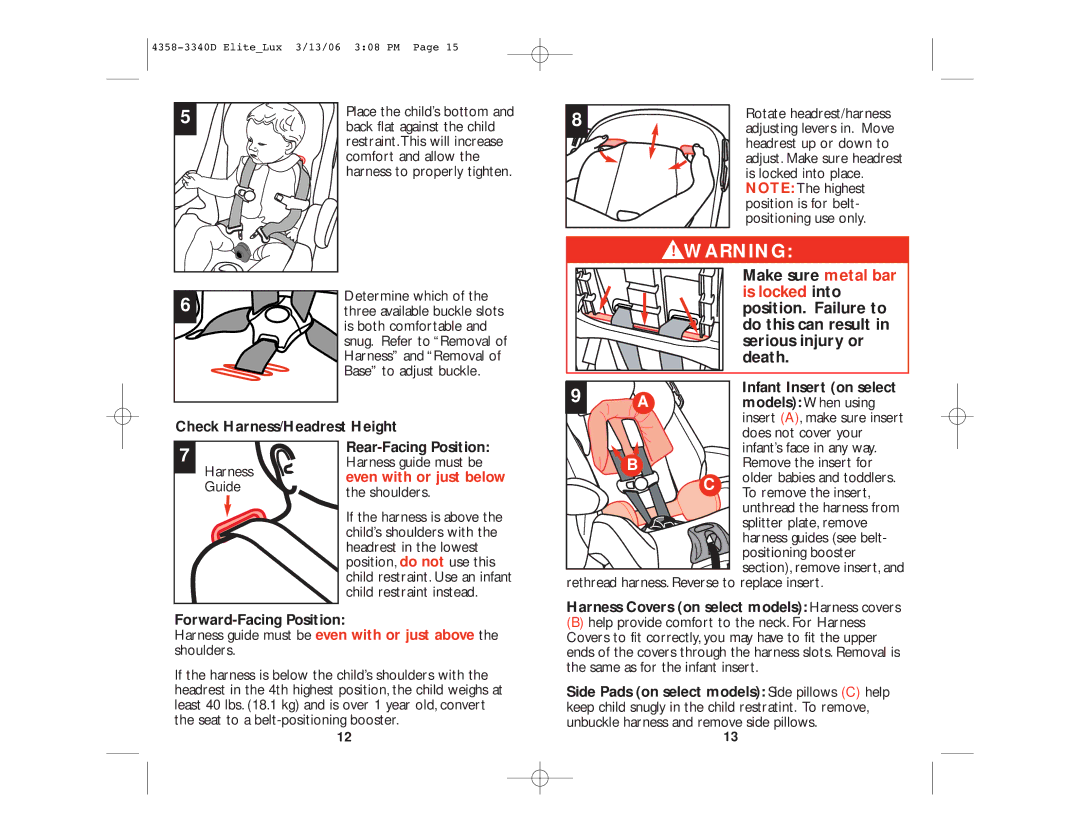
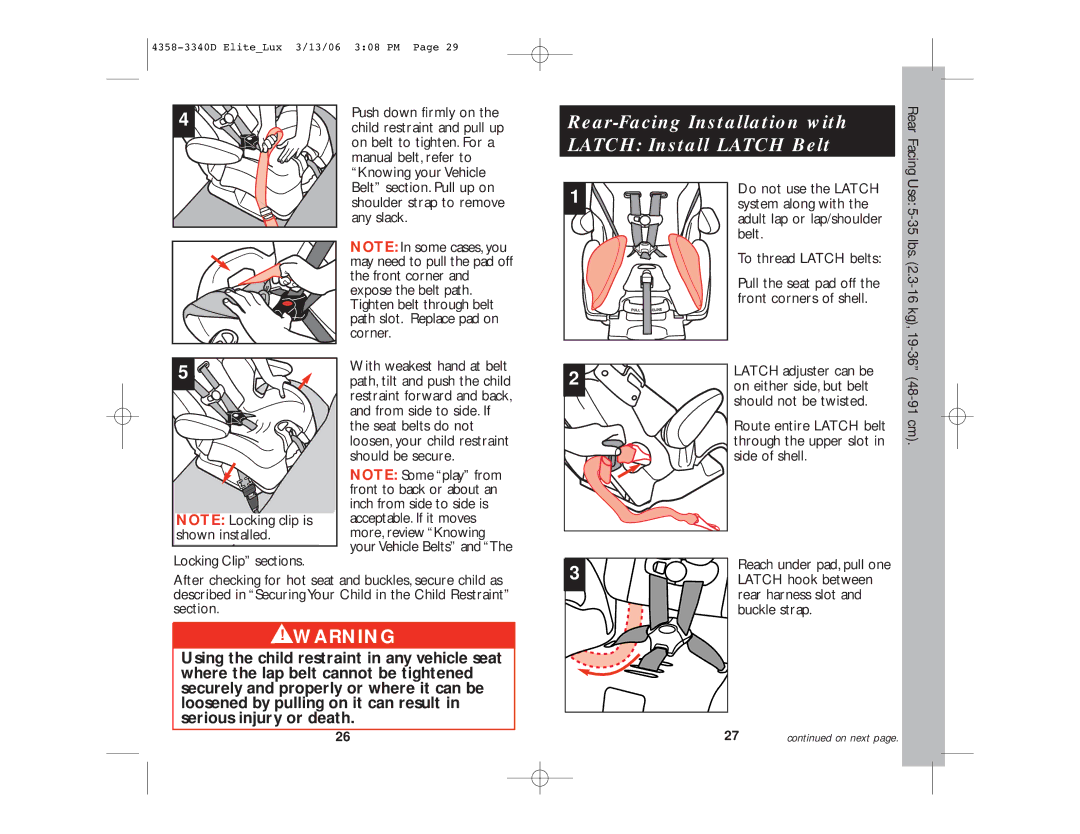
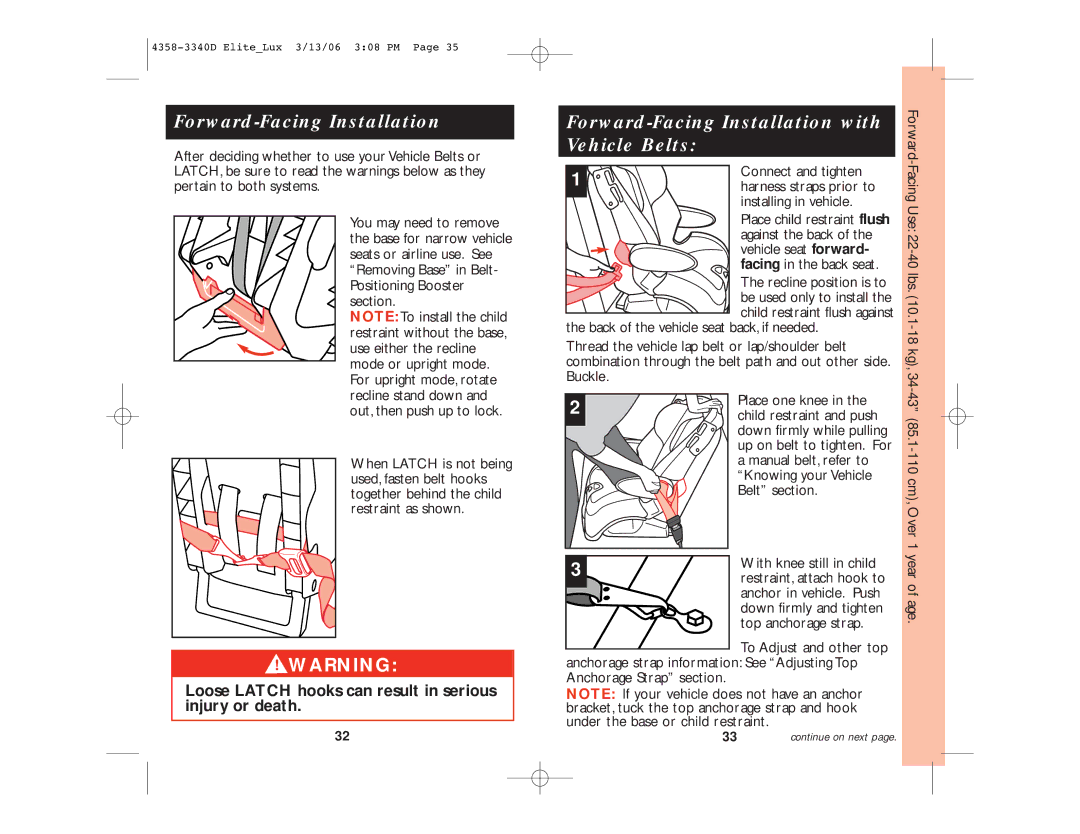
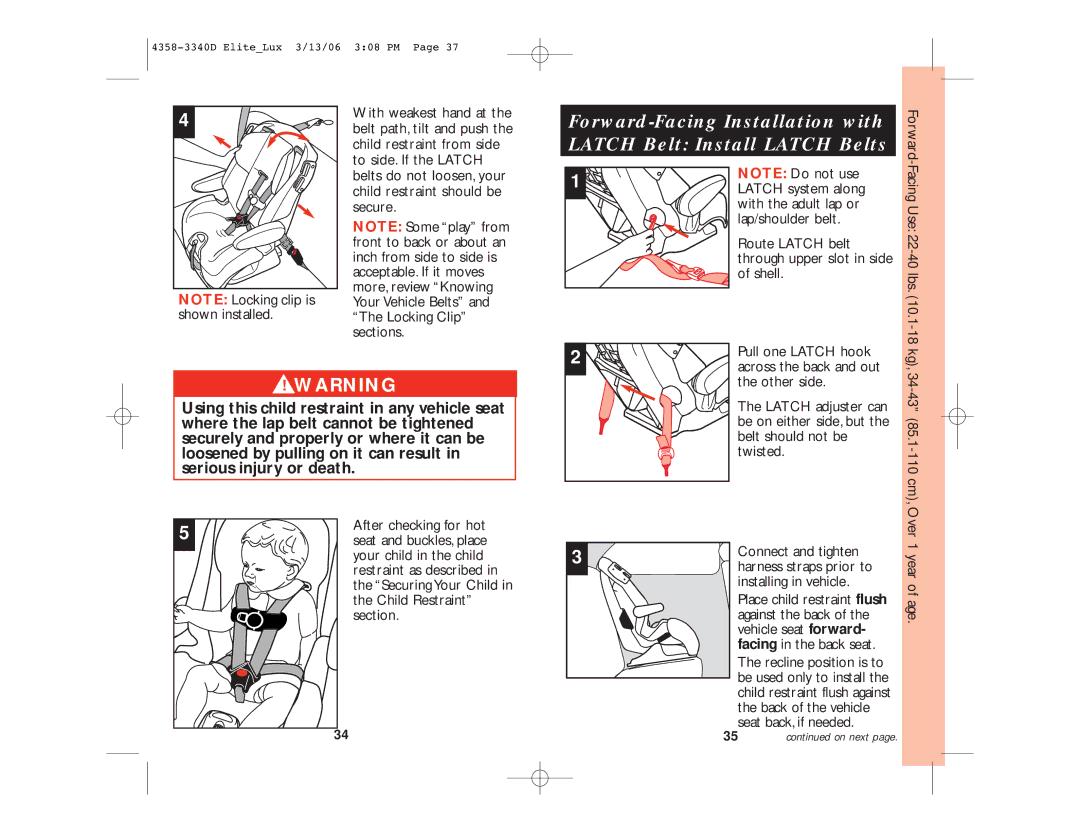
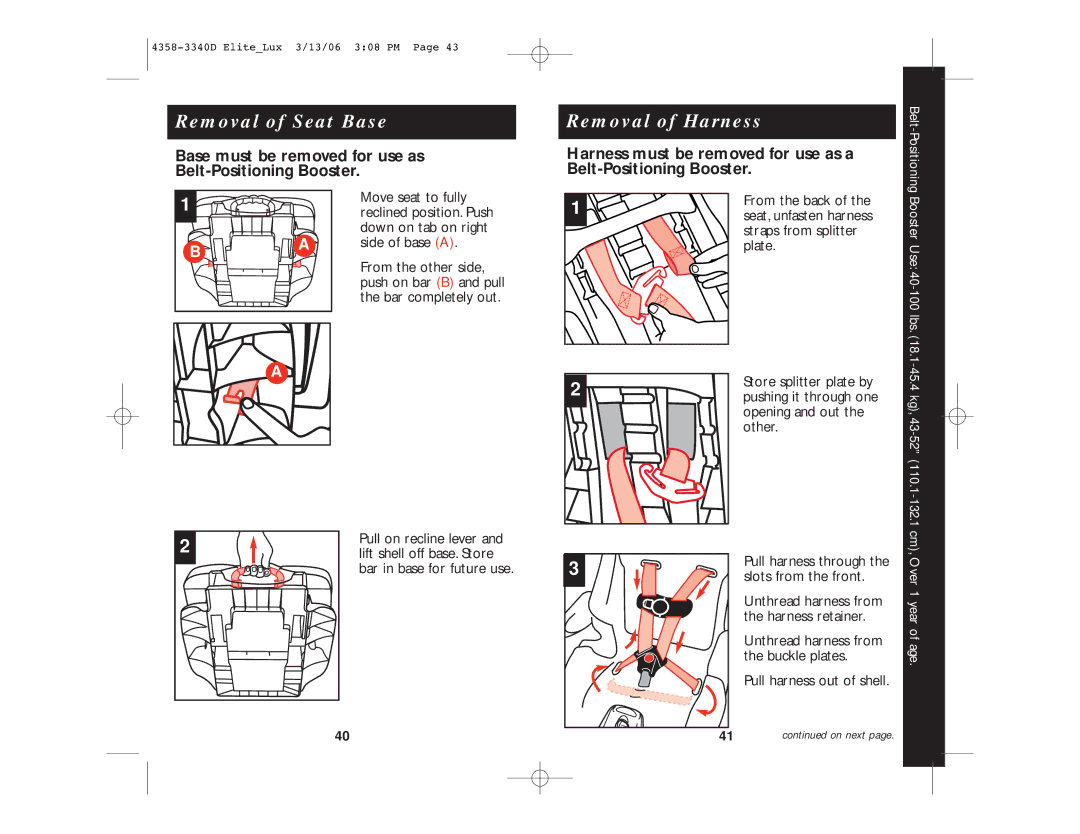
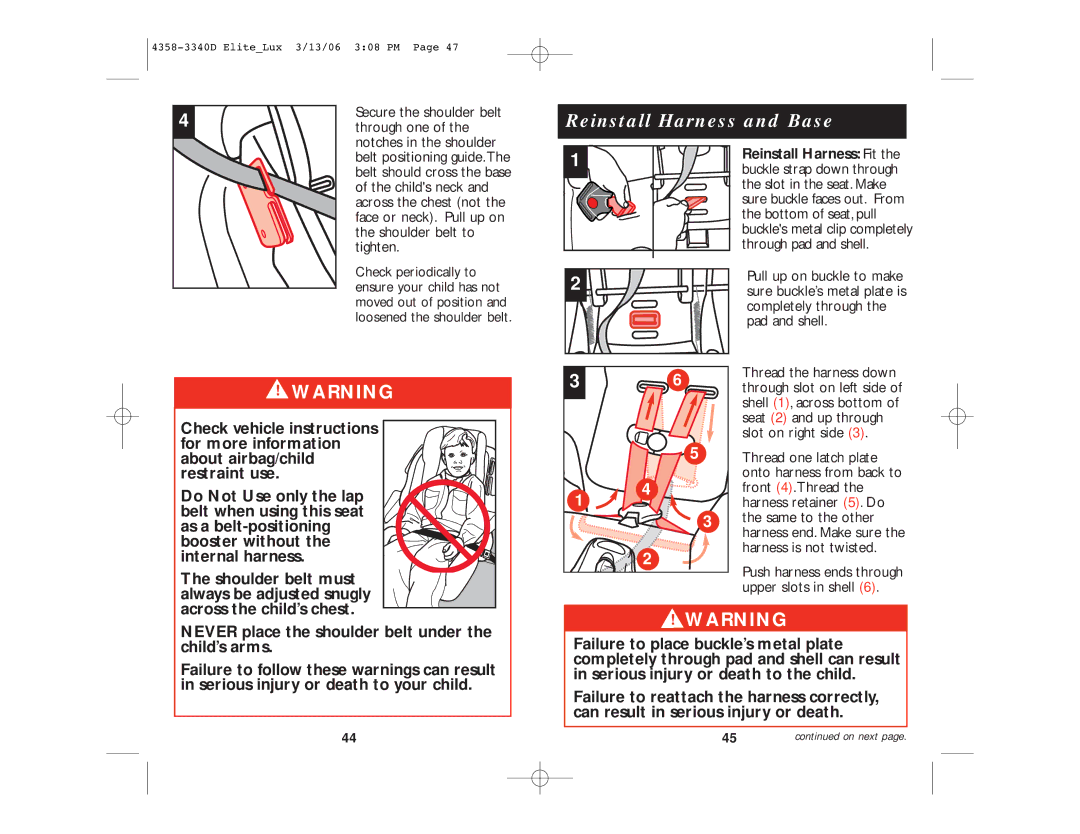
Eddie Bauer Luxe, Elite, 3-In-1, 4358-3340D Rear-Facing Installation with Latch Install in Vehicle

Page 16

4358-3340D Elite_Lux 3/13/06 3:08 PM Page 31

4

Push LATCH hook

through the rear-facing


belt path slot.

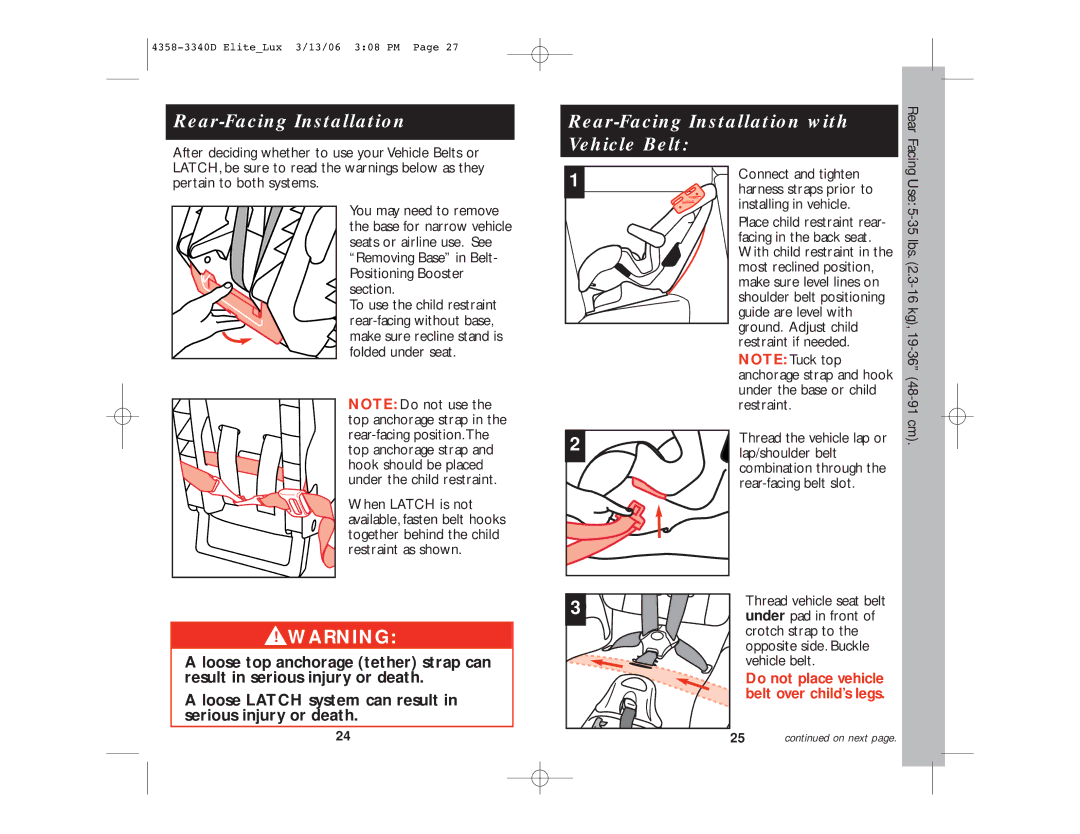
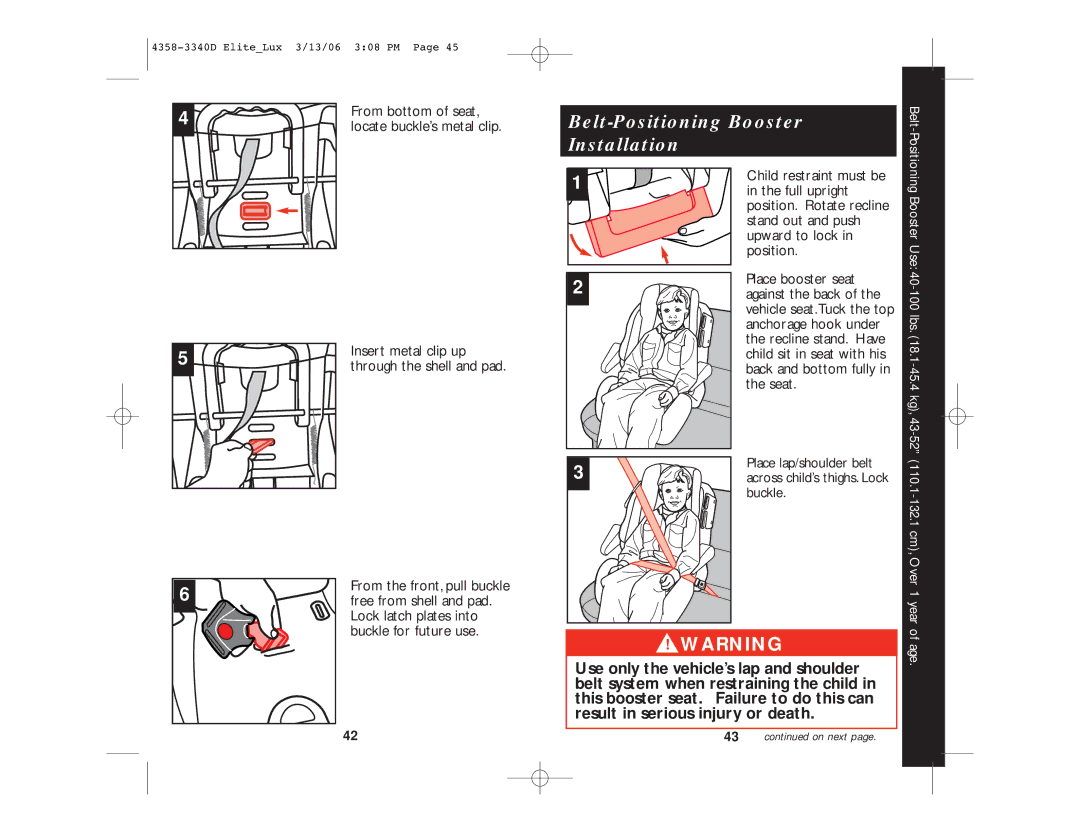
Rear-Facing Installation with LATCH: Install in Vehicle

Rear Facing

Pull other end of LATCH hook under pad in front of crotch strap to the opposite side.

1

LEVEL

Connect and tighten

TO GROUND

harness straps prior to


installing in vehicle.


Place child restraint rear-


facing in the back seat. With


child restraint in the most


reclined position, make sure


level lines on shoulder belt


positioning guide are level

with ground. Adjust child restraint if needed.

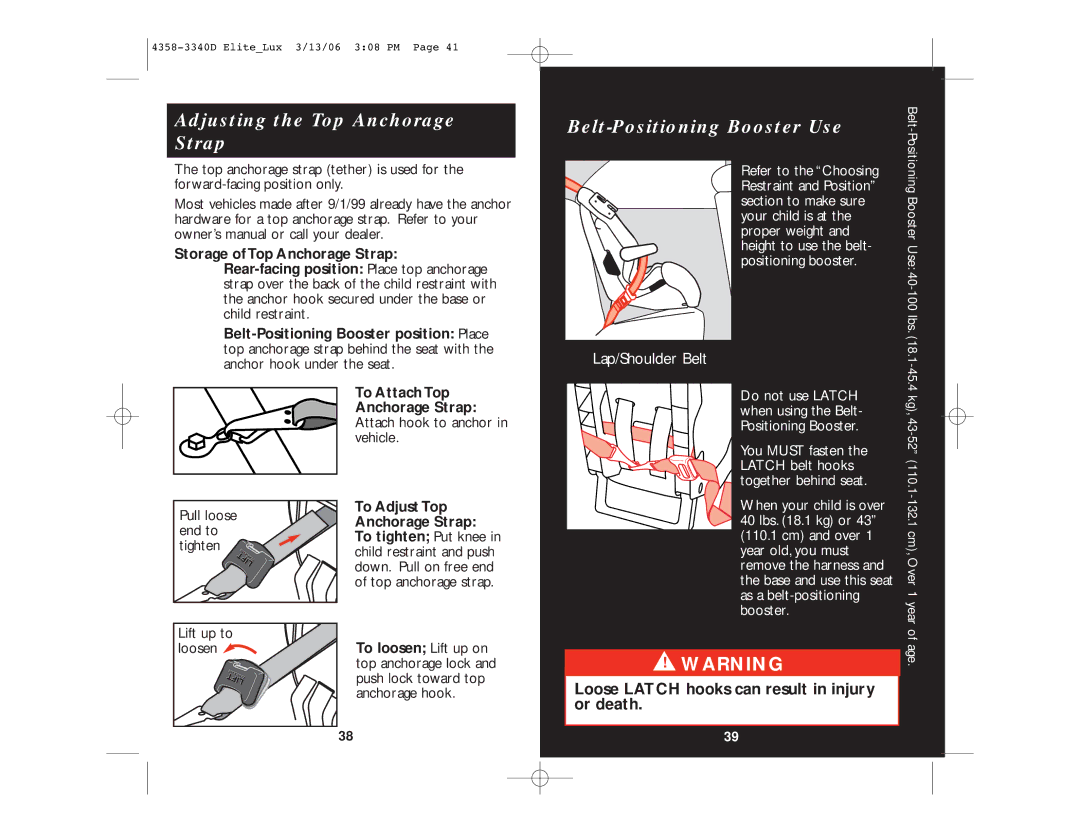
NOTE: Tuck top anchorage strap and hook under the base or child restraint.

Use: 5-35 lbs. (2.3-16 kg), 19

Do not place LATCH belt over child’s legs.
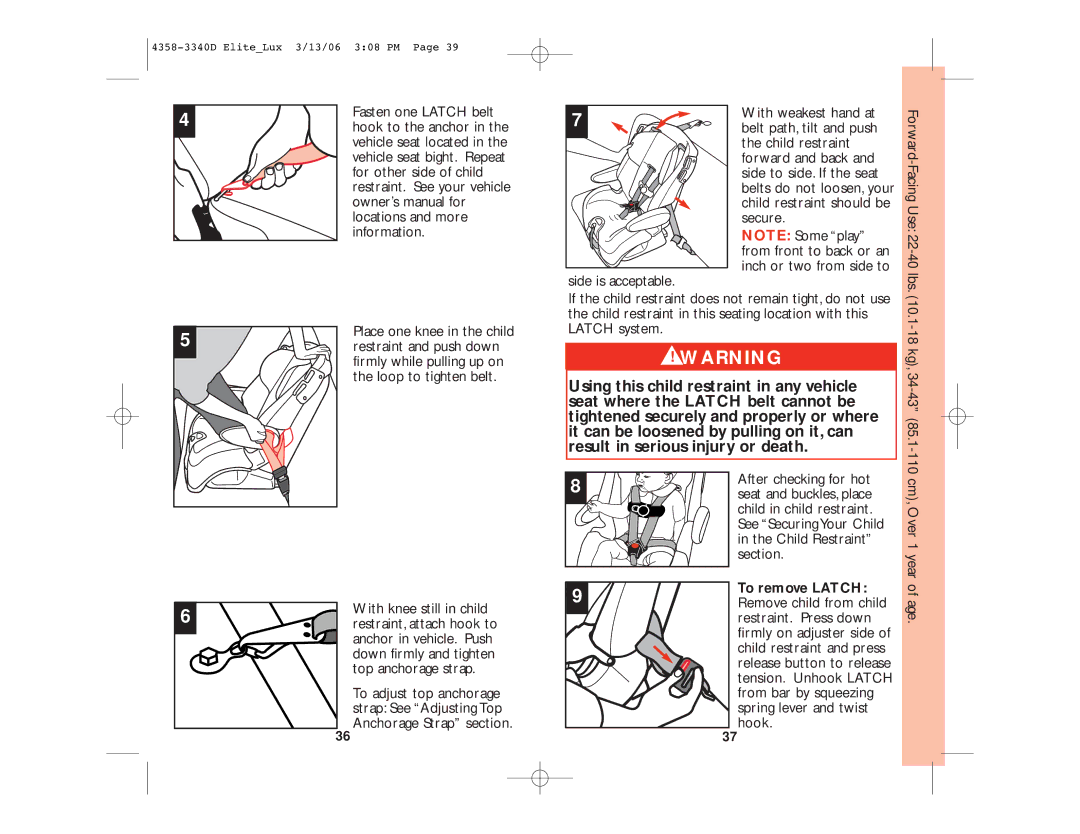
2

Fasten one LATCH belt hook to the anchor in the vehicle seat located in the vehicle seat bight. Repeat for other side of child restraint. See your vehicle

-36” (48-91 cm).

6

Push LATCH hook through the other rear- facing belt path slot.

3

owner’s manual for more information.

Push down firmly on the child restraint and pull up on the loop to tighten belt.

7

Put seat pad back over corners of shell.

Completed threading of the LATCH system rear- facing is shown.

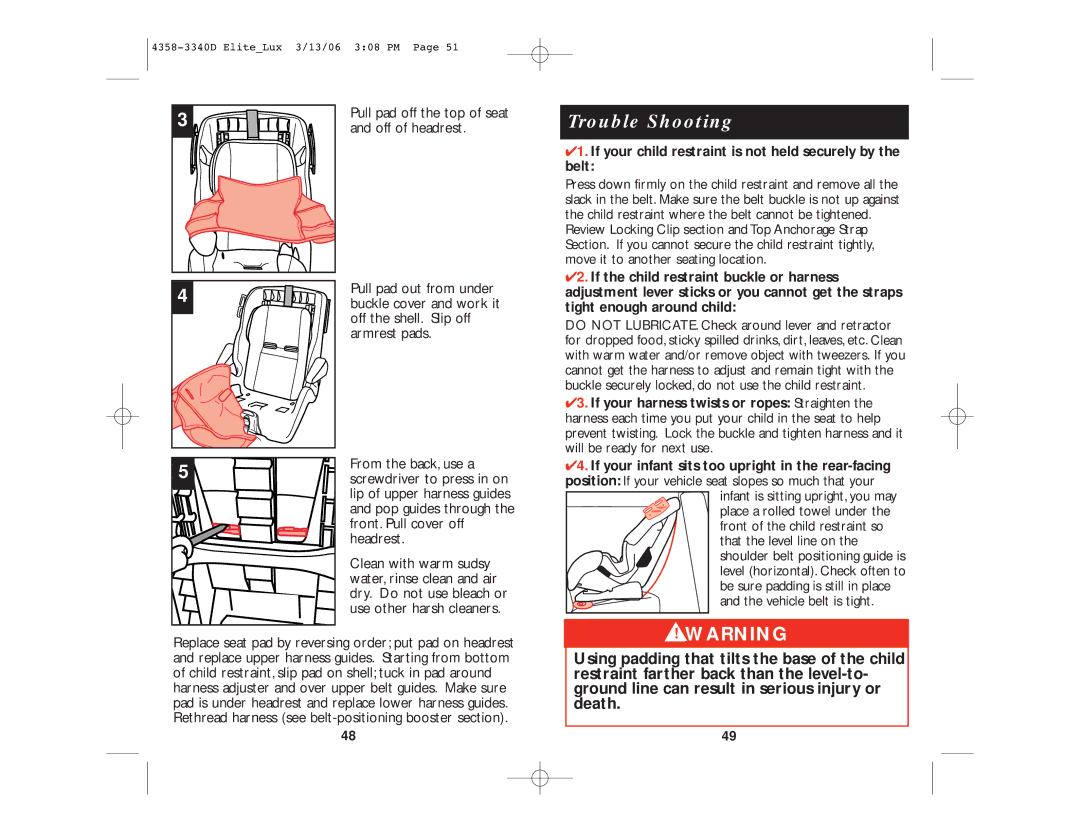
NOTE: In some cases, you may need to pull the pad off the front corner and expose the belt path. Tighten belt through belt path slot. Replace pad on corner.

28

29

continued on next page.

Image 16 Contents
Alpha Omega Elite/Luxe Deluxe 3-In-1 Table of Contents Before You BeginNever place a child less than one-year old forward facing Aircraft Installation General and Warm Weather UseRegistration and Recall Information Dorel Juvenile Group, Inc PO Box 2609, Columbus,Seat Buckles Air Bag Seat Bight Where seat cushions meet Understanding Your VehicleAnchor Bracket Latch AnchorsChild Restraint Parts Headrest/Harness FHeadrest Harness Release Infant Insert Top Anchorage Tether Strap & HookChoosing Restraint and Position Preparing Child Restraint to Fit Your ChildLbs 2.3-16 kg -91 cm Make sure Latch beltCheck Harness/Headrest Height Rear-Facing PositionForward-Facing Position Harness Covers on select models Harness coversPull on harness adjustment strap to tighten harness snugly Securing Your Child in the Child RestraintSnap the harness retainer together Position the harness Child’s neckRotating Armrests Knowing Your Vehicle Belts Choosing Latch or Vehicle BeltsAutomatic/Passive vehicle seat belts Vehicle belt too short Locking Clip Manual BeltsRear-Facing Use Rear-Facing Installation Rear-Facing Installation with Vehicle BeltRear-Facing Installation with Latch Install Latch Belt Shown installedRear-Facing Installation with Latch Install in Vehicle Forward-Facing Use Forward-Facing Installation Forward-Facing Installation with Vehicle BeltsRestraint as described Your child in the childOver 1 year of age Fasten one Latch belt For other side of childLocations and more InformationAdjusting the Top Anchorage Strap To Adjust TopBelt-Positioning Booster Use Anchorage StrapRemoval of Harness Removal of Seat BasePull harness out of shell Belt-Positioning Booster Installation Free from shell and padLock latch plates into Buckle for future useReinstall Harness and Base Through oneChilds neck Shoulder belt toRemove Seat Pad for Cleaning Reinstall BaseTrouble Shooting Off of headrestOff the shell. Slip off Armrest padsWarranty Limitation of DamagesReplacement Parts Order Form Fax orders to
Related manuals
Manual 28 pages 62.48 Kb