

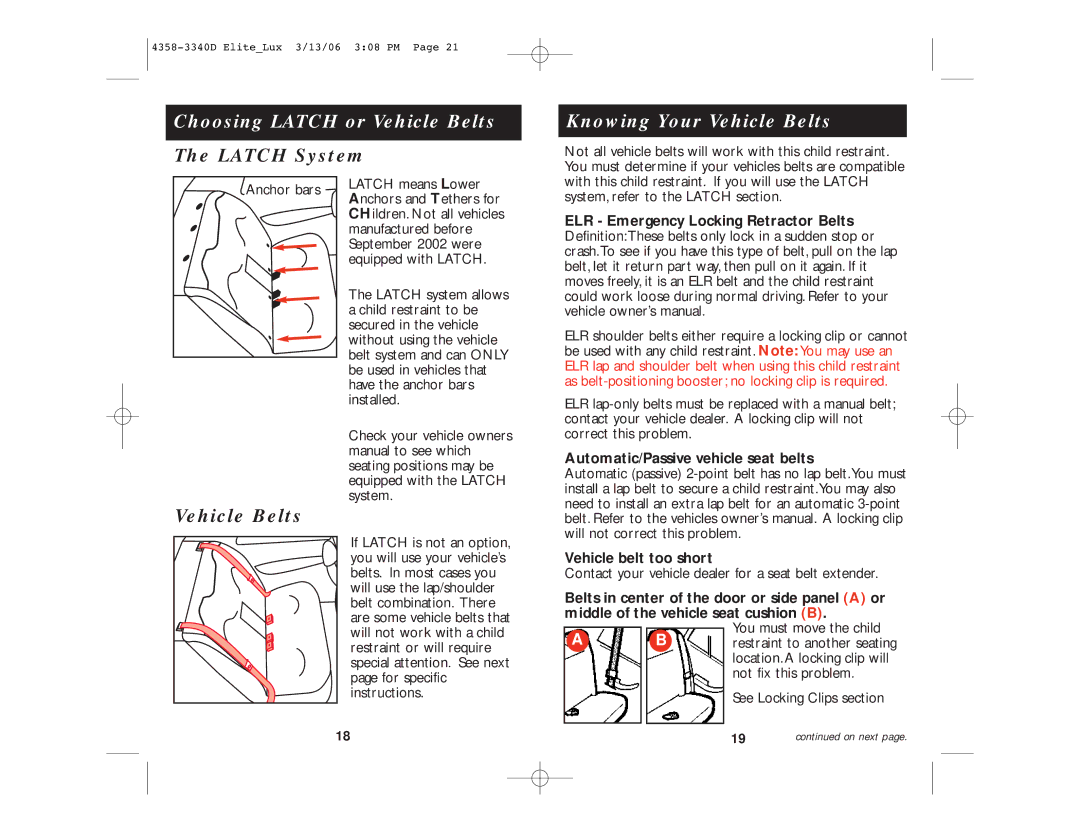
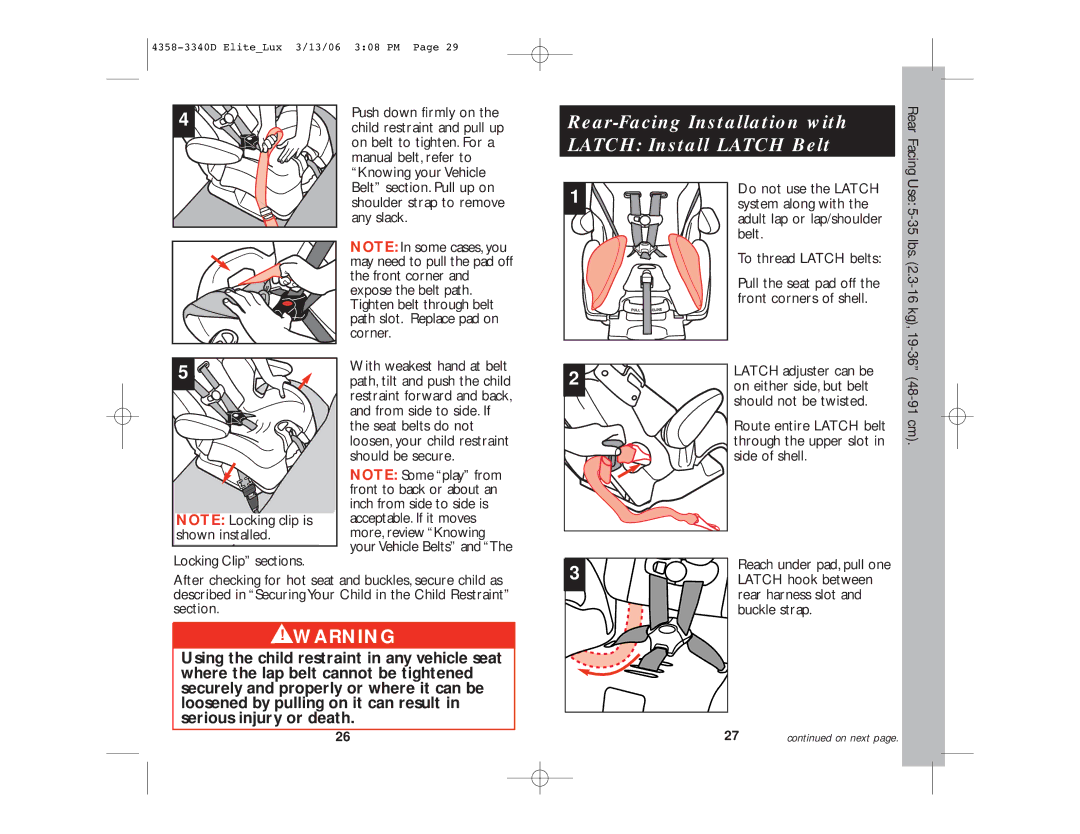


Forward-Facing Installation
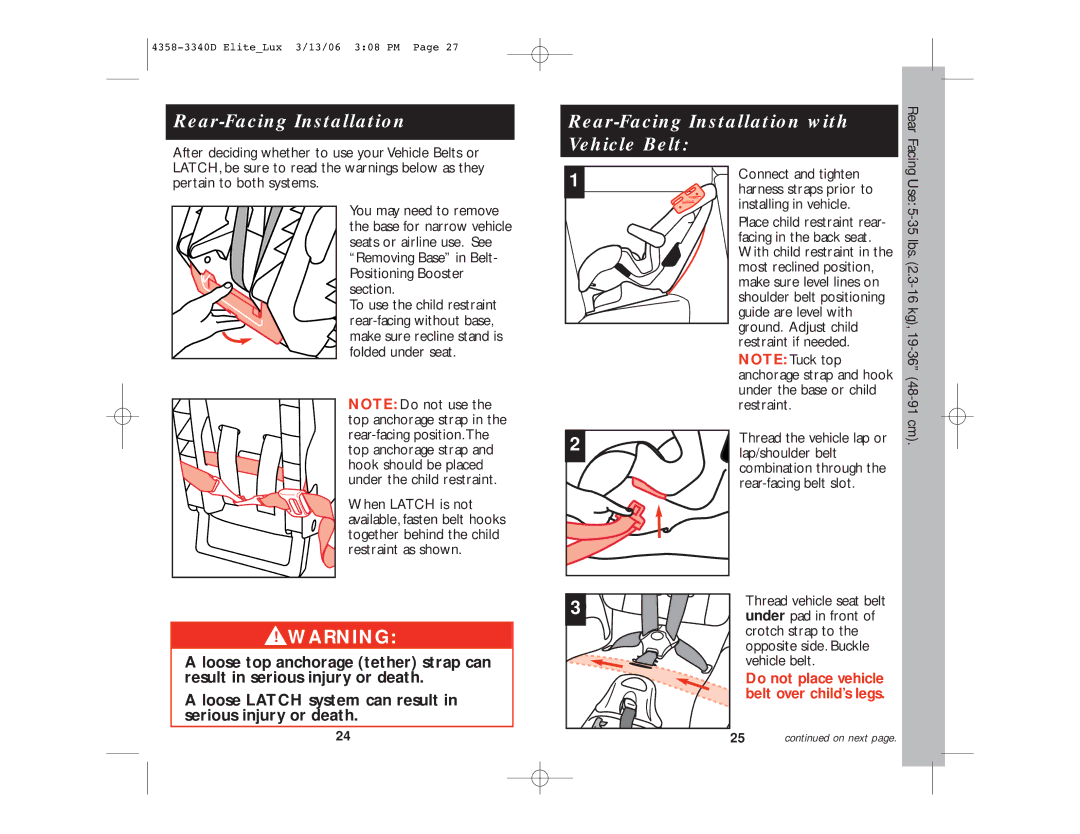
After deciding whether to use your Vehicle Belts or LATCH, be sure to read the warnings below as they pertain to both systems.
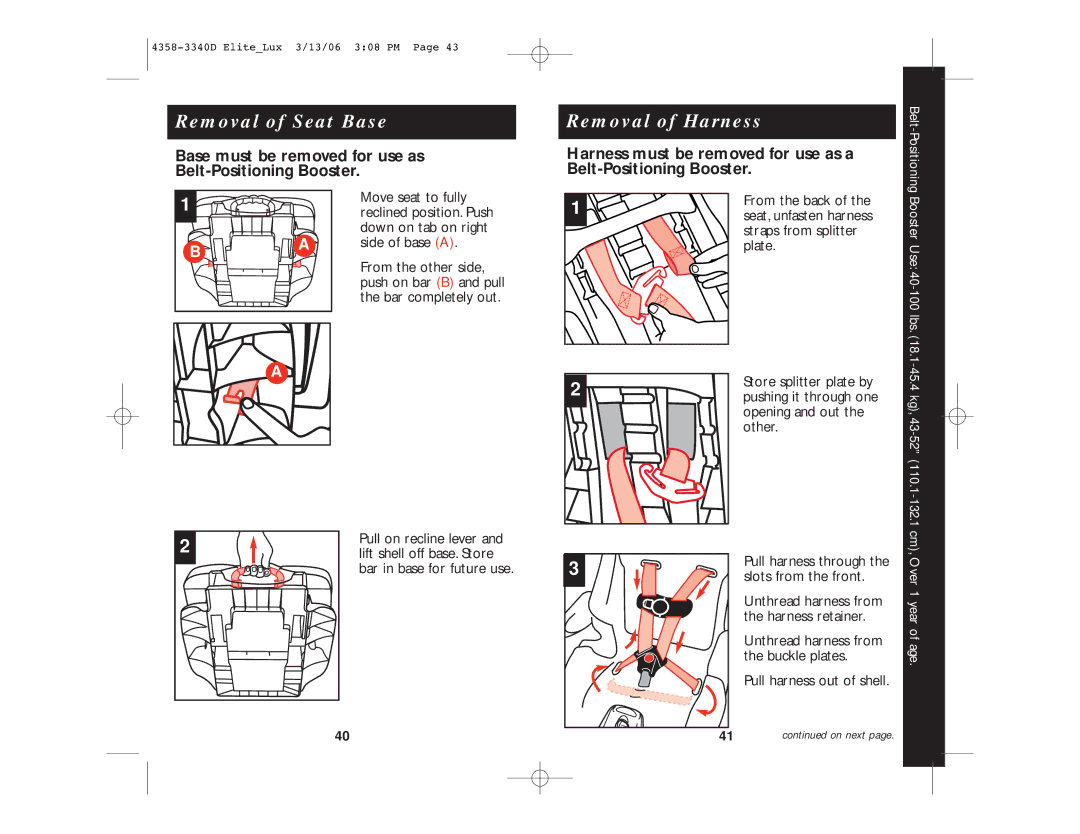
You may need to remove the base for narrow vehicle seats or airline use. See “Removing Base” in Belt- Positioning Booster section.
NOTE: To install the child restraint without the base, use either the recline mode or upright mode. For upright mode, rotate recline stand down and out, then push up to lock.
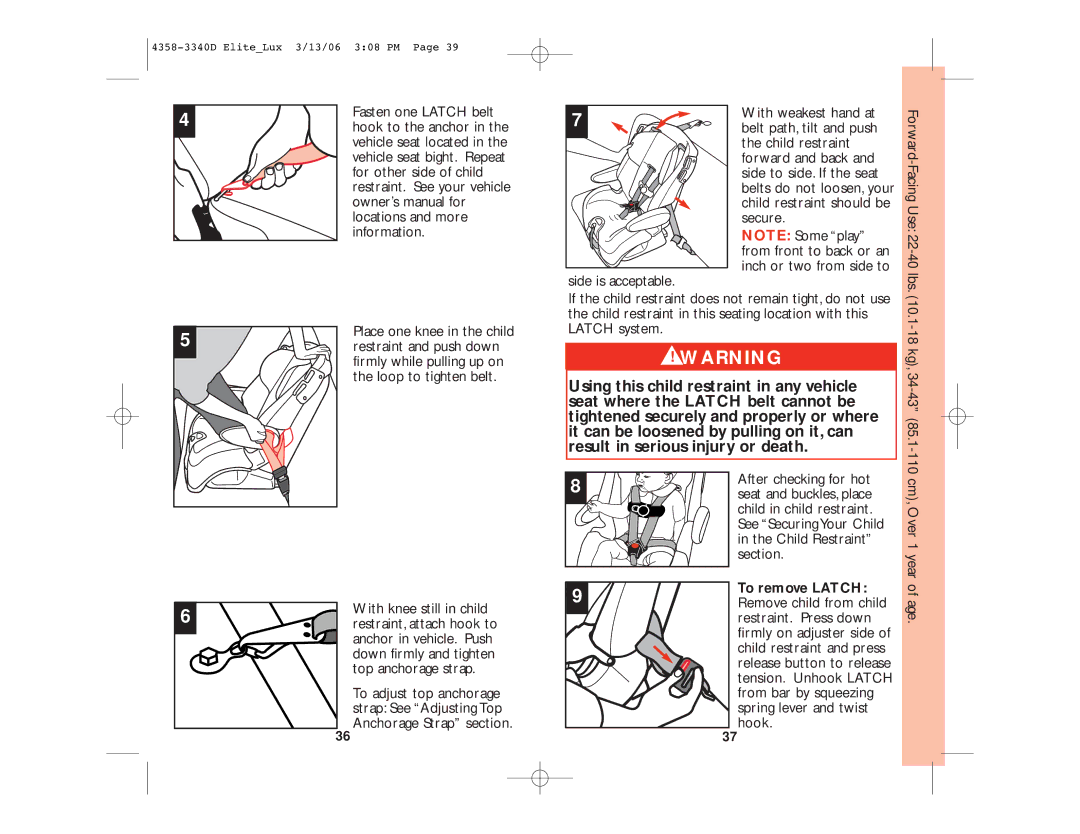
When LATCH is not being used, fasten belt hooks together behind the child restraint as shown.
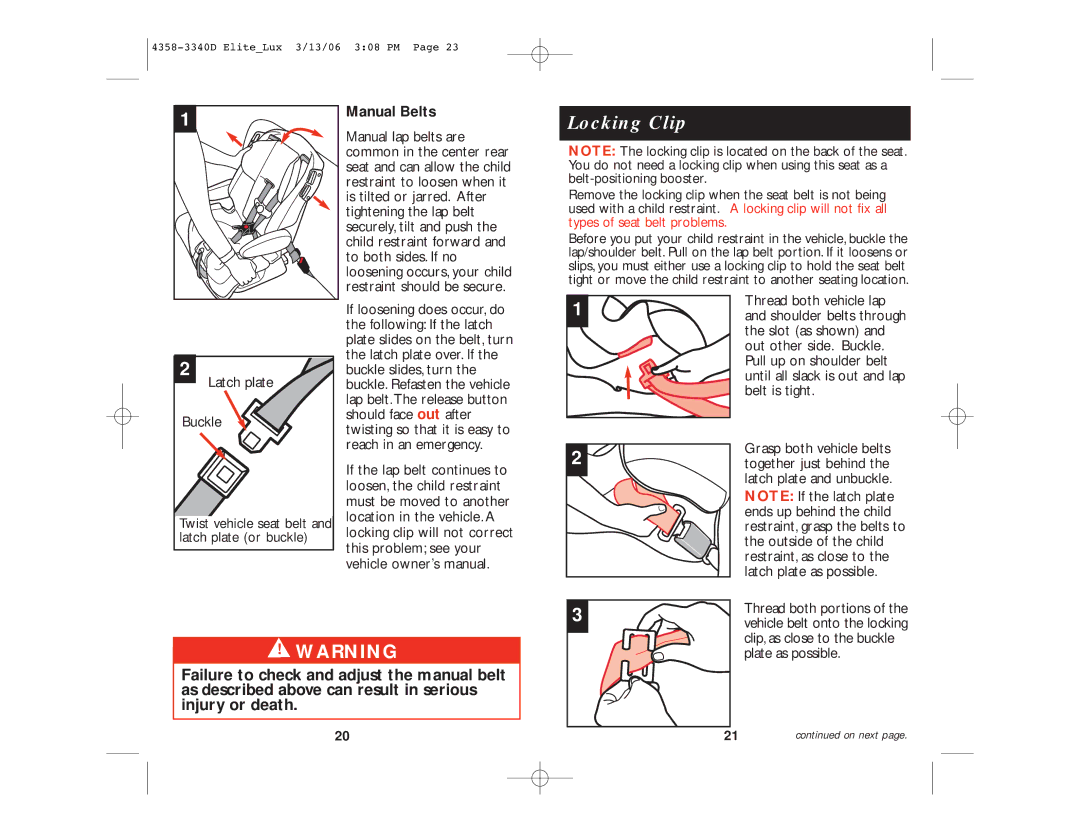
!WARNING:
Loose LATCH hooks can result in serious injury or death.
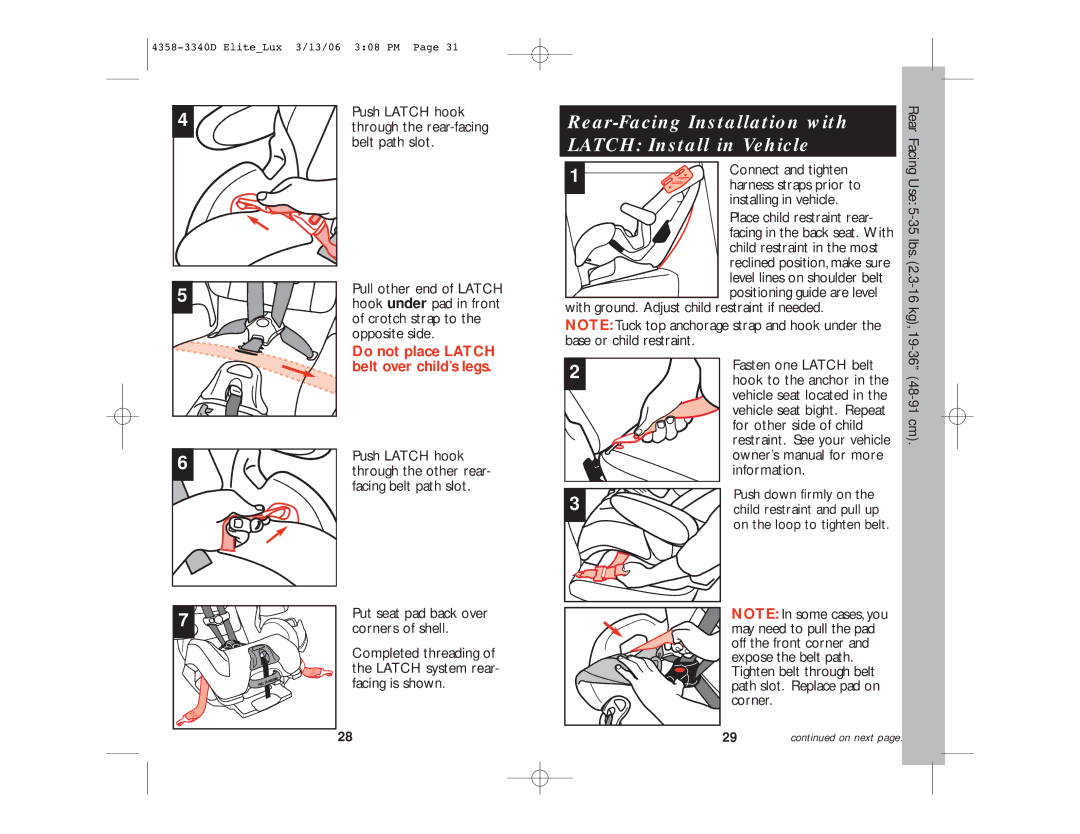
Forward-Facing Installation with Vehicle Belts:
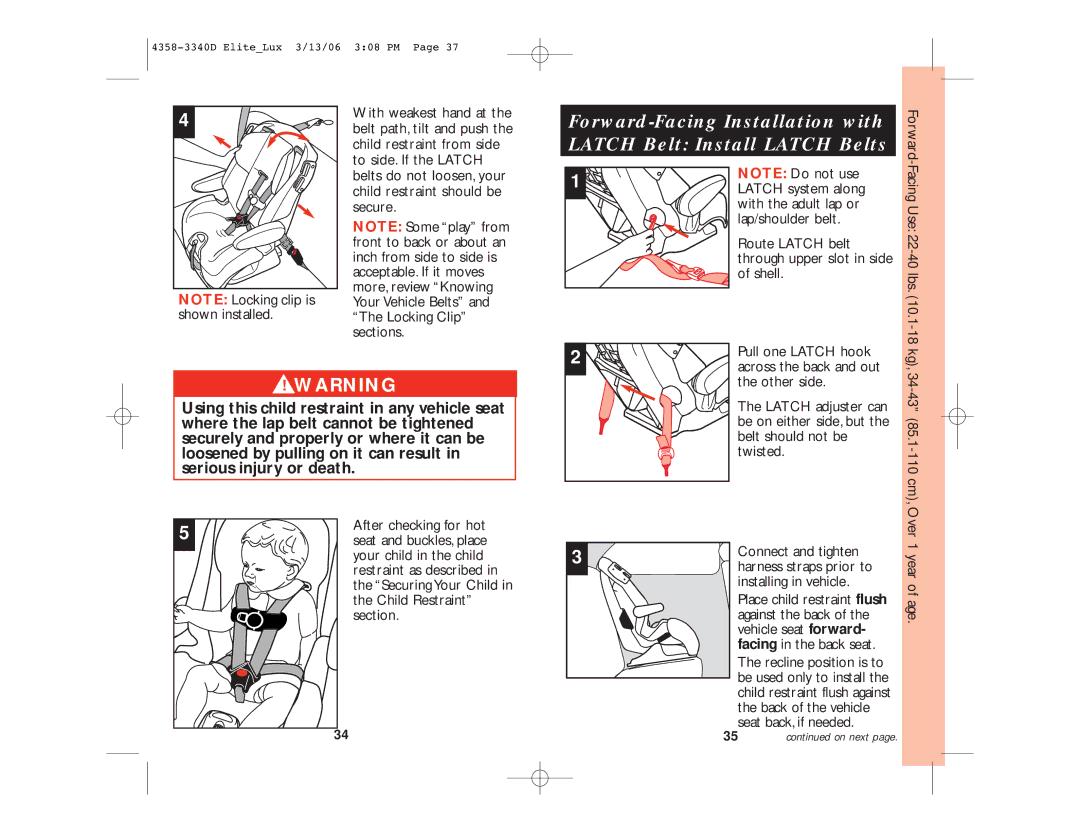
1 | Connect and tighten |
harness straps prior to | |
| installing in vehicle. |
| Place child restraint flush |
| against the back of the |
| vehicle seat forward- |
| facing in the back seat. |
| The recline position is to |
| be used only to install the |
| child restraint flush against |
the back of the vehicle seat back, if needed.
Thread the vehicle lap belt or lap/shoulder belt combination through the belt path and out other side. Buckle.
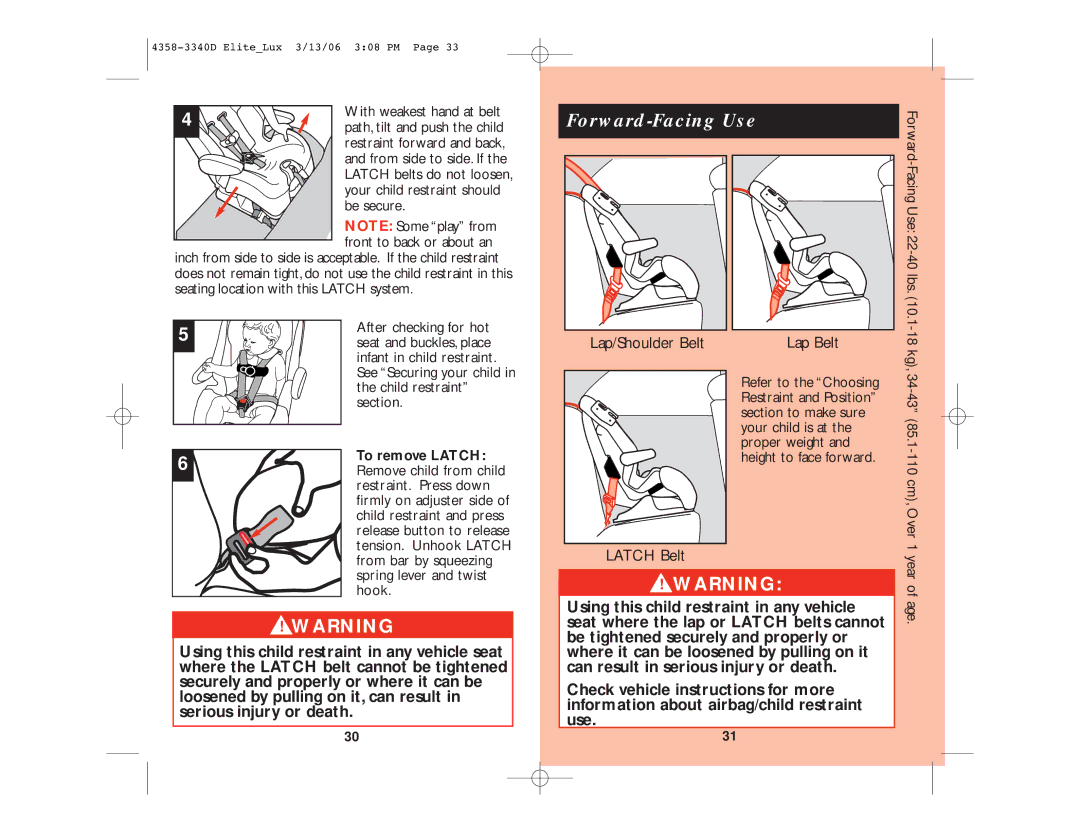
2 | Place one knee in the | |
child restraint and push | ||
| down firmly while pulling | |
| up on belt to tighten. For | |
| a manual belt, refer to | |
| “Knowing your Vehicle | |
| Belt” section. | |
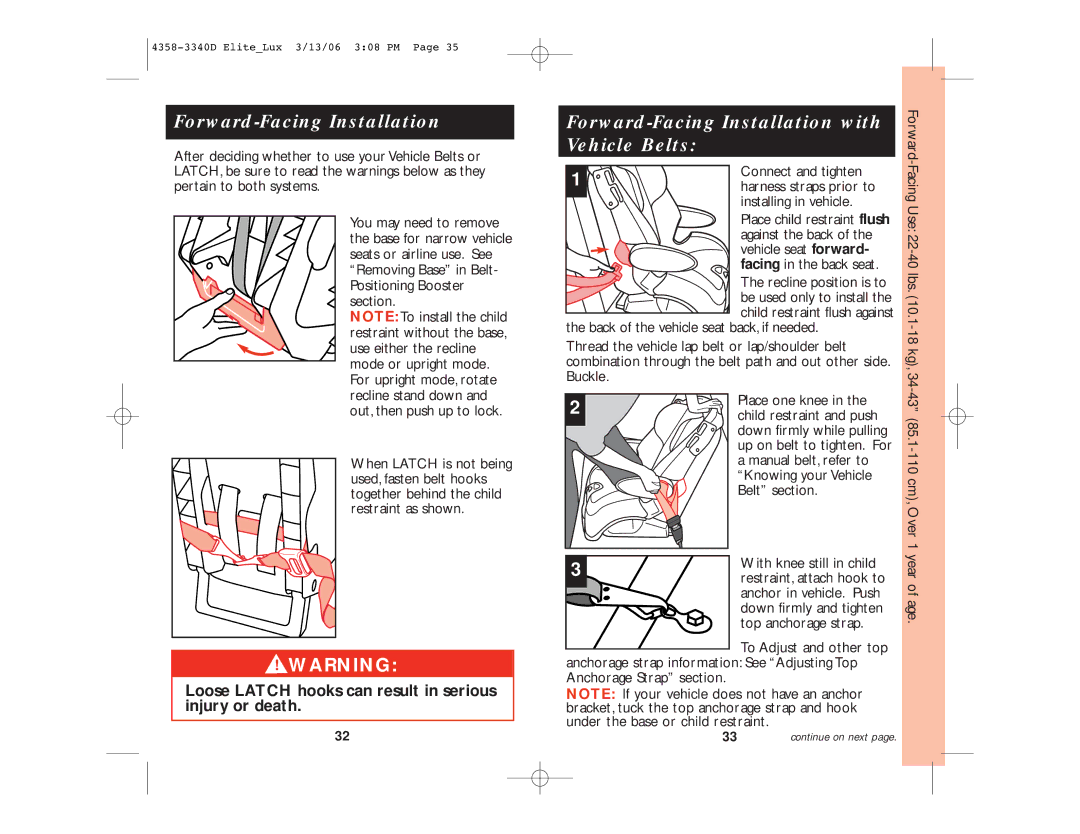
3 | With knee still in child | |
restraint, attach hook to | ||
| ||
| anchor in vehicle. Push | |
| down firmly and tighten | |
| top anchorage strap. |
To Adjust and other top
anchorage strap information: See “Adjusting Top Anchorage Strap” section.
NOTE: If your vehicle does not have an anchor bracket, tuck the top anchorage strap and hook under the base or child restraint.
32 | 33 | continue on next page. |