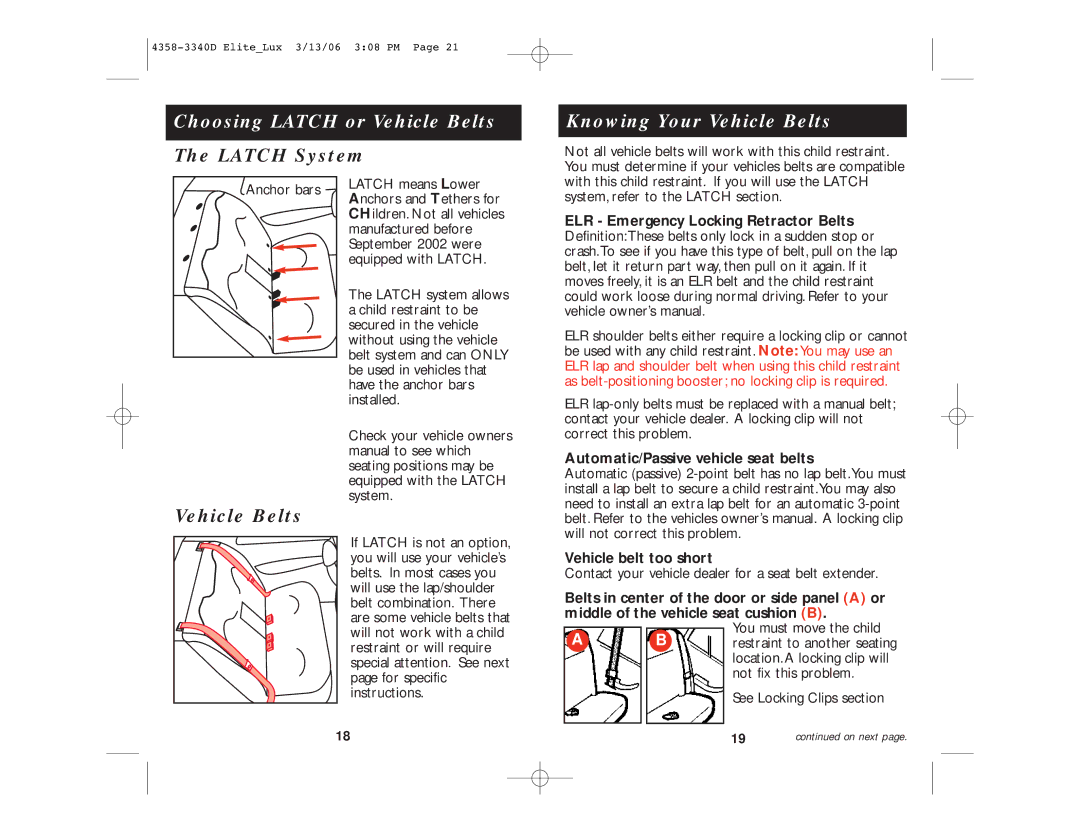
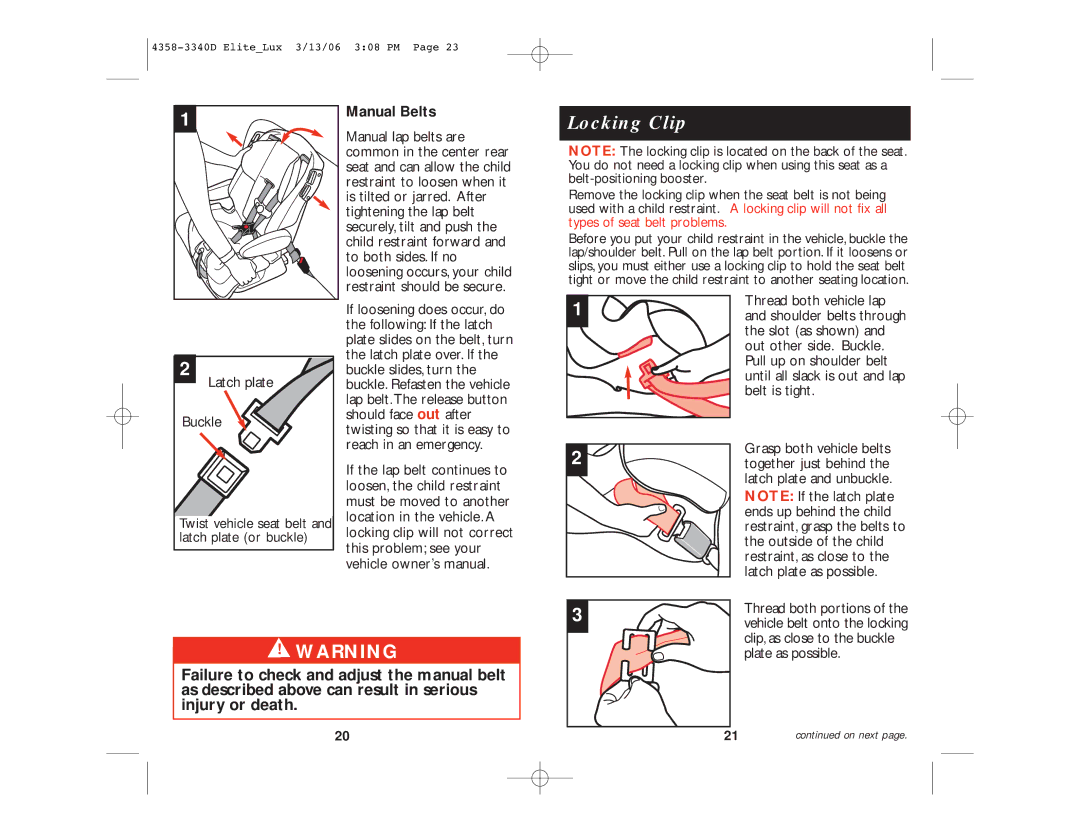
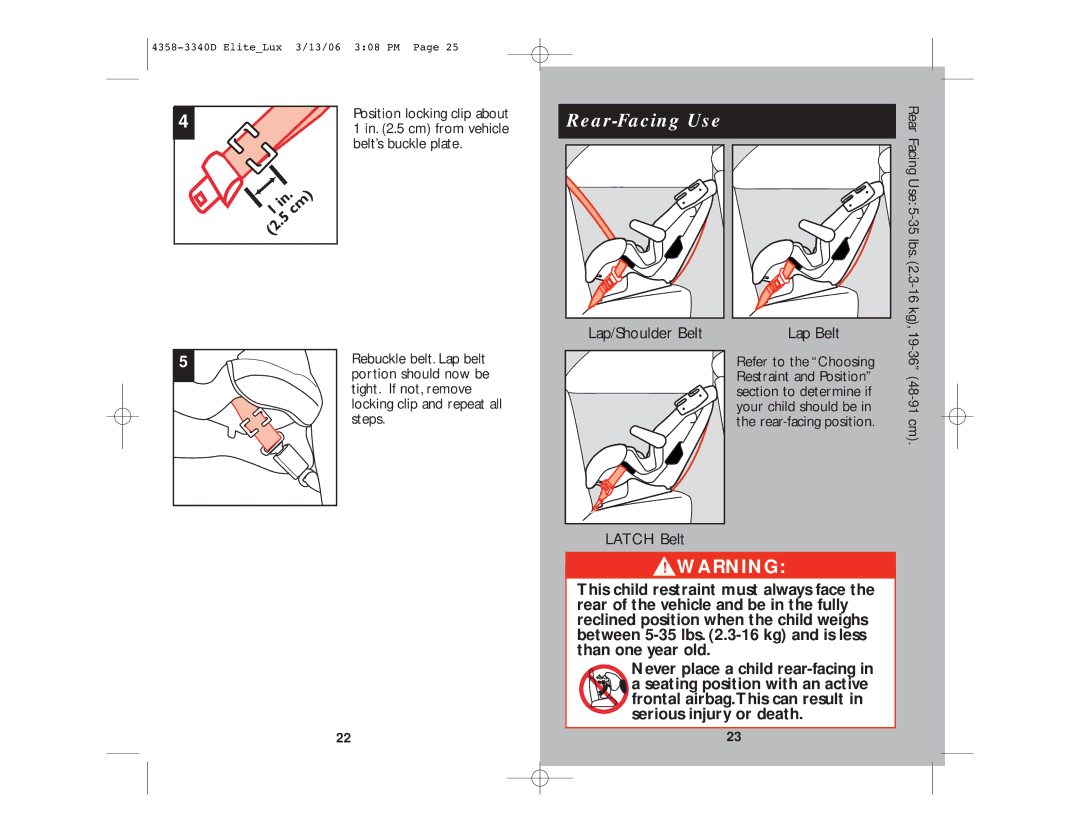
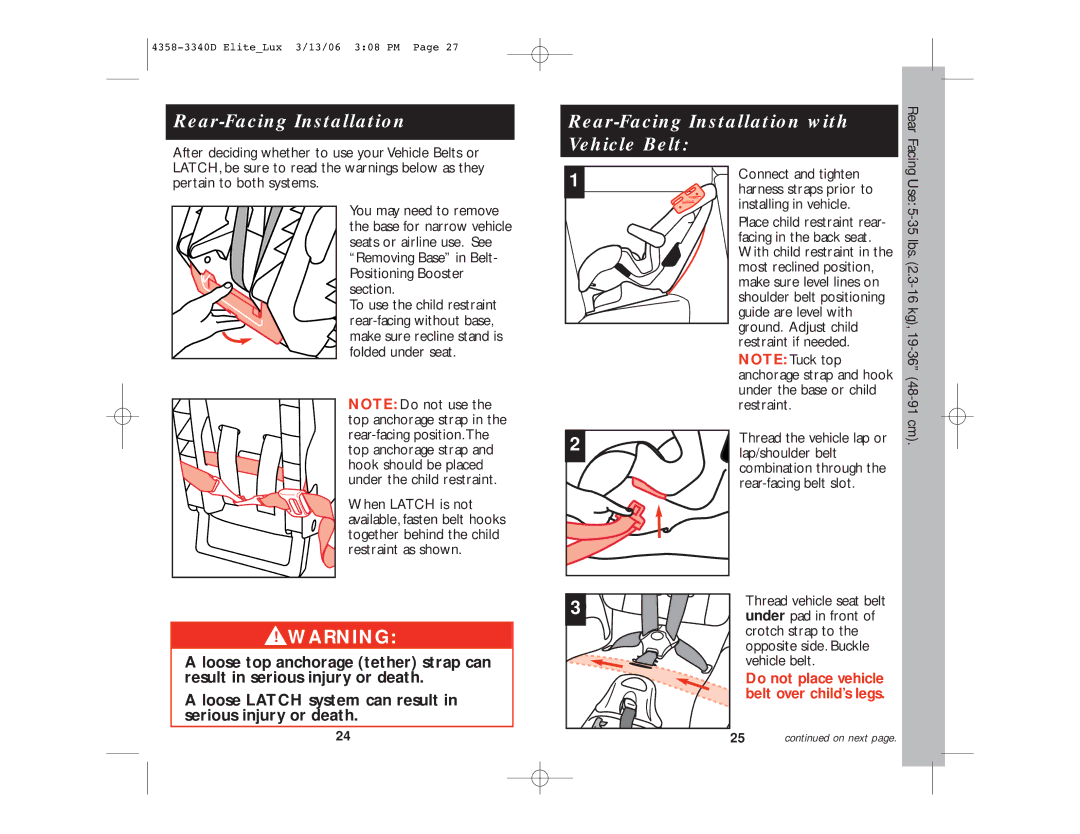
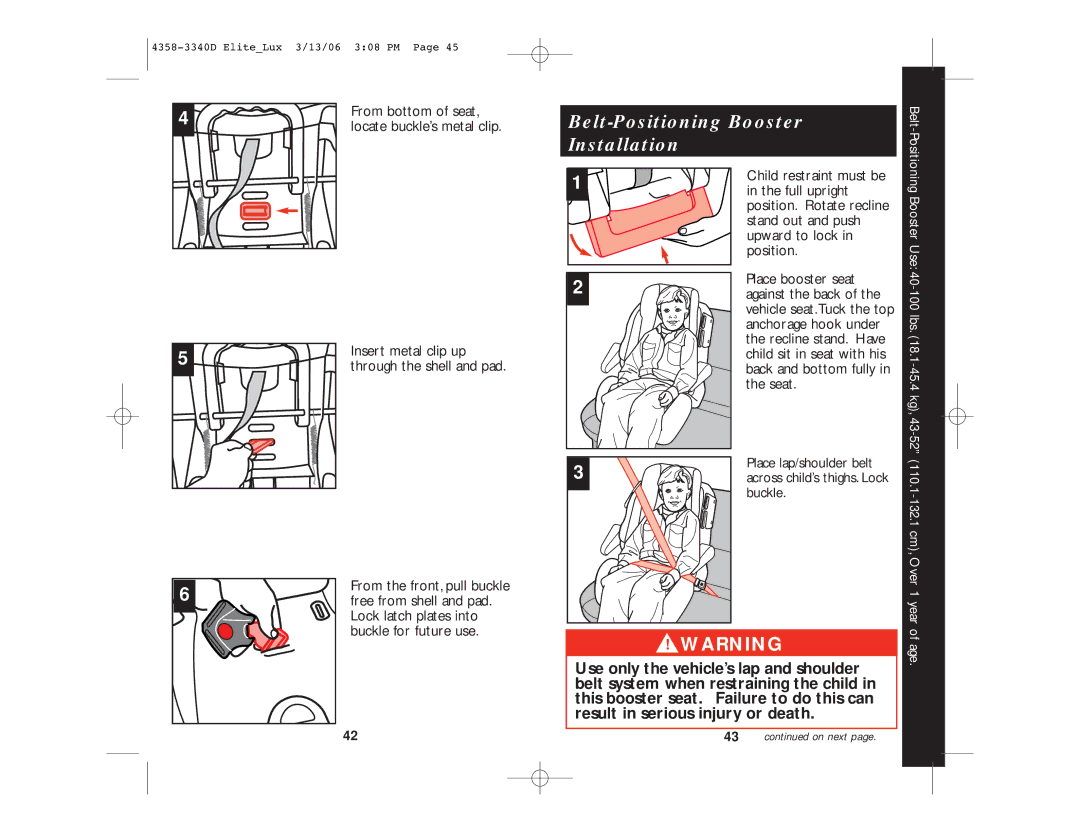
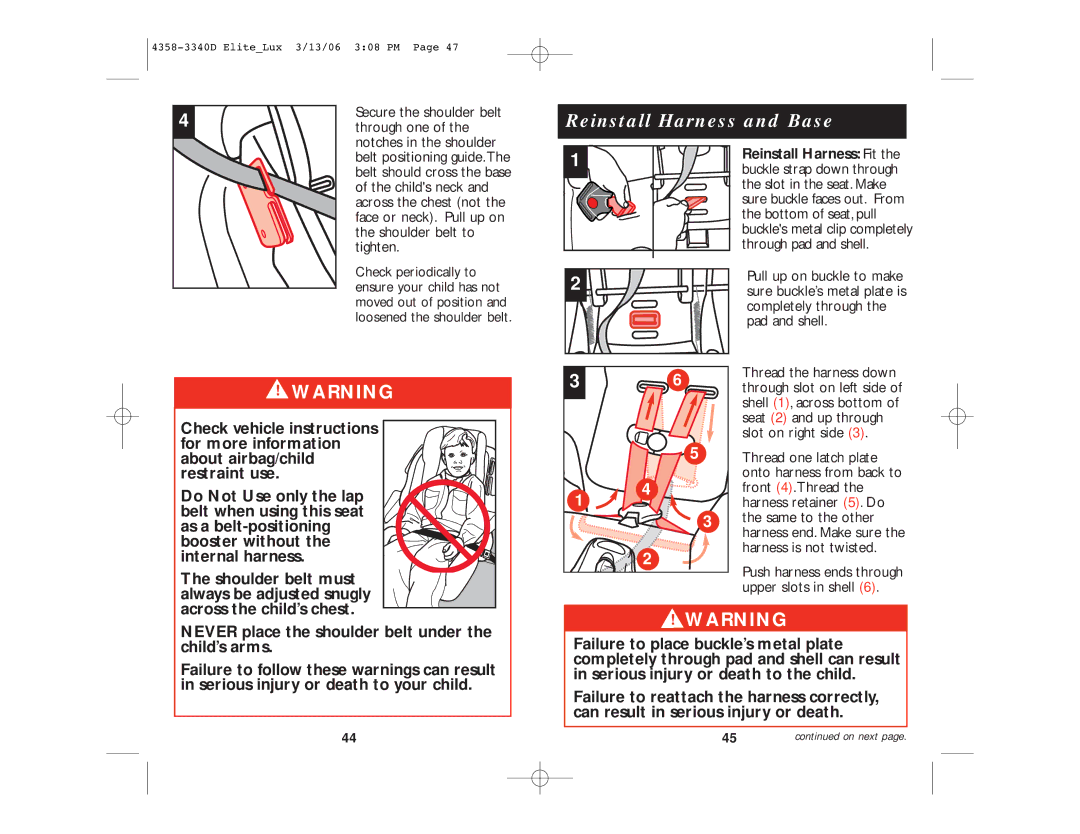
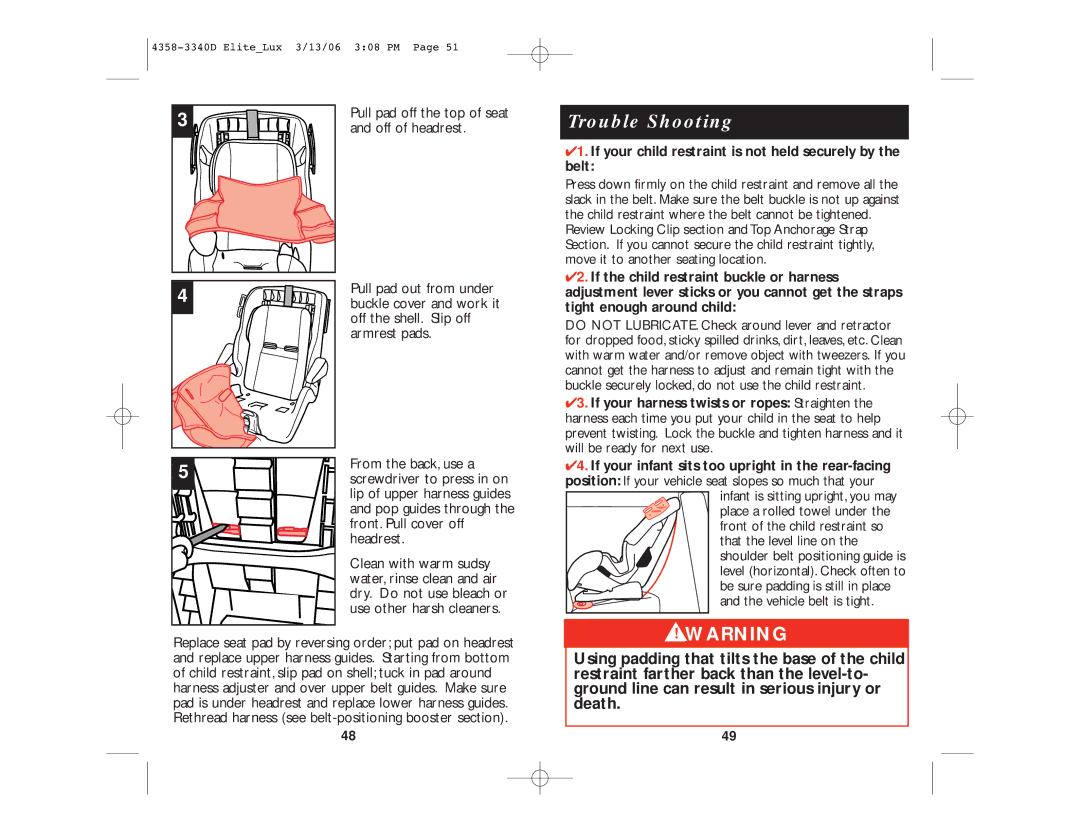
Eddie Bauer 4358-3340D Rear-Facing Installation with Latch Install Latch Belt, Shown installed

Page 15

4358-3340D Elite_Lux 3/13/06 3:08 PM Page 29

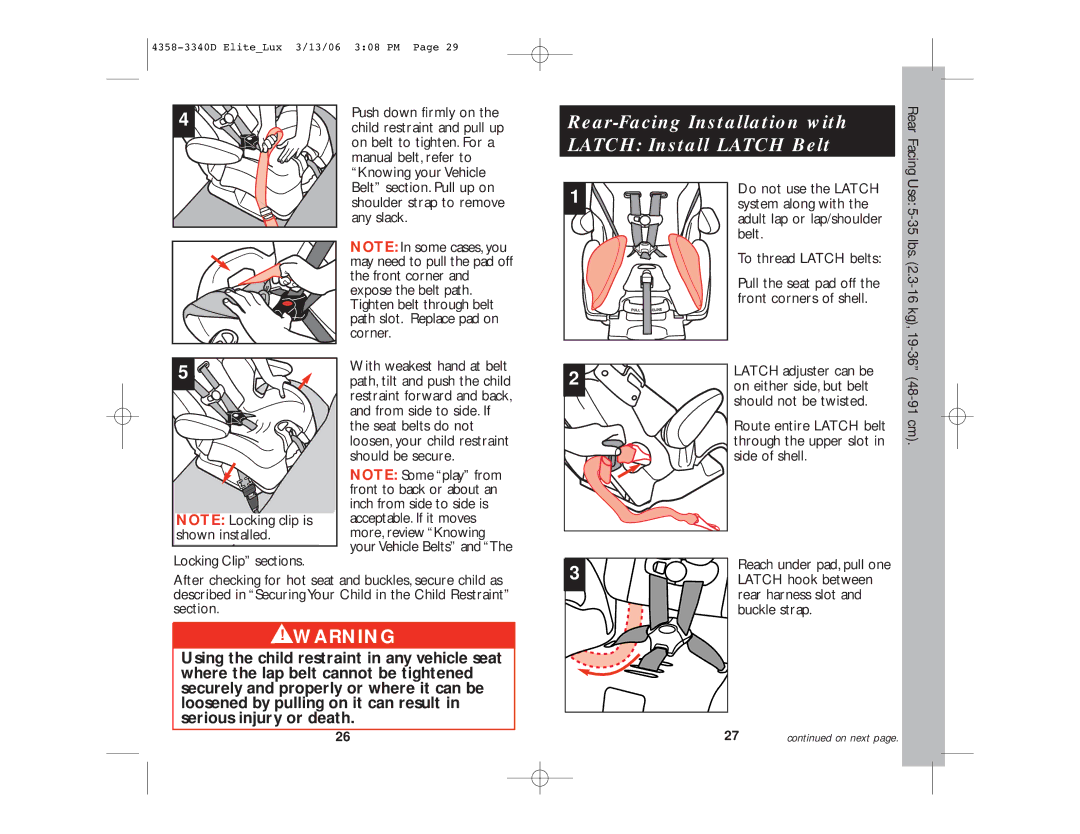
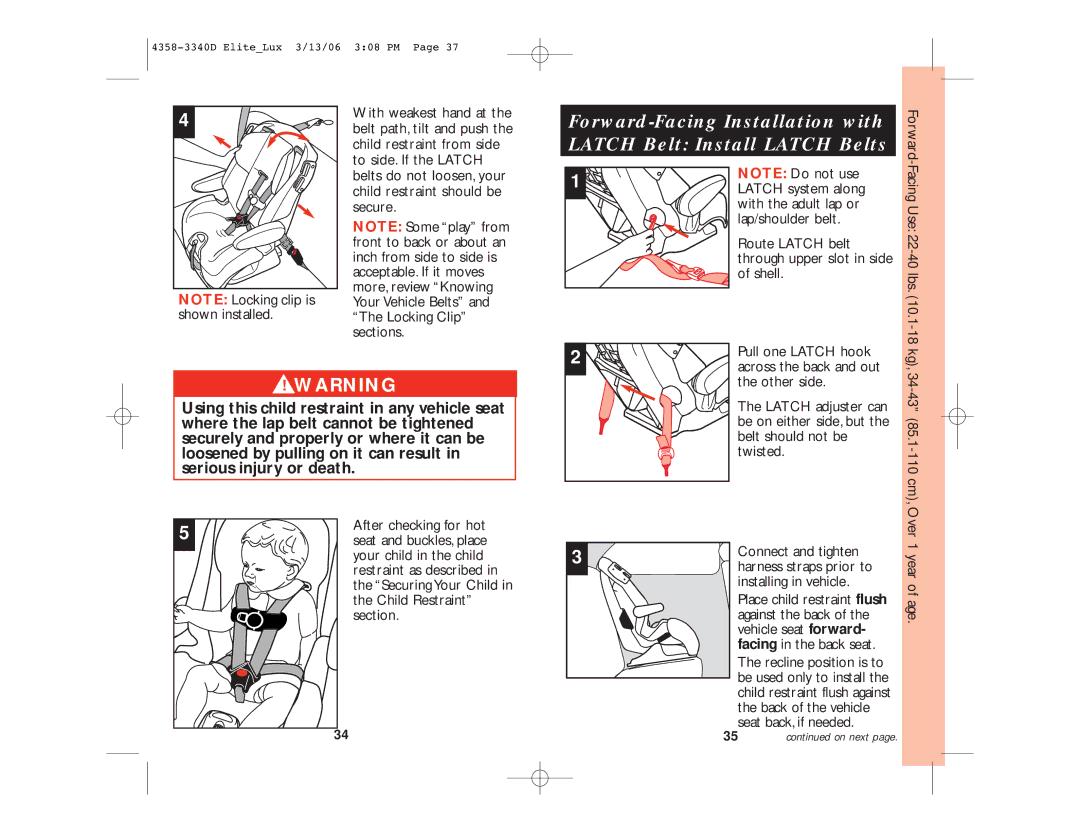
4

Push down firmly on the

child restraint and pull up


on belt to tighten. For a


manual belt, refer to


“Knowing your Vehicle


Belt” section. Pull up on


shoulder strap to remove


any slack.

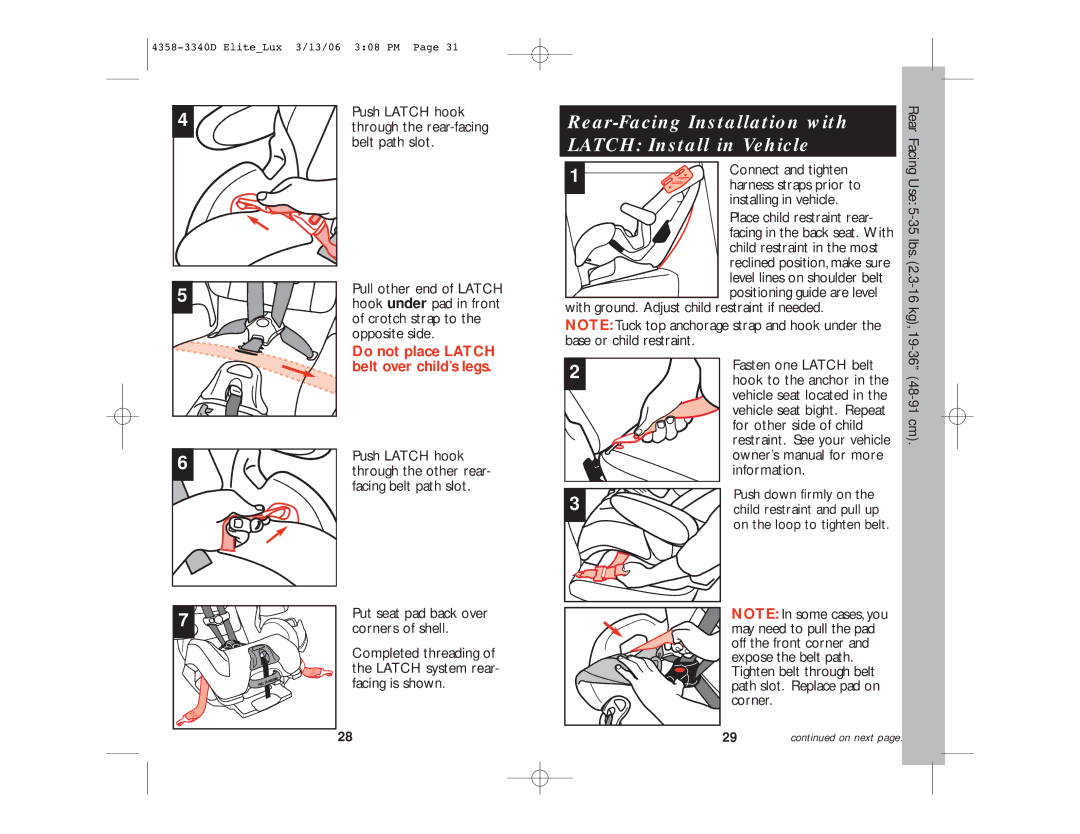
NOTE: In some cases, you may need to pull the pad off the front corner and expose the belt path. Tighten belt through belt path slot. Replace pad on corner.

Rear-Facing Installation with LATCH: Install LATCH Belt

1

Do not use the LATCH

system along with the


adult lap or lap/shoulder


belt.


To thread LATCH belts:


Pull the seat pad off the


front corners of shell.

Rear Facing Use: 5-35 lbs. (2.3-16 kg), 19-

5

NOTE: Locking clip is

shown installed.

Locking Clip” sections.

With weakest hand at belt path, tilt and push the child restraint forward and back, and from side to side. If the seat belts do not loosen, your child restraint should be secure.

NOTE: Some “play” from front to back or about an inch from side to side is acceptable. If it moves more, review “Knowing your Vehicle Belts” and “The

2

3

LATCH adjuster can be on either side, but belt should not be twisted.

Route entire LATCH belt through the upper slot in side of shell.

Reach under pad, pull one

36” (48-91 cm).

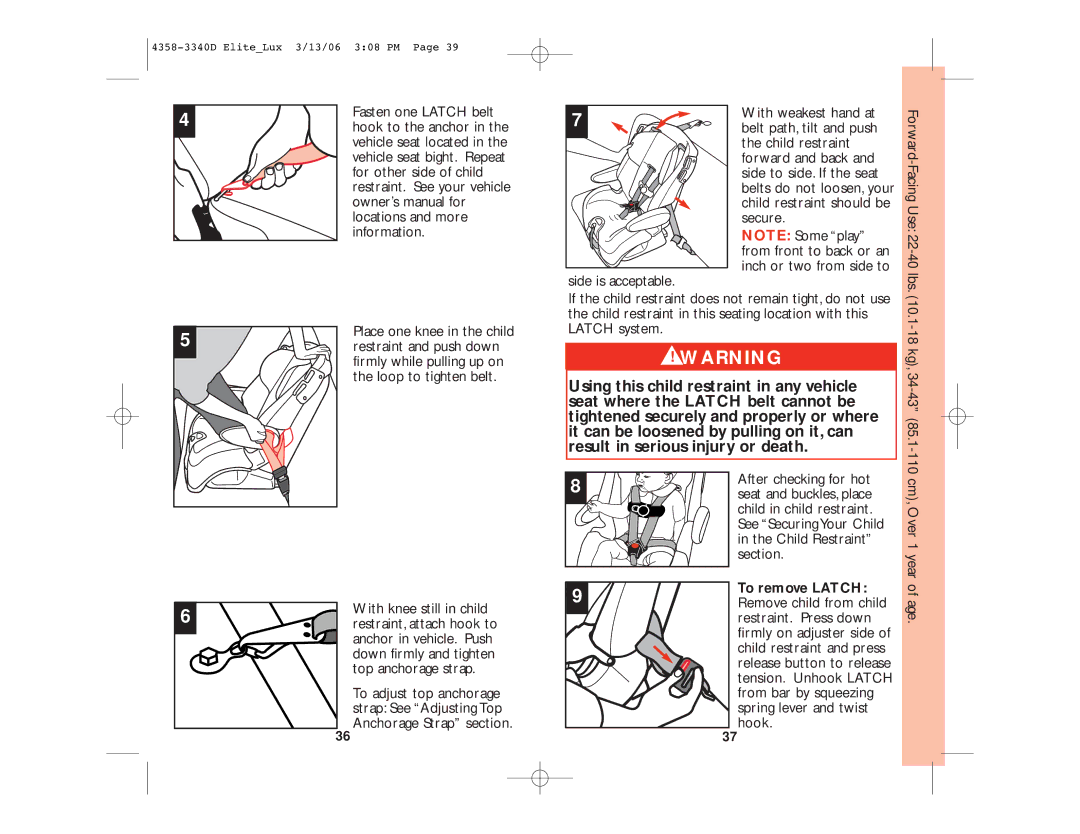
After checking for hot seat and buckles, secure child as described in “Securing Your Child in the Child Restraint” section.

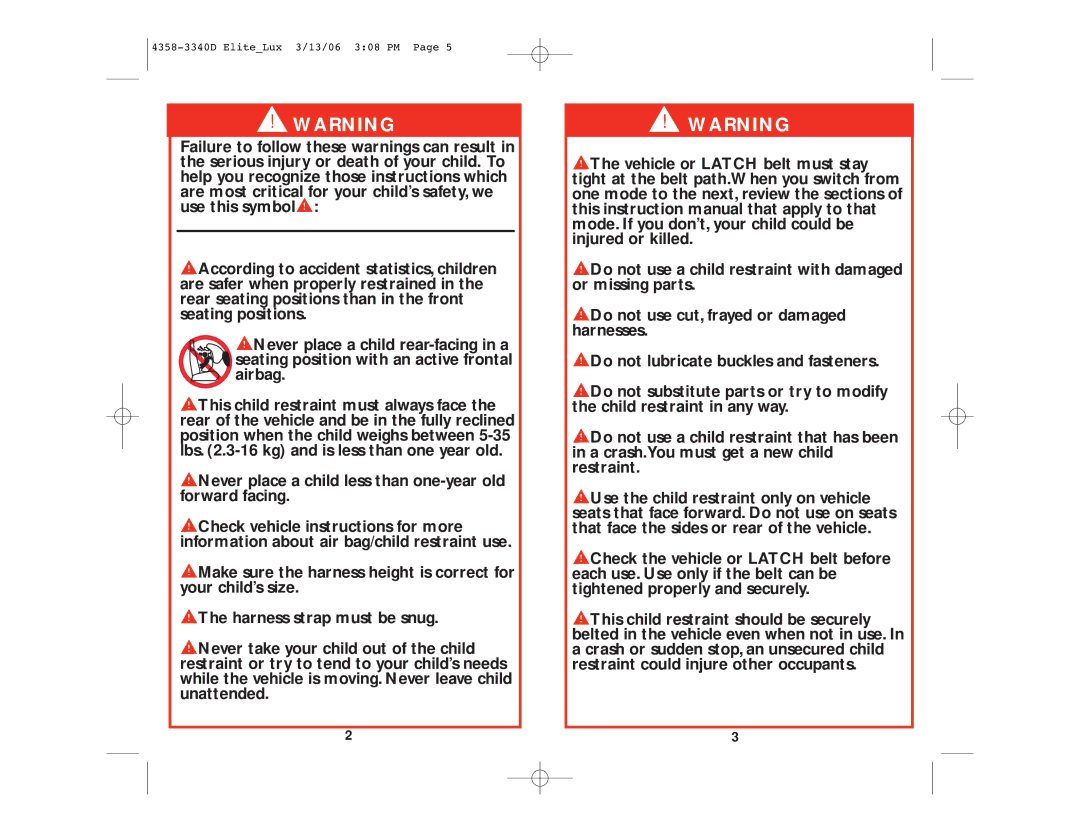
!WARNING

Using the child restraint in any vehicle seat where the lap belt cannot be tightened securely and properly or where it can be loosened by pulling on it can result in serious injury or death.

LATCH hook between rear harness slot and buckle strap.

26

27

continued on next page.

Image 15 Contents
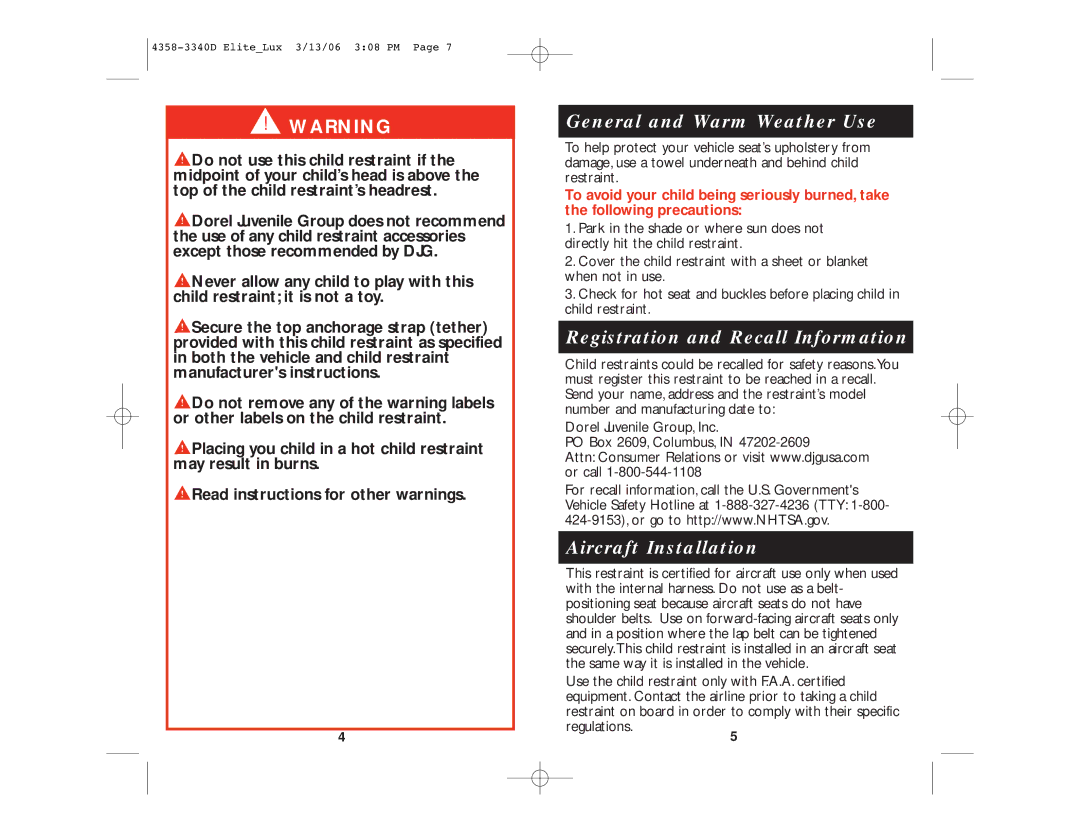
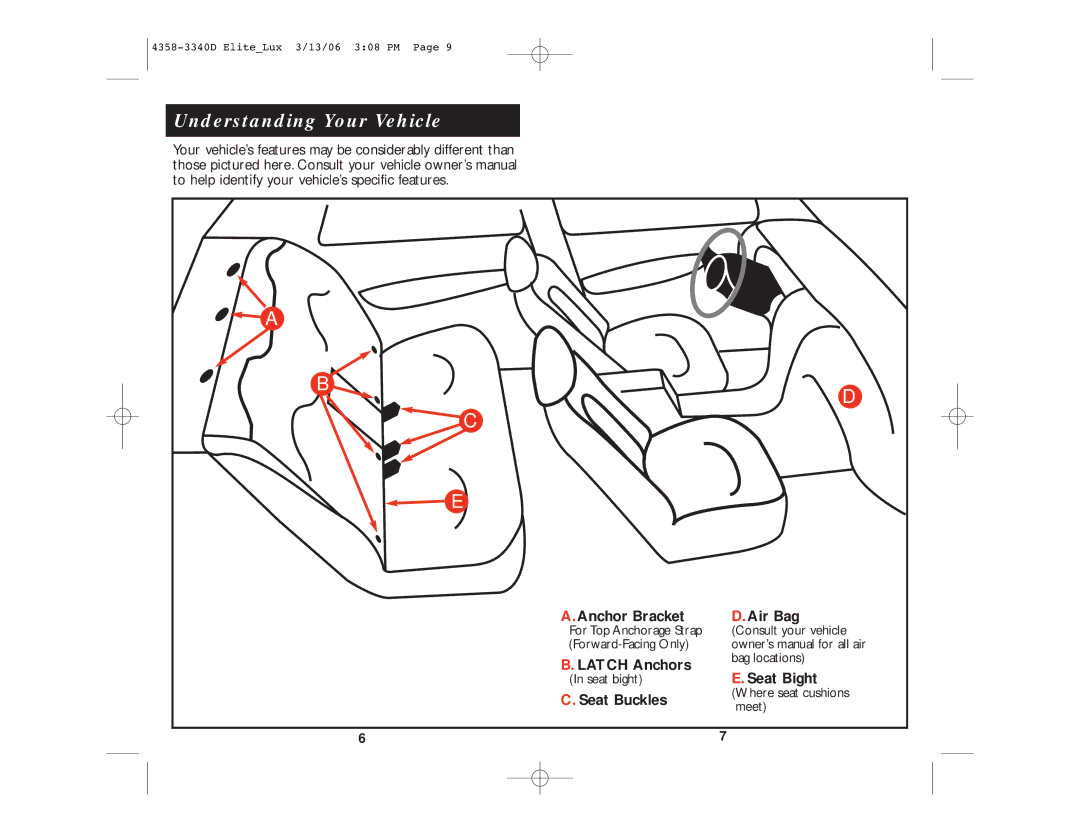
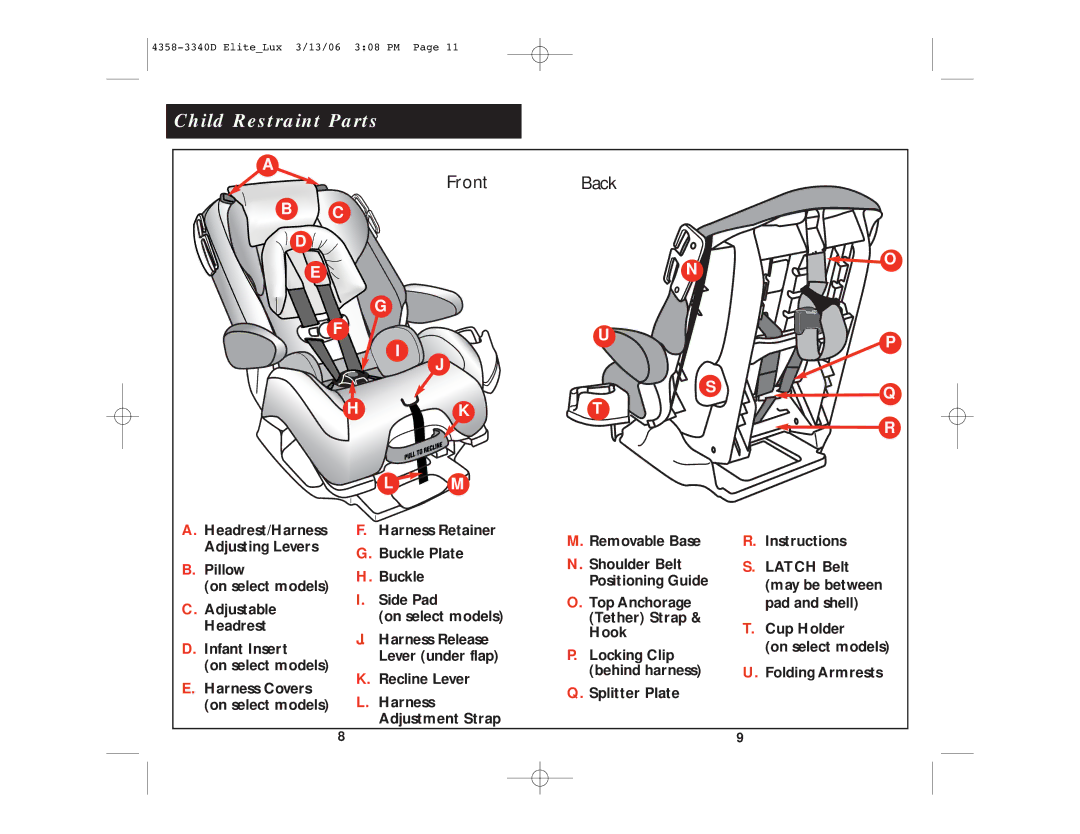
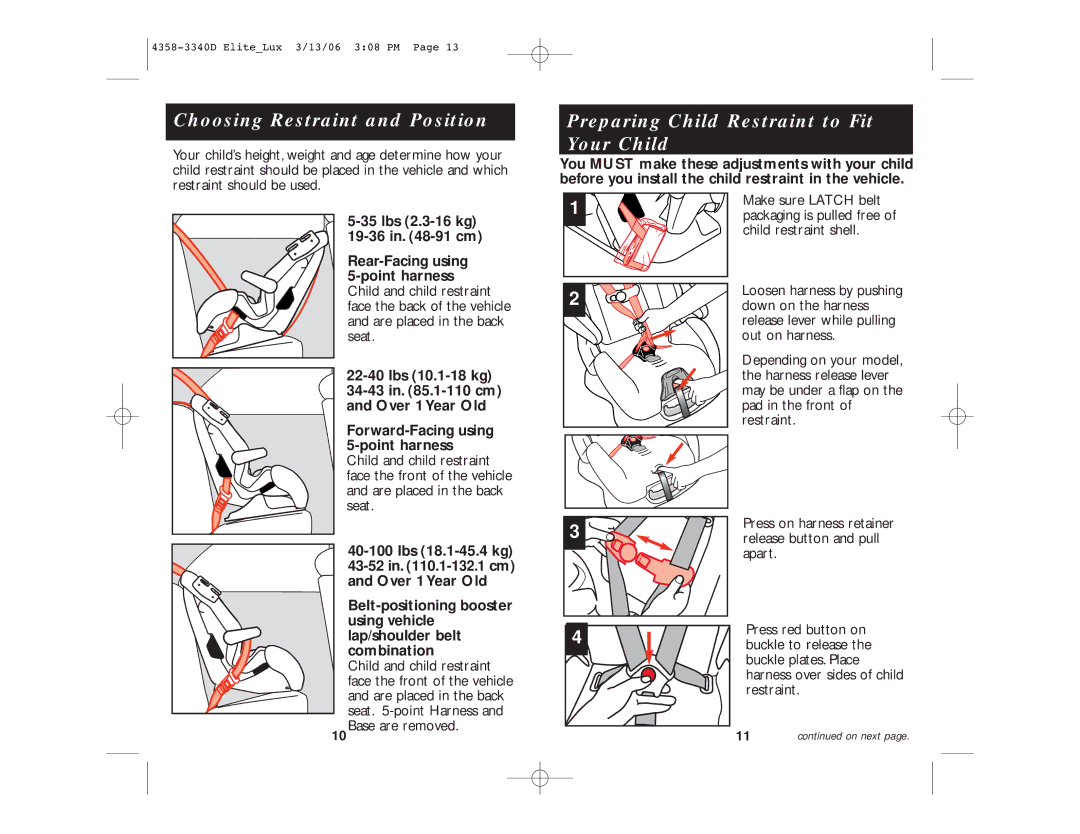
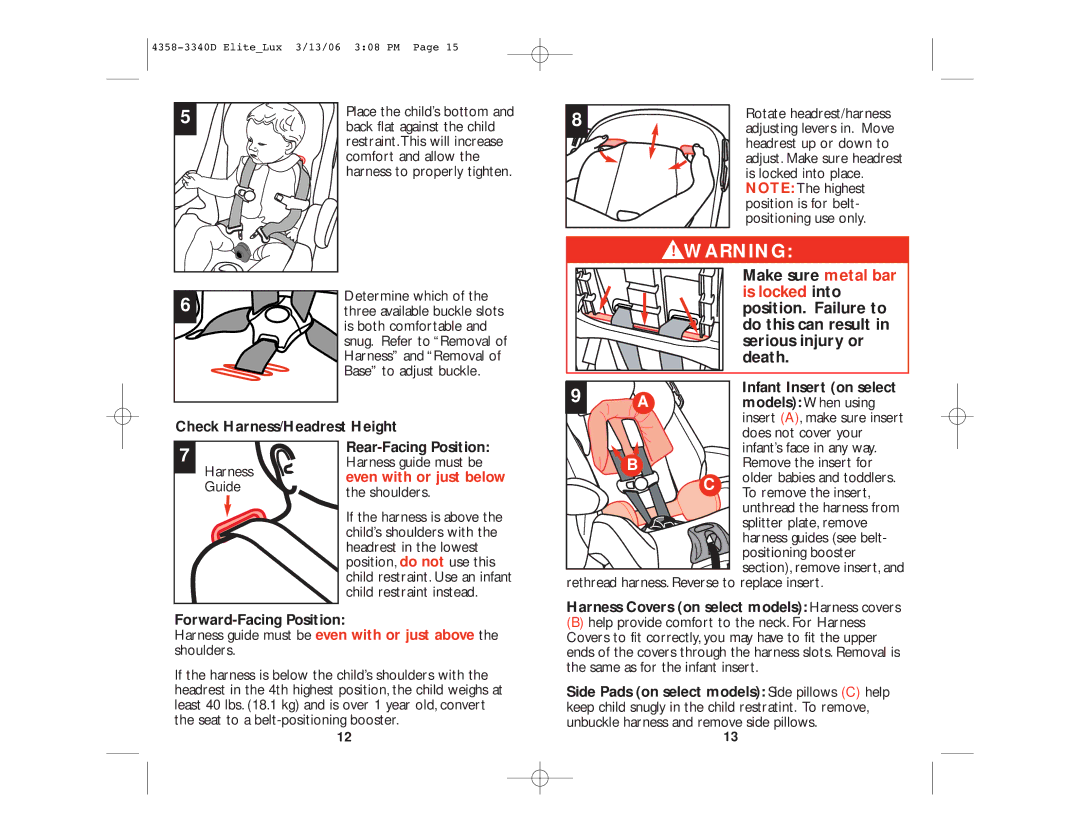
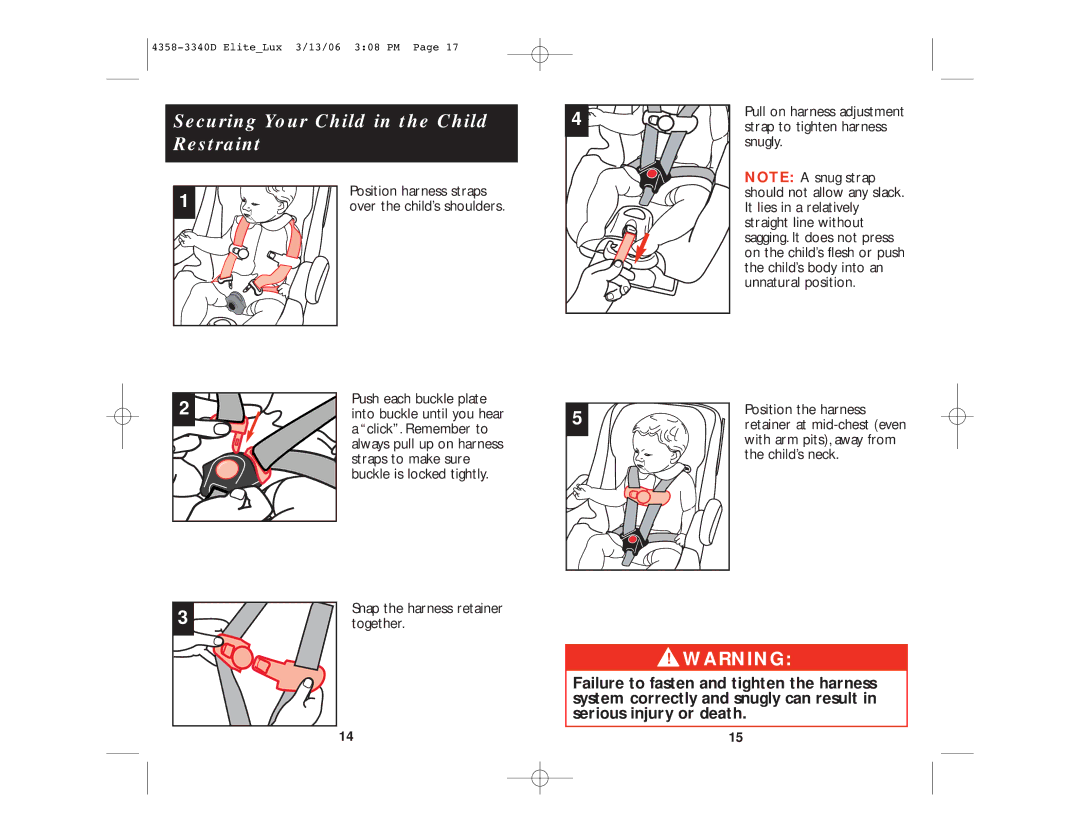
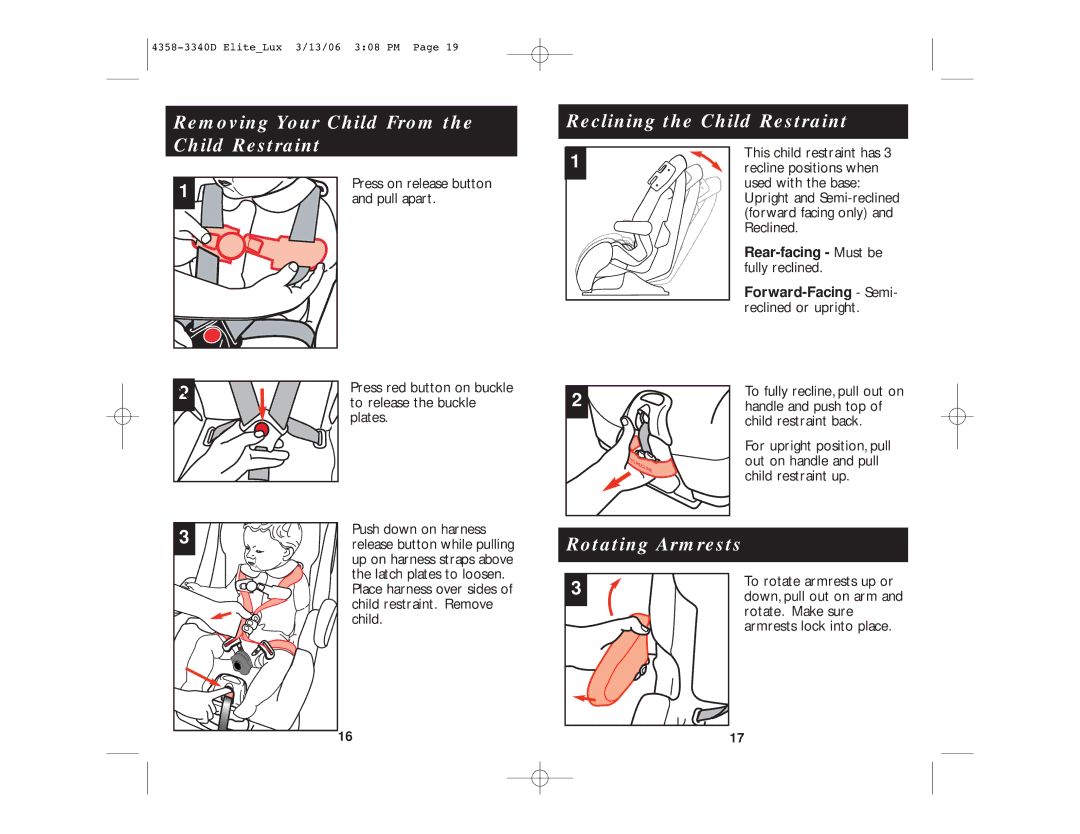
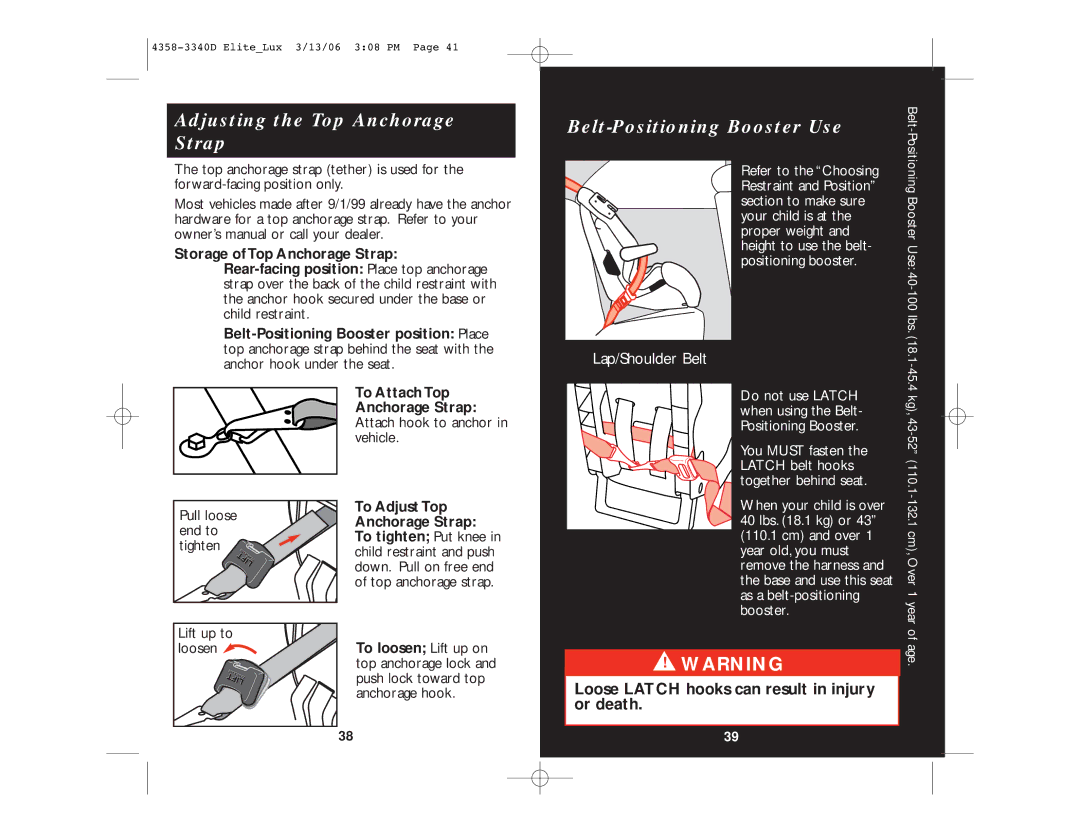
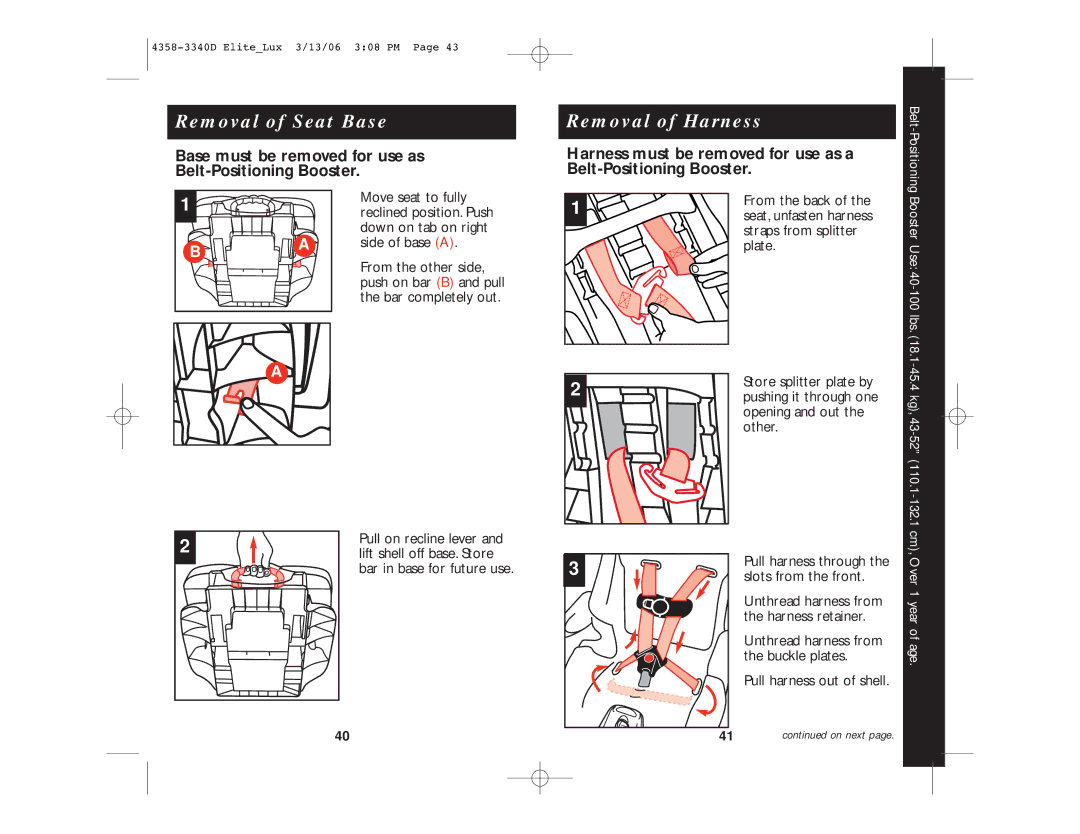
Alpha Omega Elite/Luxe Deluxe 3-In-1 Before You Begin Table of ContentsNever place a child less than one-year old forward facing Dorel Juvenile Group, Inc PO Box 2609, Columbus, Aircraft InstallationGeneral and Warm Weather Use Registration and Recall InformationLatch Anchors Seat Buckles Air Bag Seat Bight Where seat cushions meetUnderstanding Your Vehicle Anchor BracketTop Anchorage Tether Strap & Hook Child Restraint PartsHeadrest/Harness F Headrest Harness Release Infant InsertMake sure Latch belt Choosing Restraint and PositionPreparing Child Restraint to Fit Your Child Lbs 2.3-16 kg -91 cmHarness Covers on select models Harness covers Check Harness/Headrest HeightRear-Facing Position Forward-Facing PositionChild’s neck Pull on harness adjustment strap to tighten harness snuglySecuring Your Child in the Child Restraint Snap the harness retainer together Position the harnessRotating Armrests Choosing Latch or Vehicle Belts Knowing Your Vehicle BeltsAutomatic/Passive vehicle seat belts Vehicle belt too short Manual Belts Locking ClipRear-Facing Use Rear-Facing Installation with Vehicle Belt Rear-Facing InstallationShown installed Rear-Facing Installation with Latch Install Latch BeltRear-Facing Installation with Latch Install in Vehicle Forward-Facing Use Forward-Facing Installation with Vehicle Belts Forward-Facing InstallationYour child in the child Restraint as describedOver 1 year of age Information Fasten one Latch beltFor other side of child Locations and moreAnchorage Strap Adjusting the Top Anchorage StrapTo Adjust Top Belt-Positioning Booster UseRemoval of Seat Base Removal of HarnessPull harness out of shell Buckle for future use Belt-Positioning Booster InstallationFree from shell and pad Lock latch plates intoShoulder belt to Reinstall Harness and BaseThrough one Childs neckReinstall Base Remove Seat Pad for CleaningArmrest pads Trouble ShootingOff of headrest Off the shell. Slip offLimitation of Damages WarrantyFax orders to Replacement Parts Order Form
Related manuals
Manual 28 pages 62.48 Kb