1 GettingStarted
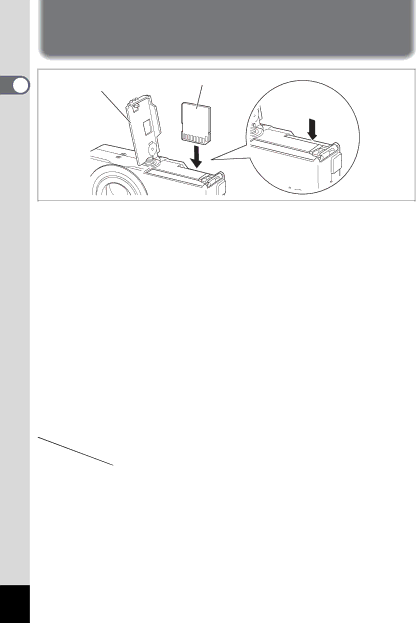
Installing the SD Memory Card / MultiMediaCard
Battery/Card | SD Memory Card / MultiMediaCard | |
To remove the | ||
cover | ||
card, push and | ||
| pull out |
This camera uses an SD Memory Card and MultiMediaCard. Captured images are recorded on the SD Memory Card / MultiMediaCard if a card is inserted (![]() icon on the LCD monitor), or in the
icon on the LCD monitor), or in the ![]() icon on the LCD monitor). Make sure that the camera is turned off before inserting or removing the SD Memory Card / MultiMediaCard.
icon on the LCD monitor). Make sure that the camera is turned off before inserting or removing the SD Memory Card / MultiMediaCard.
1 Open the battery/card cover.
2 Insert SD Memory Card / MultiMediaCard so the label (the side with the 2 symbol) is facing toward the LCD monitor and push the card in until it clicks.
3 Close the battery/card cover.
To remove the card, eject the card by pressing it in the direction indicated by the arrow and pull it out.
•Approximate Number of Recordable Images and Recorded pixels/ Quality levels
Quality Level | Best | Better | Good | Movie images | ||
Recorded Pixels | C | D | E | (320 × 240) | ||
2304 | × 1728 | 5 | 9 | 14 |
| |
1600 | × 1200 | 11 | 20 | 28 | 60 sec × 1 | |
1024 × 768 | 26 | 47 | 62 | |||
| ||||||
640 | × 480 | 57 | 89 | 119 |
| |
•The above table indicates the number of images when using a 16MB SD Memory Card.
•The above table is based on standard shooting conditions specified by PENTAX and may vary depending on the subject, shooting conditions, capture mode, SD Memory Card, etc.
16